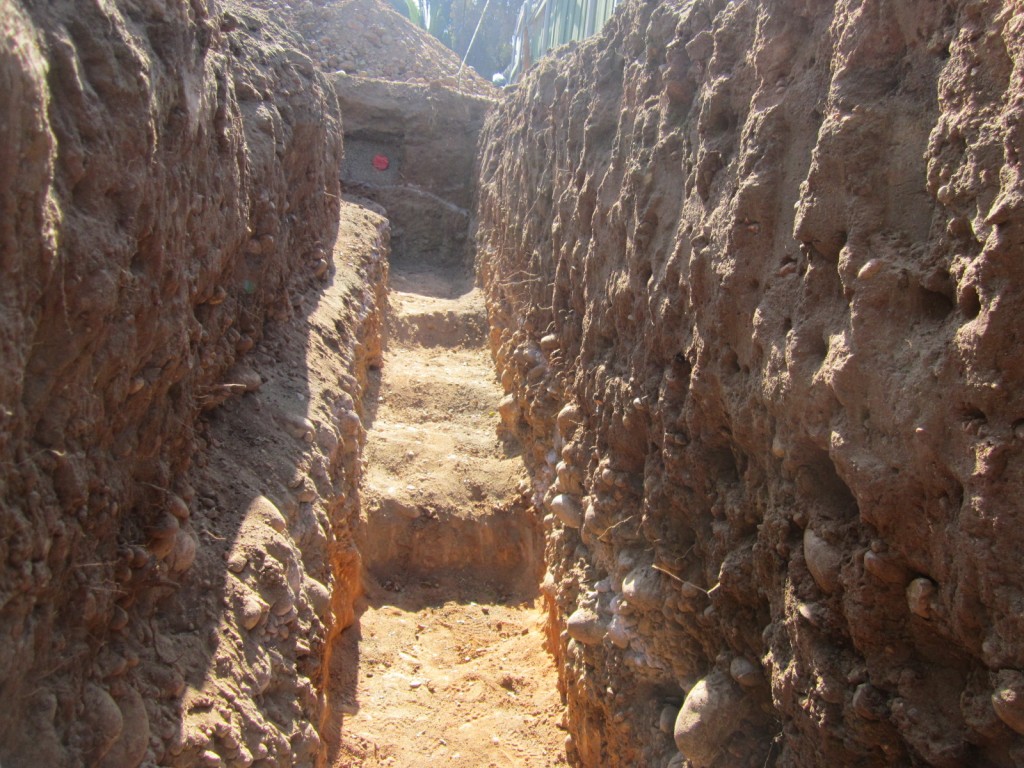
While the City of San Diego only requires footings for a 2 story house to be 18 inches deep, went close to 5 feet in some spots. You can see here that the bottom of all my trenches remain level with steps, so gravity doesn’t take our house down the canyon. The reason the footing trenches vary in depth is due to the distance to reach native soils. No lot is perfect, in our case with this house one main challenge besides having the rear 30% unusable due to the canyon is unstable fill that’s been there for years. The only alternative to digging all the way down to native soils would be to have the whole site compacted to 90%. I could have done a slab on grade at that point but at the end of the day I felt this way will be the most structurally sound. While these deep footings will eat up expensive concrete at $95/yard, a slab on grade foundation would still need deepened grade beams and since the lot slopes down towards the back, the foundation is 3 feet high and end up being about the same amount of concrete. Note the existing 4″ sewer lateral ready to go.
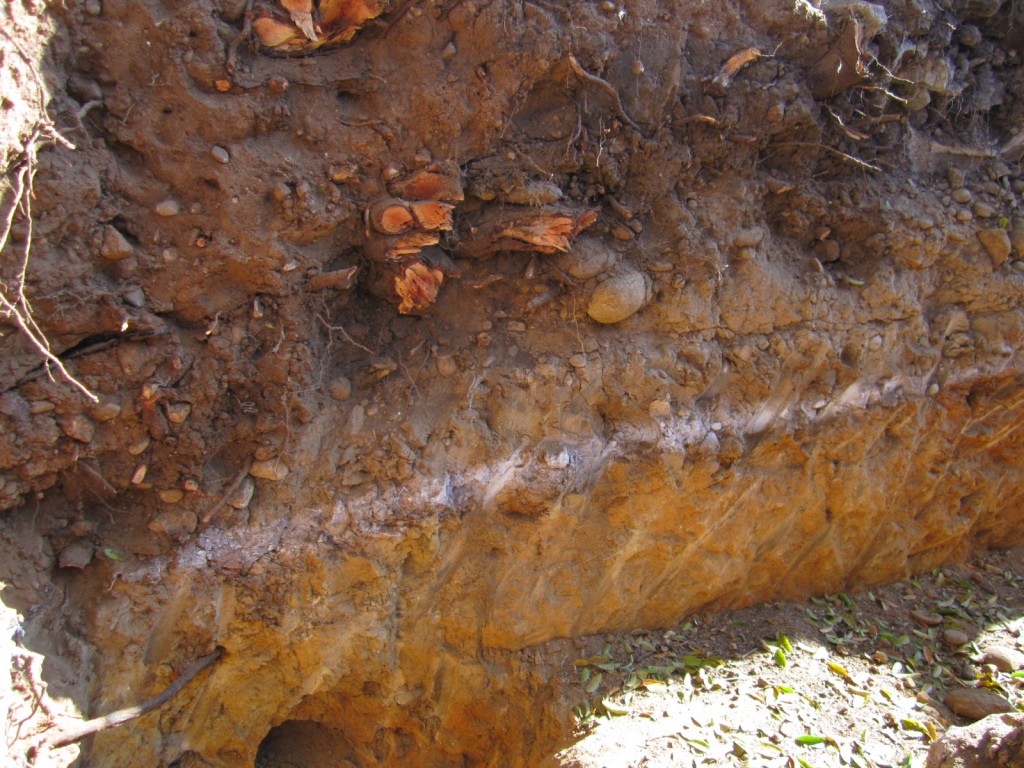
The excavator we rented made quick work of the foundation dig but after the soils engineer came and inspected our footing trenching, he requested us to go farther into the native soils. You can easily see here where the brown, silty cobble fill changes to a rock hard gold color at my spray paint line. This stuff is so hard to dig we used a jackhammer for 3 days to deepen the trenches to satisfy the soils engineer. He’ll now give me a certificate which I’ll hand to the City inspector when he comes to inspect the foundation forms and rebar placement. As previously mentioned, you could roll the dice and not have a soils test but if the City inspector feels there is fill he’ll make you take all the forms apart and get the report anyway. I want to build it right so in my mind this is the only way to do it.
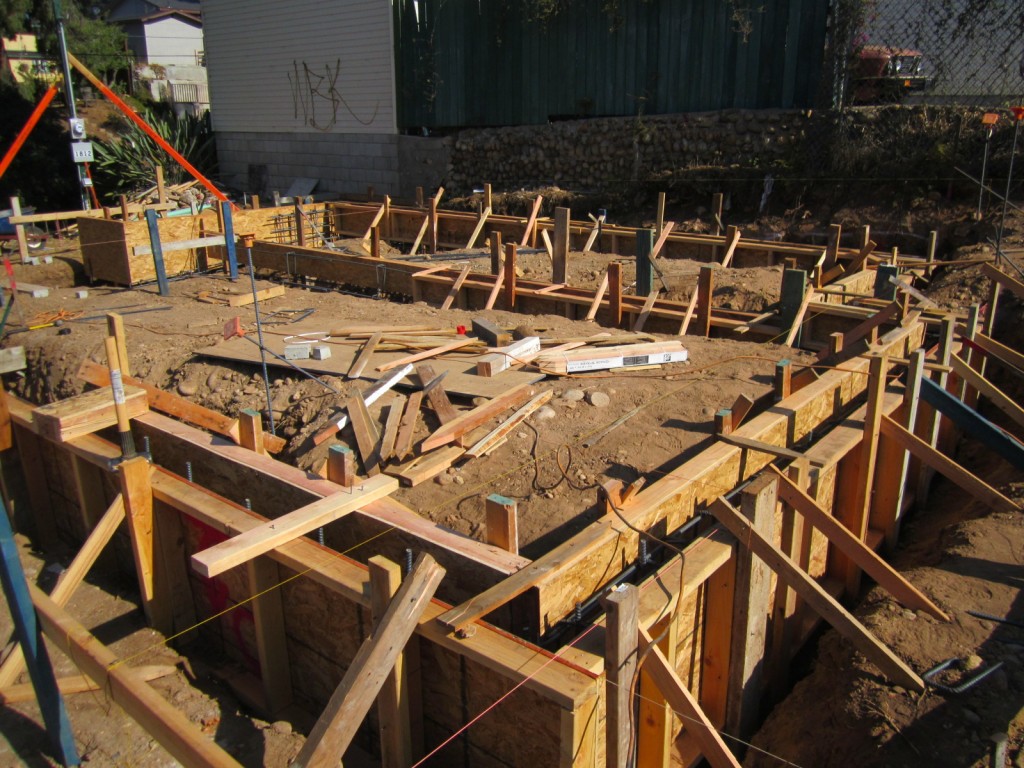
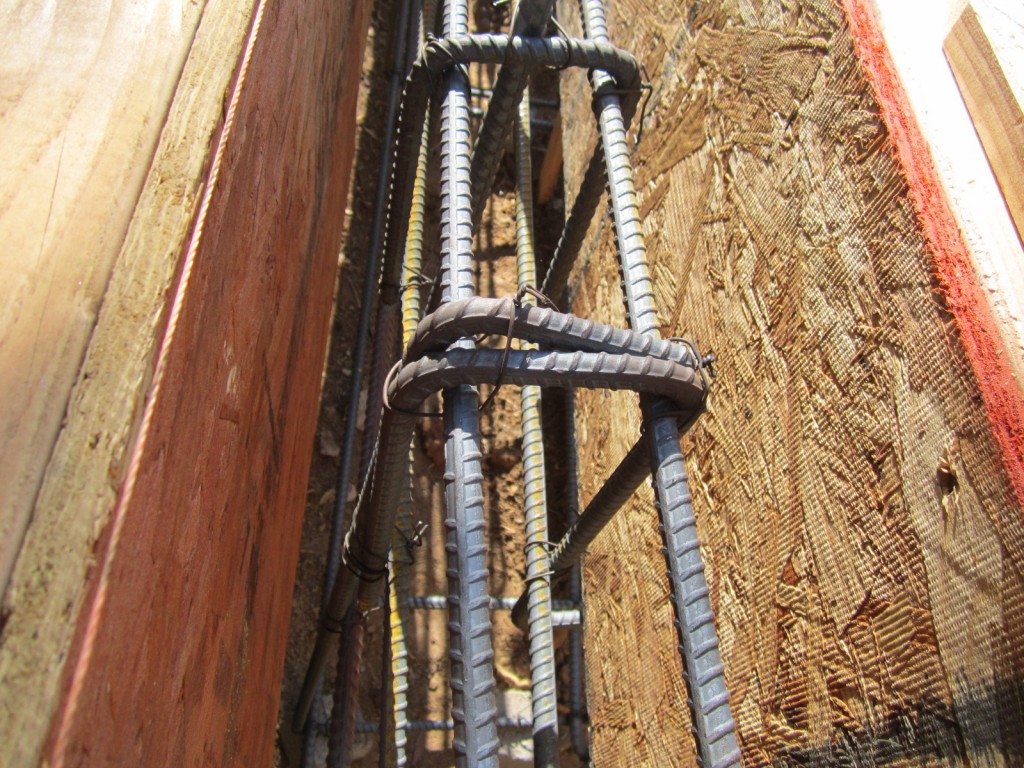
The first step in forming a raised foundation is pulling some control lines from which you can set your exterior forms. We build them all with 2×4’s and OSB, setting the outside of the house footprint first and then starting with hanging the rebar inside. All rebar has to be 3″ away from dirt or forms. Finally after cleaning out and debris that might have fallen into the trenches you then set the inside form. After inspection we’ll pump concrete in from the top.
Once again the City only calls for (4) 1/2″ horizontal rebar inside the foundation with vertical bars 24″ on center. For just a little extra cost I upped the ante to (6) horizontal 5/8″ bars with verticals 16″ on center. Raised foundation houses in California have this exterior stem wall. In the interior of the foot print the load is typically carried by4x6 treated sills that the floor joists rest on. These beams usually sit on posts and piers. My raised foundation design is far superior with one more stem wall running down the middle of the house like a spine. I’ll be using TJI floor joists which will span the whole width of the house without any posts and piers. We’ve fixed so many foundations on old pier and beam bungalows, with this method you’ll also have the convenience of a wide open crawl space to run mechanicals without any posts in the way. A little extra cost but by far a superior design for a raised foundation. Most of the neighbors have stopped by now, its the talk of the street that something is going up on “old man Fred’s” lot. I’ve been extremely respectful to everyone, even buying car washes for neighbors whose cars got dusted out by all the digging. I also rented a construction fence with privacy mesh so no one has to look at the mess all summer. We should be done with the forms mid week and then we’ll get started with the underground plumbing that needs to go in before we pour concrete. Stay tuned, once I get past the undergrounds and pumping this foundation it will get framed up real quick.


Now you’re cooking!
@tj, if I was hiring a GC it wouldn’t be as easy to beef things up. They tell you they only add 15% over the sub contractor price but their sub contractor prices are 25% high already! I’m spending way less than the crowd and learning how to make things better by being hands on. We are talking an extra $800 bucks in rebar, no question there for something that will outlive all of us.
Go Tom, Go!
Seriously, it’s great to see you back in action!
Thanks enplaned, I’m stoked too.
Gotta love the Building Departments! NOT!
Very informative, Tom!
I’m wondering where you stand on the topic of foundation vents and fans. Poking around the net, I’ve seen some discussions arguing that a tightly sealed foundation is preferable—- usually from a source that’s selling a system to convert an existing situation.
Also, is it too late to work in a real wine cellar??
Thanks Halbert. Yes we always ventilate the crawlspaces on raised foundation homes. Its City code and you want to let it breath so moisture doesn’t build up. I think the rule is 1 square foot of vent per 150 s.f. of floor space. We’ll accommodate for the access entrance through the stem wall but for venting the crawlspace itself the vents can be placed between the floor joists which sit on top of the foundation stem walls. Even with a 3 foot high stem wall in some areas you never want to sacrifice the integrity of it by adding the vents so that’s why they are commonly place right above it between the joists. I don’t really see a need for a fan unless maybe there is a moisture problem, the main thing is keeping it dry under your house. Maybe fans are for more humid climates, not sure on that one but I never saw them in Texas either. Moisture under raised houses causes all sorts of problems. I never heard the sealed crawlspace argument so I’m just going with what I know works; )
A wine cellar would be neat, even with just these footings we removed (5) 10 yard trucks of dirt already. A friend of mine who is building on a sloped lot took out (40) trucks of dirt last week when excavating for a garage, anything can be done!
Great work Tom. I’m working on my first bigger house remodel, and I was curious regarding when you are a GC, do you pay your sub-contractor’s by job or by days?
I’m been having a query regarding if I’m getting what I should be getting out of my guys (I have been paying by day).
Hey Aslam,
Thanks for the compliment but Im not a GC. We are building this owner/builder to live in. As you grow bigger its important to break down the processes and order they need to occur for renovations. I’m sure you are already on your way. I like to break it down into steps and find the best person for each activity. Kind of like a factory. I always pay per activity when flipping houses unless its general labor. Its best to sub everything out to specialists in that respective trade, you get better work and avoid “do-it-all” type daily guys.
Also, avoid the guy who gets on your jobsite to do something then asks, “who’s doing the _____?” They try and squeeze themselves into other areas than you hired them, and tell you they can do even if they barely know how. You’ll end up with a “handyman remodel” and tons of problems.
I’m curious, how much does it add the building costs to build a full (unfinished) basement instead of a crawl space?
Thank you for the insight Tom. I just signed a deal with a drywall crew to skim the entire house and mud some drywall for the kitchen and living room. I feel much more relieved that the work will be done in a timely and efficient manner.
Tom,
I’m anxious to see an update. Hope all is going well out there in Cali.
Jason
@Jason,
Everything is going well but just had been too busy to post and I hate to just throw pics up without taking some time to give details too. Family time and work is keeping me from blog updates! This damn blog. This weekend for sure you’ll get all the details and see the foundation pour video! Hope all is well with you too bud.
That is quite the undertaking to say the least. Very impressive foundation work, thanks a lot for posting this.
Fortunately in my area on the East Coast I do not often times run into foundation issues like those described in your post, however if I do I know where to turn to for information!
Keep up the solid work,
Mike