by Tom | Oct 26, 2012 | Exterior Paint, South Park Modern Bungalow

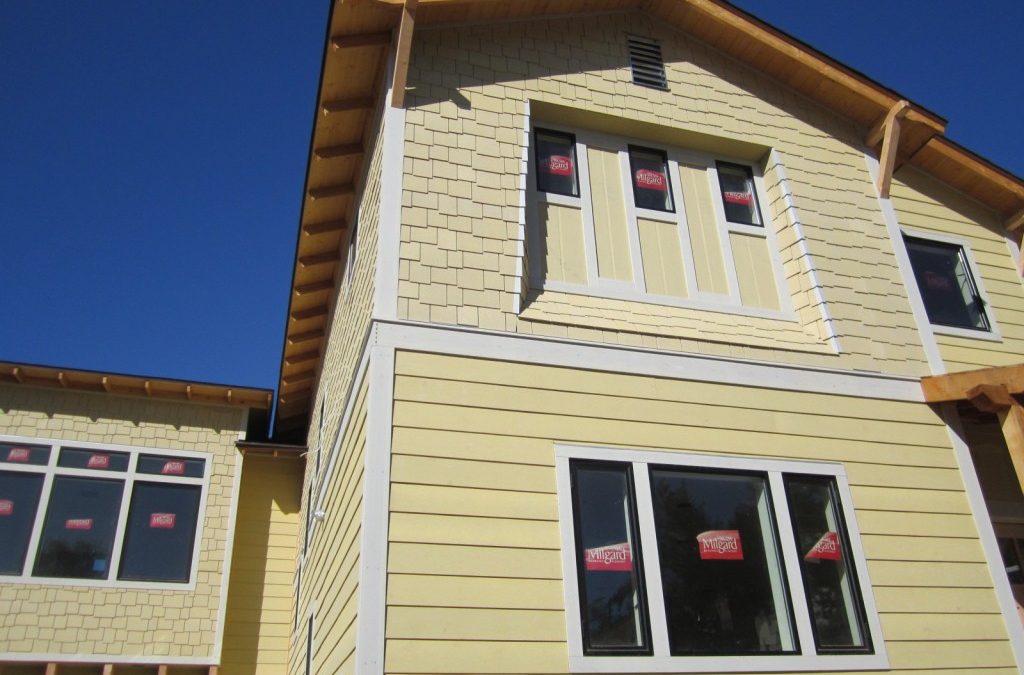
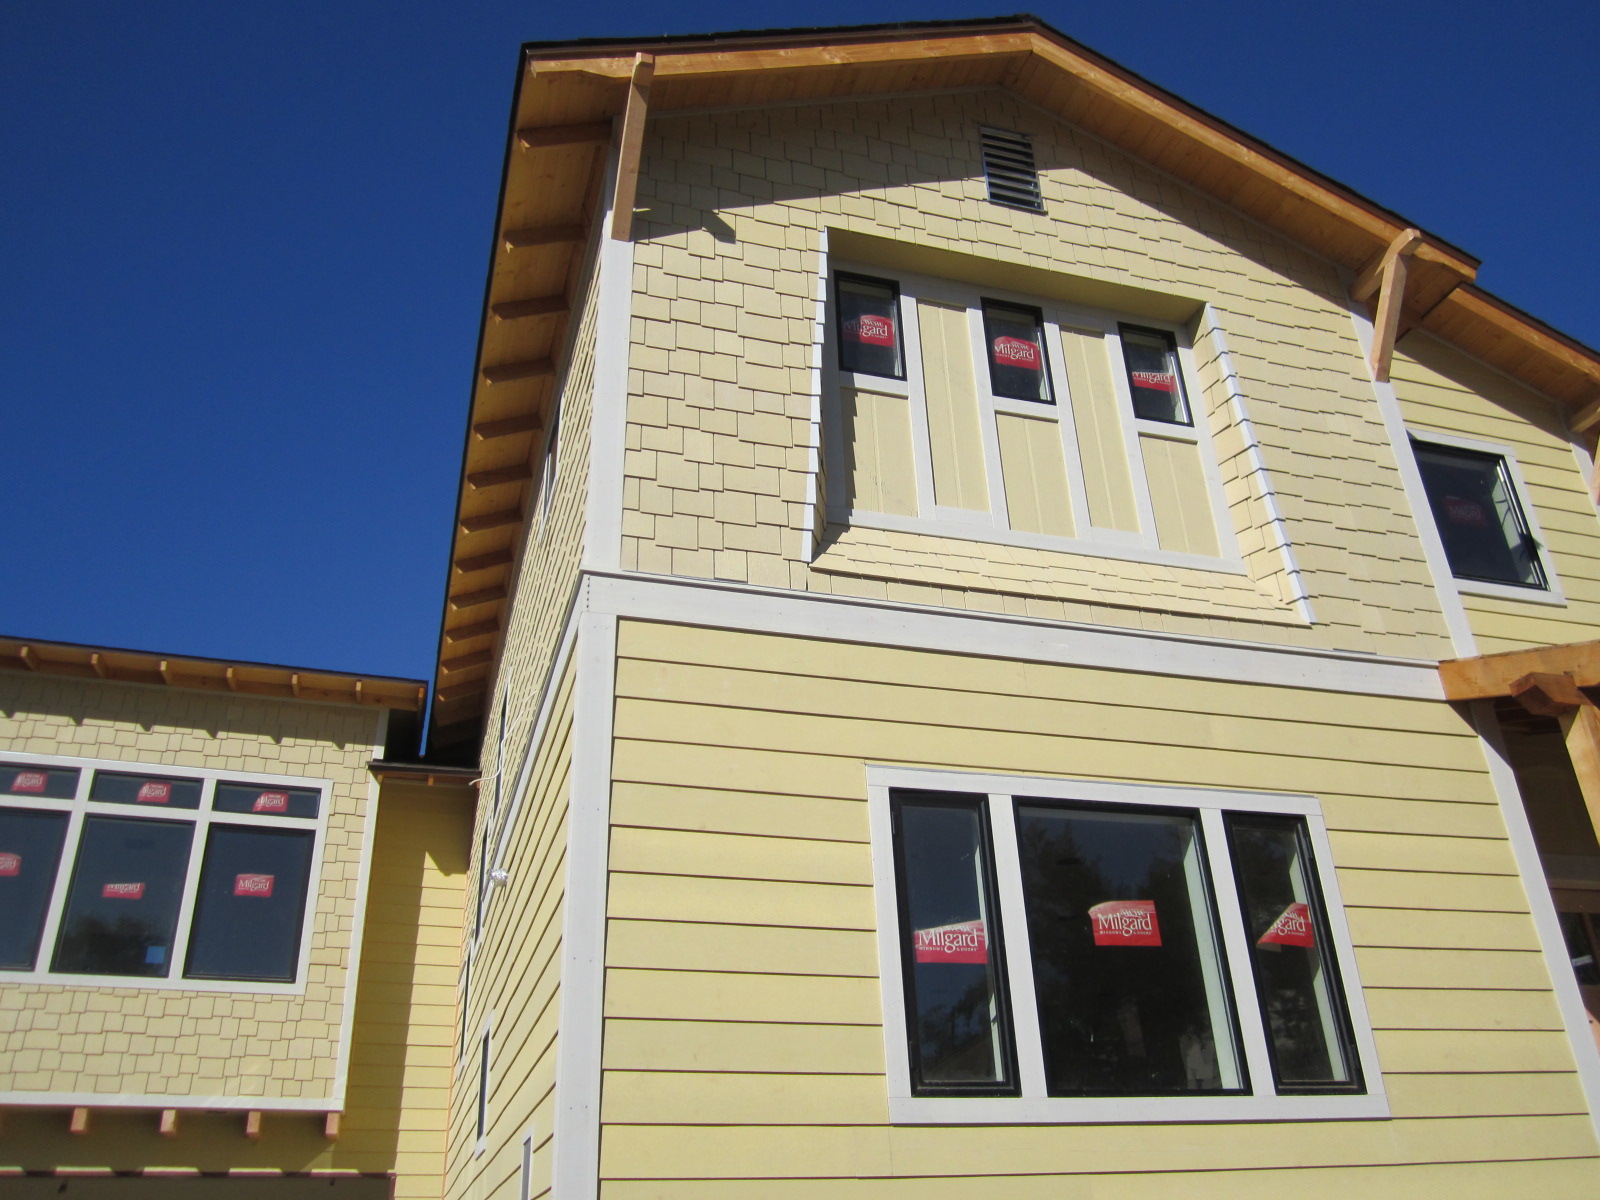
The James Hardi Siding on My South Park Modern Bungalow new build is finally ready for paint, take one last look because the next time you see her she’ll have 3 shades of green, grey rafter tails and cedar stained eaves. It took me and a helper just over 3 weeks to do all the siding, knee braces and corbels but it was worth it.

The James Hardi staggered shingle is very labor intensive but it paid off. It gives some great depth and adds texture while defining the pop out shed dormer too. You can see I separated the siding styles with a Hardi Trim 1×8.

We kept the corbels very simple to match the knee braces. I used Douglas Fir 4×8 and had it re-sawn at my local lumber yard. They will get a cedar stain to match the tongue and groove eaves and porch posts and beam. I’m really liking the big overhang look and all the open rafter tails, cant wait to see them individually painted.

I left the roof off the porch until after paint so I didn’t mess it up by walking on it. It’s going to be a Bronze standing seam metal roof that will be close in color to my aluminum windows. The James Hardi reveal for the 3 small bathroom fixed windows was quite challenging to pull off but it looks very organic. You’ll notice the angle changes from the top as you go down. We used aluminum corners made especially for the Hardi staggered shingle to hide the edge seams and protect it from moisture.

Here are the 4 colors we picked for the house, The body is 2 shades of green, Edgy Gold and Wheat Grass by Sherwin Williams. The trim is a very light green that almost looks white, its Ionic Ivory. The rafter tails, barge rafters and knee braces will be Benjamin Moore Cromwell Grey. All the tongue and groove eaves, corbels and porch post and beam will get that cedar stain. This is the first time we’ve stained the eaves on top of painted rafter tails so I’m pretty excited to see the results.

by Tom | Oct 14, 2012 | Craftsman Bungalow, Drywall and Texture, Hardwood Flooring, Marketing, South Park Modern Bungalow

Outside we are now into the second week of the siding job while the drywall crew finished up on the inside of our Modern South Park Bungalow. I ended up going with a 90% smooth, hand-troweled texture on the entire house and garage. It took 165 sheets of drywall, a case of tape and 30 boxes of mud for the entire job on this 1850 s.f. house. My guys do an incredible flawless job so I’m happy once again.

Now that the drywall is done, we are going straight into laying the hardwood floors this week. These are the real deal, 2 1/4″ x 3/4″ Red Oak unfinished hardwood.
Once the house is all done, one of the last things we’ll do is then sand and stain them. These are the best hardwood floors you could ask for, they’ll last 100 years and you can refinish them many times and always change the stain color.
Laying unfinished Red Oak hardwoods and then paying someone to refinish it, is a little more expensive than just laying a pre-finished engineered hardwood, but the quality is second to none. After the hardwoods go in, I’ll then trim out the house on top of them.
What you see here is about half of the red oak hardwood I bought, I am doing 1200 of the 1850 s.f., which is the whole house minus the two secondary bedrooms.
by Tom | Oct 6, 2012 | Craftsman Bungalow, Drywall and Texture, House Design, San Diego Real Estate Market, Siding, South Park Modern Bungalow

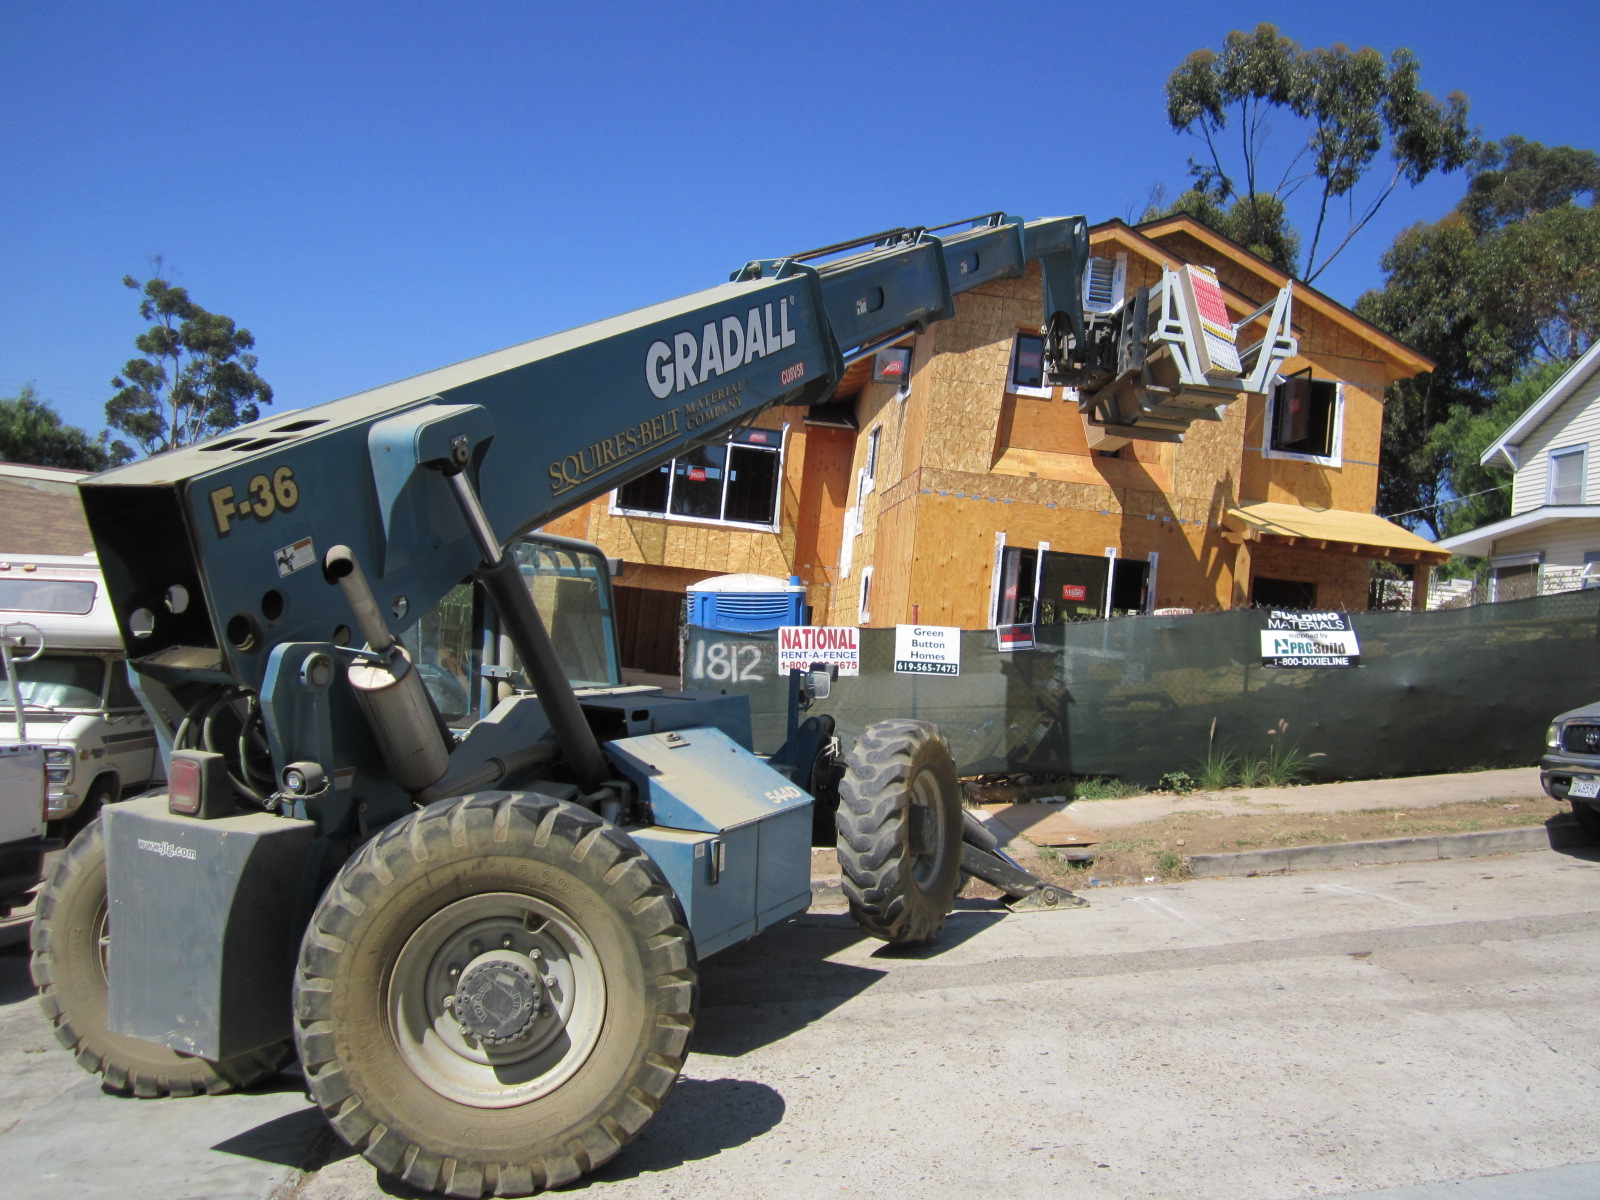
My new construction project is running very smoothly. After passing the inspection on my house wrap Monday, we were finally able to start putting the Hardi Siding up. I have really been anxious to see what the house will finally look like after all the rough work that gets buried and nobody will see. Now comes the fun part, which actually gives the house its personality. What’s inside the walls is just as good as you guys know, but this part is what I’ll look at every day.
First, I framed the windows with 1 x4″ Hardi Trim. The Hardi Lap Siding on the bottom goes up pretty fast in 12 foot lengths with a 7″ reveal, I went with the smooth version to look clean. The Hardishingle Staggered Edge style up top on the other hand, is quite labor intensive. The pieces are only 48″ wide and go up with a 6″ reveal, but really give the house some dimension and texture.
I ran a 1×8″ dividing band board with a 1×2″ shelf on top to separate the styles and add even more detail. The siding comes in primer, but oddly enough the color is similar to what we will actually be using for paint. We are now on our second wall, I can see this siding project stretching out to several weeks as there is tons of detail work and not much room around the house for the scaffolding, but its looking great!


The second inspection we passed this week was on Thursday, for the drywall screw spacing. The mud crew was on standby to start taping and floating everything once the inspector signed off on the hanging job. Once again, this is an extremely specialized crew. Different guys than the drywall hangers last week. We are putting one of the best drywall crews in San Diego on this project and after the whole house is taped and floated we’ll be doing 2 coats of a level 4 smooth hand-troweled texture.
In order to keep up my construction pace, I ordered all the pre-hung interior doors last week, bought the Red Oak unfinished hardwood flooring material this week, and am currently about ready to pull the trigger on the millworks package. It’s all about thinking 2 steps ahead to make sure you don’t run into a 3-week wait for a special order, which in my case is just about everything.

by Tom | Sep 29, 2012 | Drywall and Texture, Insulation, Siding, South Park Modern Bungalow
Rough Inspection in San Diego. I’m rockin’ and rollin’ baby! Monday I passed the huge, monumental Frame and Rough inspection. The inspector looks at how the whole house was framed, Simpson hardware installations, shear panel nailing and then electrical, plumbing, hvac duct work, ventilation and fire sprinklers.
There are so many little things that he looks for, that its easy to fail but I’ve been through this so many times we’ve got it dialed now. He was very impressed with the quality of my work and how fast we built the house, we just passed the 2-month mark from when we got our permit stamps and poured the foundation.
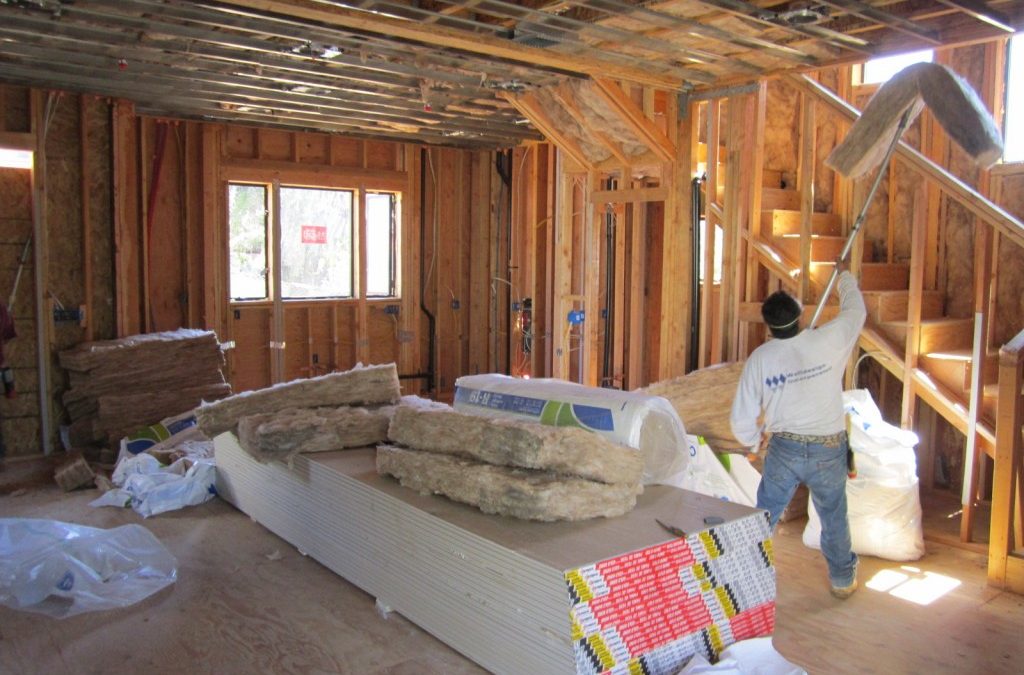
I had the insulation company ready to come in Tuesday morning so we didn’t lose any time.

I use Tracy at OJ Insulation out of Escondido, I would pay the same money just buying the insulation at Home Depot for what it costs to have them do it. Since I went 2×6 on my exterior walls I was able to upgrade the standard R 13 wall insulation to twice-as-thick R 19, this is going to be a huge energy saver.
The guys hung all exterior walls, between floors, attic, HVAC closet and bathrooms for noise reduction, in a day so I could call in the insulation inspection. The insulation job ran about $1500 bucks for materials and labor.
Here in San Diego the inspector wants to verify the insulation before you can hang drywall, we passed this second inspection on Wednesday this week and I had the drywall hangers ready to come in on Thursday.

I’m using the same drywall crew that did my big historic project last summer The Painted Lady. There are less expensive guys I know that were chomping at the bit to do it, but this crew specializes in smooth hand troweled texture and I want the best for this house.
They do all the custom spec houses and million-dollar Coronado remodels. I didn’t want the skip trowel or birdseye finish that most guys do, it costs more to go smooth because you are basically doing 2 coats of mud on the whole house and using lights at night to make sure everything is flat. The drywall hangers are old guys, one guy is 62 and another is 71 years old.
I didn’t have to ask how long they’ve been hanging drywall but the texture guys wont use anybody else because the better its hung, the easier it is to get perfect smooth walls. The extra time we spent “straight edging” the walls is paying off. We took an 8-foot level and went around the whole house planing down high wall studs and shimming low ones to prep for the drywall.

The next inspection I have next week is for drywall screw spacing before we can tape and float. At the same time the inspector will sign off on the exterior moisture barrier so we can start installing the Hardi Siding on the house. I used the best product out there, Tyvek Home Wrap.
My siding delivery comes on Monday so we’ll be off to the races on the exterior siding while the drywall guys continue inside. This project is running like a machine, its all production work and as long as you have the materials ordered and ready, pass inspections in a timely manner and have sub-contractors lined up, its like running a factory, I should know from my old days from the snowboard factory. Thanks for following!
by Tom | Sep 23, 2012 | San Diego Real Estate Market, South Park Modern Bungalow


It seems most sub-contractors are having a busy summer. Building is definitely picking up by talking to everyone in the industry. Because of this, my regular electrician couldn’t get to my project right away so I brought in a new crew.
These guys are new construction, not messin’ around, real-deal electricians. 5 guys showed up on Saturday and by Sunday at 4pm the whole house was 90% done including 200 amp service, riser, all 24 branch circuits, home runs, under cabinet lighting, multiple 3-way switching and 24 can lights.
I went with LED recessed lighting for energy savings, having just used it on a customers kitchen remodel I was surprised that the light quality is far superior to the florescent cans we were using last year to conform to Title 24 requirements. For only 9 watts of power usage you get 65 watts of clean lighting, a huge savings on your electric bill. Just another green feature on this project.

We took the drywall delivery this week, too. I like to get it in the house and stacked in all the rooms ready to go before we close everything up outside. It would have been impossible to carry the 12′ sheets upstairs later so this is essentially planning ahead.
I measured 160 12′ 1/2″ sheets of drywall for the house and 5/8″ for the garage and under the stairwell per City Code. Material cost was $2021.00 not including tape, mud and corner bead.


For more energy savings we always foam the doors and windows before drywall. Some guys still wont do this because they think it will warp the window frames, but its the only way to get a complete seal after the new construction windows go in. We learned this in the hot Texas climate.
After it dries you just remove the excess that comes out and then you have a great energy seal. Per Building Code you also have to use the Fire Block foam on all the holes you drilled through the top plate for mechanicals. The inspector will look for this at my insulation inspection.

After the electrician was done I brought in my last and final mechanical sub-contractor, the Fire Sprinkler guy. Fire sprinklers on all San Diego residential new construction, and some addition/remodels in fact, has been mandatory since 2007 after we had the big Cedar and Witch Fires.

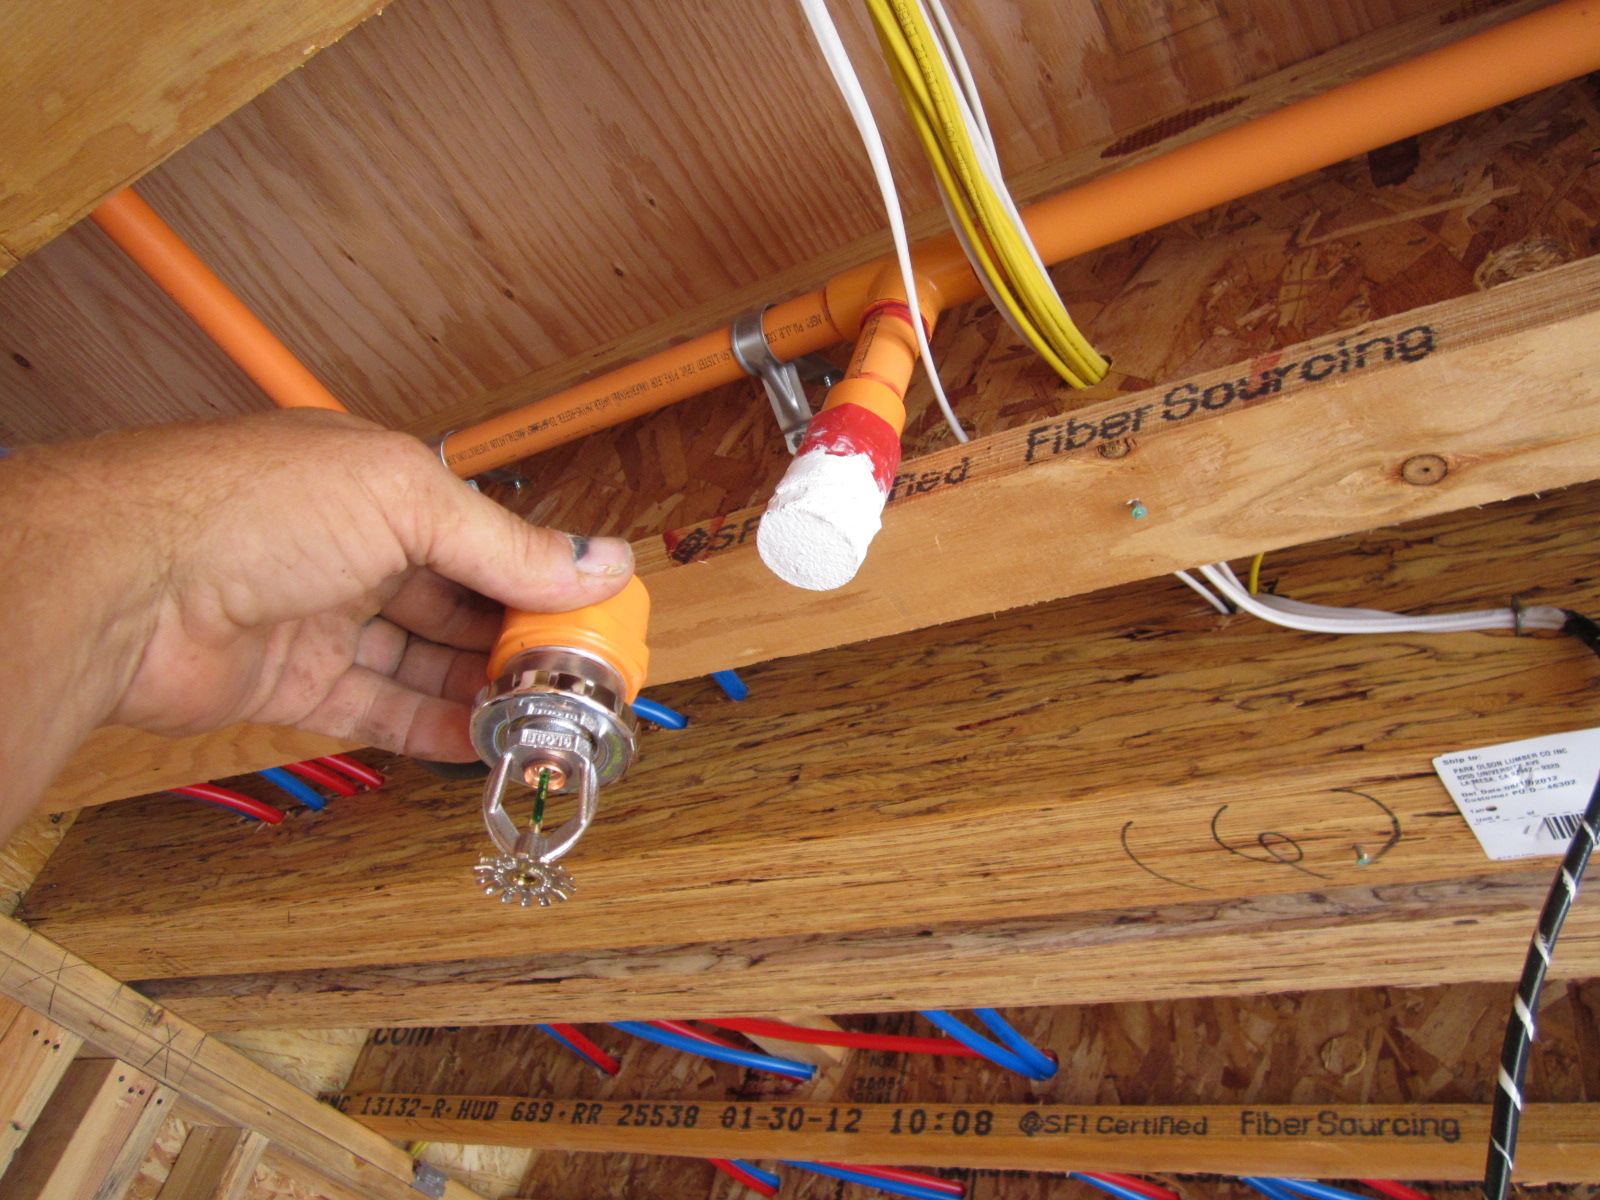
The supply lines come from a panel location near your water service. To handle the increased volume, water supply size is stepped up to 1 1/4″ to the house and 1″ at the cut off. The fire sprinkler lines are 1″ CVPC that is orange in color, its ran throughout the entire house keeping heads around 8 feet apart and away from A/C registers and lighting, and the calculations call for a certain number of sprinkler heads per room size.
Per his City permitted design, my sub-contractor has 4 heads in the great room, 1 in each bedroom and bathroom, and even 1 in the walk-in closet, water heater closet and HVAC closet. The master bedroom got 2 heads. The fire sprinkler heads will not be visible in the living areas and look like flush mounted white discs after trim out.

The fire sprinklers in the garage go by different calculations and are a bit different, visible sprinkler heads will be in place after drywall. The requirement is 1 head for every 150 s.f. of garage space.

This is the fire sprinkler riser that is located in a panel accessible from the outside of my house near the water service. It also feeds the bell box which gets mounted high on the house in an area where bedrooms can hear it easily.
Once the system is pressurized with water the Fire Marshall will come inspect it and give me a card, which in turn I will give to the City Inspector at the Frame and Rough inspection this week. The cost for this complete fire sprinkler system installed, with design and permits was $2,200.00. I’m ready for this big monumental inspection this week, its all going to be downhill after we get to start insulating and hanging drywall, stay tuned!


