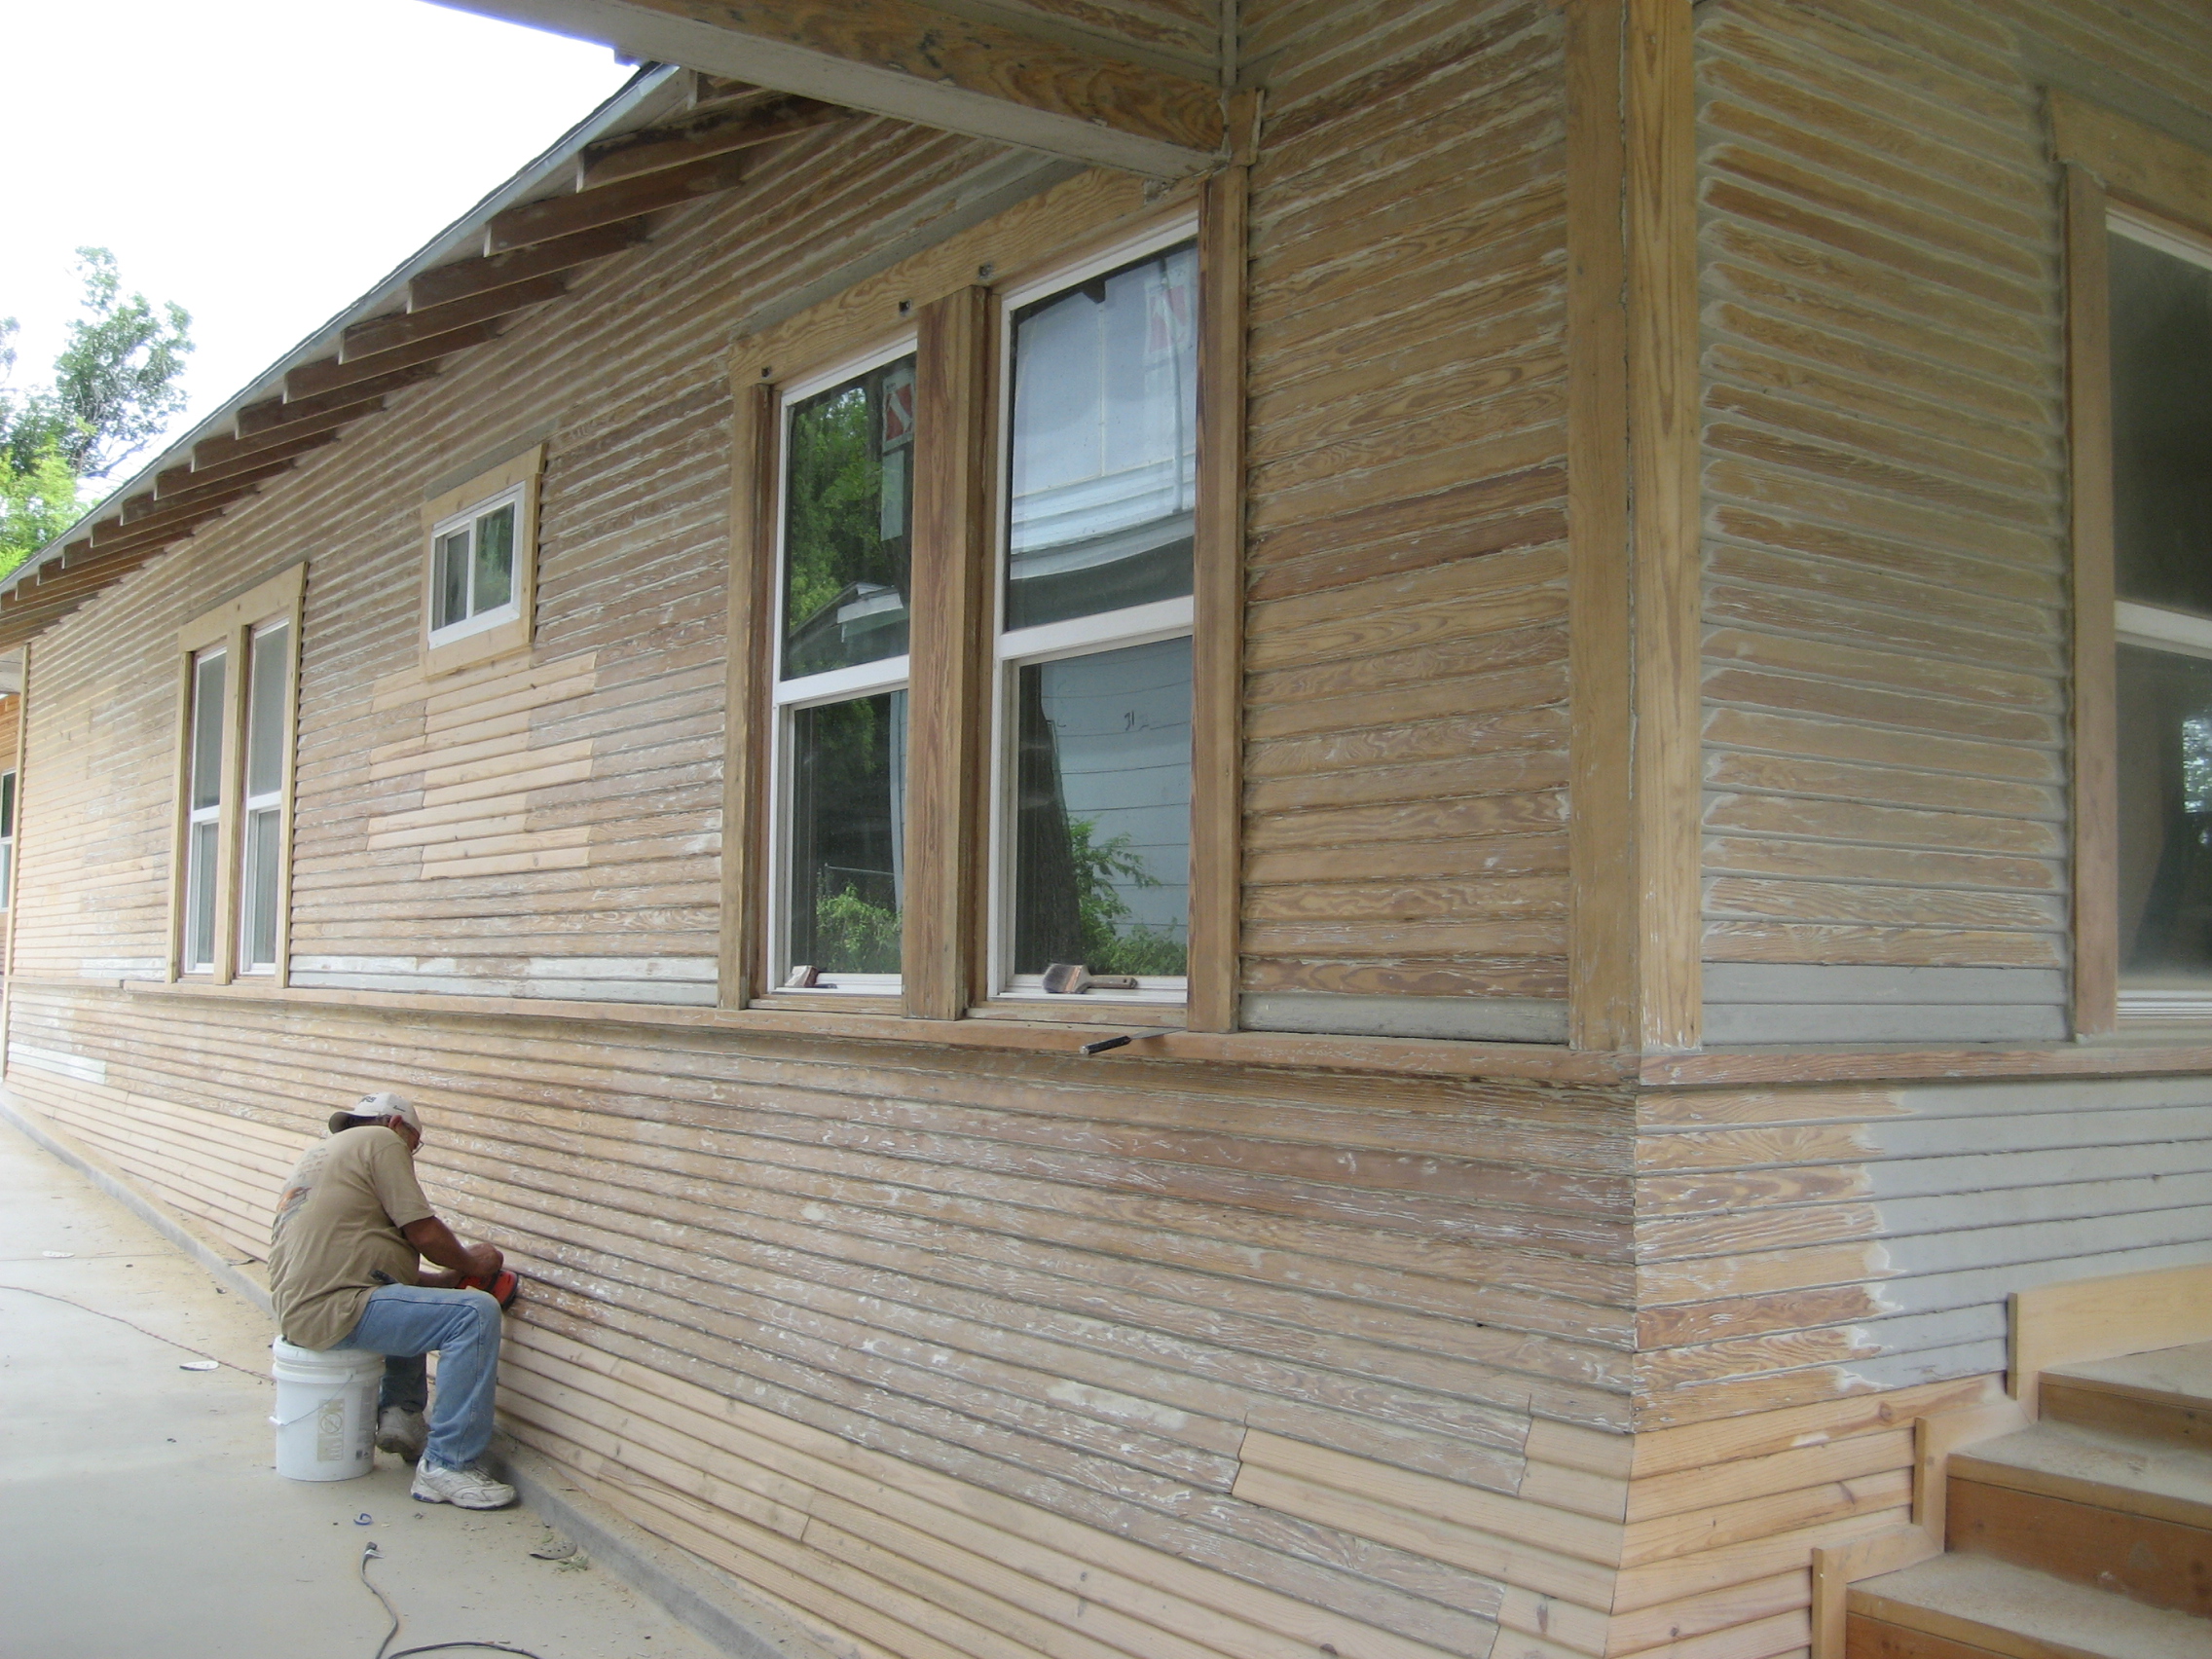
90 man hours and $400 bucks in sandpaper and we haven’t even started shooting the primer or caulking yet. A good paint job is all in the prep, as you can see here we’ve been giving this grand old lady some love this week. You cant just paint over 90 years of multiple peeling paint jobs on one of these historic houses and a scraper wont faze it. We stripped this T 117 siding down bare. Don’t worry, we used full protective gear and the lead paint remediation process. My guy is posing here for the photo!
I’ve seen people pay $18-20k for a paint job like this, stay tuned we’ve got 7 great colors going up playing off the colors in the original stained glass windows still present. Oddly enough after first picking the colors we found that our trim choice was exactly the same as what was underneath all those layers of paint. I guess the builder had the same idea about matching the windows. You can also see here where we found replica T 117 siding and patched some areas.
Just wait until you see it with the original decorative window screens over these new windows. Would have been better to save the original sashed wooden windows but they were too far gone and replacement TM Cobb was not in the budget for this price point.
Exterior paint jobs on historic homes are probably one of the most satisfying jobs we do!
Happy 4th! Here’s a construction update for our big rehab, the Target House. It rained all week from Hurricane Alex so we got skunked out on the exterior prep for paint but at least I saw some progress with the interior trim-out that’s now complete. I used a cool new 5 panel style door from Masonite called “Riverside” and a complete custom MDF trim out. Walk through the project with me below and see how our progress is coming along. There’s a house for sale on our street that just went under contract, cant wait to see the sales price as that will be the nearest comp. It’s listed for $300k but its hardly updated at all. With this in mind, I think our list price will be close to $399k for this project when its completed later this summer. In other news, our House Flipping Blog got chosen this week for “Top 20 Real Estate Investing Blogs”over at Biggerpockets.com. Thanks to Joshua Dorkin for the recognition! PS, keep the comments/questions coming as well! Thanks for following along with me on our 1923 Arts and Crafts Bungalow renovation.
“From the joining of two unexpected, seemingly opposite mates, great pairings can happen. How about Sonny and Cher, bacon cupcakes or Labradoodles?
Well the home design world is adding another great, albeit unexpected pairing to the list: historic home shells with über-modern interiors.” – Jason Buch, Express-News
I was interviewed this week to take part in a story that came out today called “Great Pairings”in the Express-News about local home remodelers specializing in pairing historic homes with modern interiors and features. As it turns out they were actually interviewing a realtor and another remodeler in the Historic King William area of town and they told him about what I’ve been doing for Mahncke Park and along the Broadway Corridor so they searched me out.
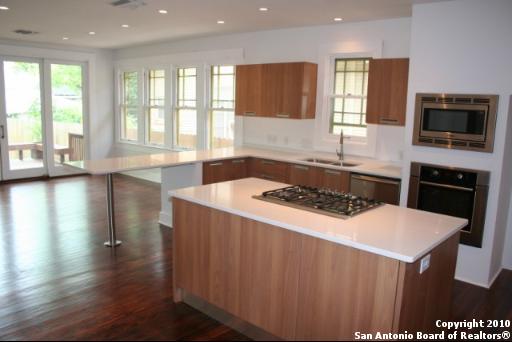
I was pretty excited to see who’s photos they used for the front page, especially when the meat of the story is really about another guy blending Contemporary architecture. As you can see our 1900 Arts & Crafts Bungalow built by H.C. Thorman dubbed Hat Trick House from last summer got the money shot. What made this house so special is the time we put in to carefully preserve the historic exterior of the home while gutting the entire interior, adding square footage, re-configuring the floor plan and offering a finish out to meet today’s most discriminating buyer.
While the article is promoting “uber-modern” interiors, we stayed somewhat true to the time period of this home with the renovation and material choices. This house got a lot of white ceramic tile w/subway pattern, White Shaker style cabinetry with seeded glass fronts and even a Farmhouse sink to keep the historic feel. While new materials like granite and stainless were still present, the kitchen didn’t look out of place after we were done.
Maybe Jason is trying to stir up his audience by using the terms historic and modern together because everyone hates seeing historic homes altered but at some point nobody wants to live in an antique either. If you want to see for yourself, here is the Contemporary Ikea kitchen in the other historic house referenced in the article. To check out the whole renovation video of my project with before and after shots, click here.
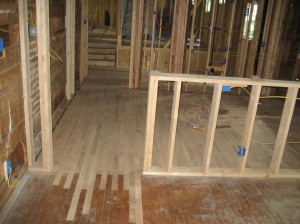
I picked up 1200 s.f. of hardwood flooring last week from Home Depot and we got started putting it down. On a full gut rehab I always put down the new wood floors before hanging drywall (if they are unfinished).
We patched into the dining room, staggering the joints and have run the new 2 1/4″ unfinished Red Oak all the way through the kitchen, utility room and we are half way through the master bedroom. In the old portion of the house the wood nails right to the floor joists but in my new addition it nails to the plywood sub floor with some felt paper in between as a moisture barrier.
Most of the Craftsman Homes in San Antonio originally have Red Oak flooring but occasionally you’ll see Long Leaf Pine used and especially in kitchens. After some deliberation I decided to have all hardwoods in my master suite instead of using high end carpet for the bedroom and tile for the bath floor.
On the last couple of houses I used carpet and didn’t really hear any complaints but these Arts and Crafts style homes are really all about having hardwoods throughout. By the time I looked at what I would spend on the carpet, tile and installation it made more sense to just put down all wood and I’ll end up with a way finer product.
Like the last house, I’ll even run the hardwood floors through the master bathroom which got great feedback and will really give my new addition some character. I usually buy this flooring at Lumber Liquidators for $1.99/s.f. but their price went up to $2.89 now.
Home Depot has it for $2.39 plus I got a little bit more off the order since it was over $2500.00 we got to send it to the bid room. I’ll still have to have these floors sanded and refinished with the rest of the house once the renovation is complete but on the flip-side putting down a prefinished engineered wood just wouldn’t give you that old house feel.
I’ve been doing extra dark stains like Dark Walnut & Ebony on my last few projects but for this house I think I am going to go lighter with Golden Oak just to change it up.
The dark floors are really trendy right now and very dramatic but they get so dusty and are a nightmare to keep clean during the period the house is on the market for sale. When the flooring got delivered the driver didn’t show up until 7 o’clock. Wouldn’t have been so bad but he dropped the pallets curbside so I had to lug all 63 bundles up 15 steps myself after a long week.
Here’s another item that I always do before the house gets drywall, I install all the HardiBacker in the areas that I have planned for tile. In the hall bath (not shown) I am doing the floor and tub surround. In the master bath pictured here I’ll do the entire new shower all the way up, inside and out of the 9 foot walls, and the box for the spa tub with a mini surround.
Before the backer board could go up I had to do the shower pan. I use the rubber membrane and a dry mortar bed and slope to the drain. It takes about 2-3 hours to complete. The backer board is easy as well, it cuts great with a skil saw and goes in with tons of screws.
You want a real stable base so your tile job doesn’t crack. I’ve seen some remodelers using that blue board the sell at Lowe’s, don’t do it, your tile job will crack in a few short months! That would suck to have your flip on the market for sale and a tile job start cracking. I’ve seen it happen, multiple times. Always use 1/2″ HardiBacker and screw it down, even if the guys on DIY Network nail it.


