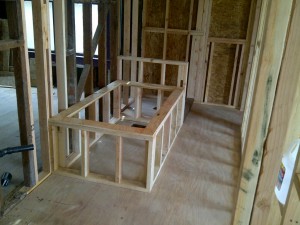
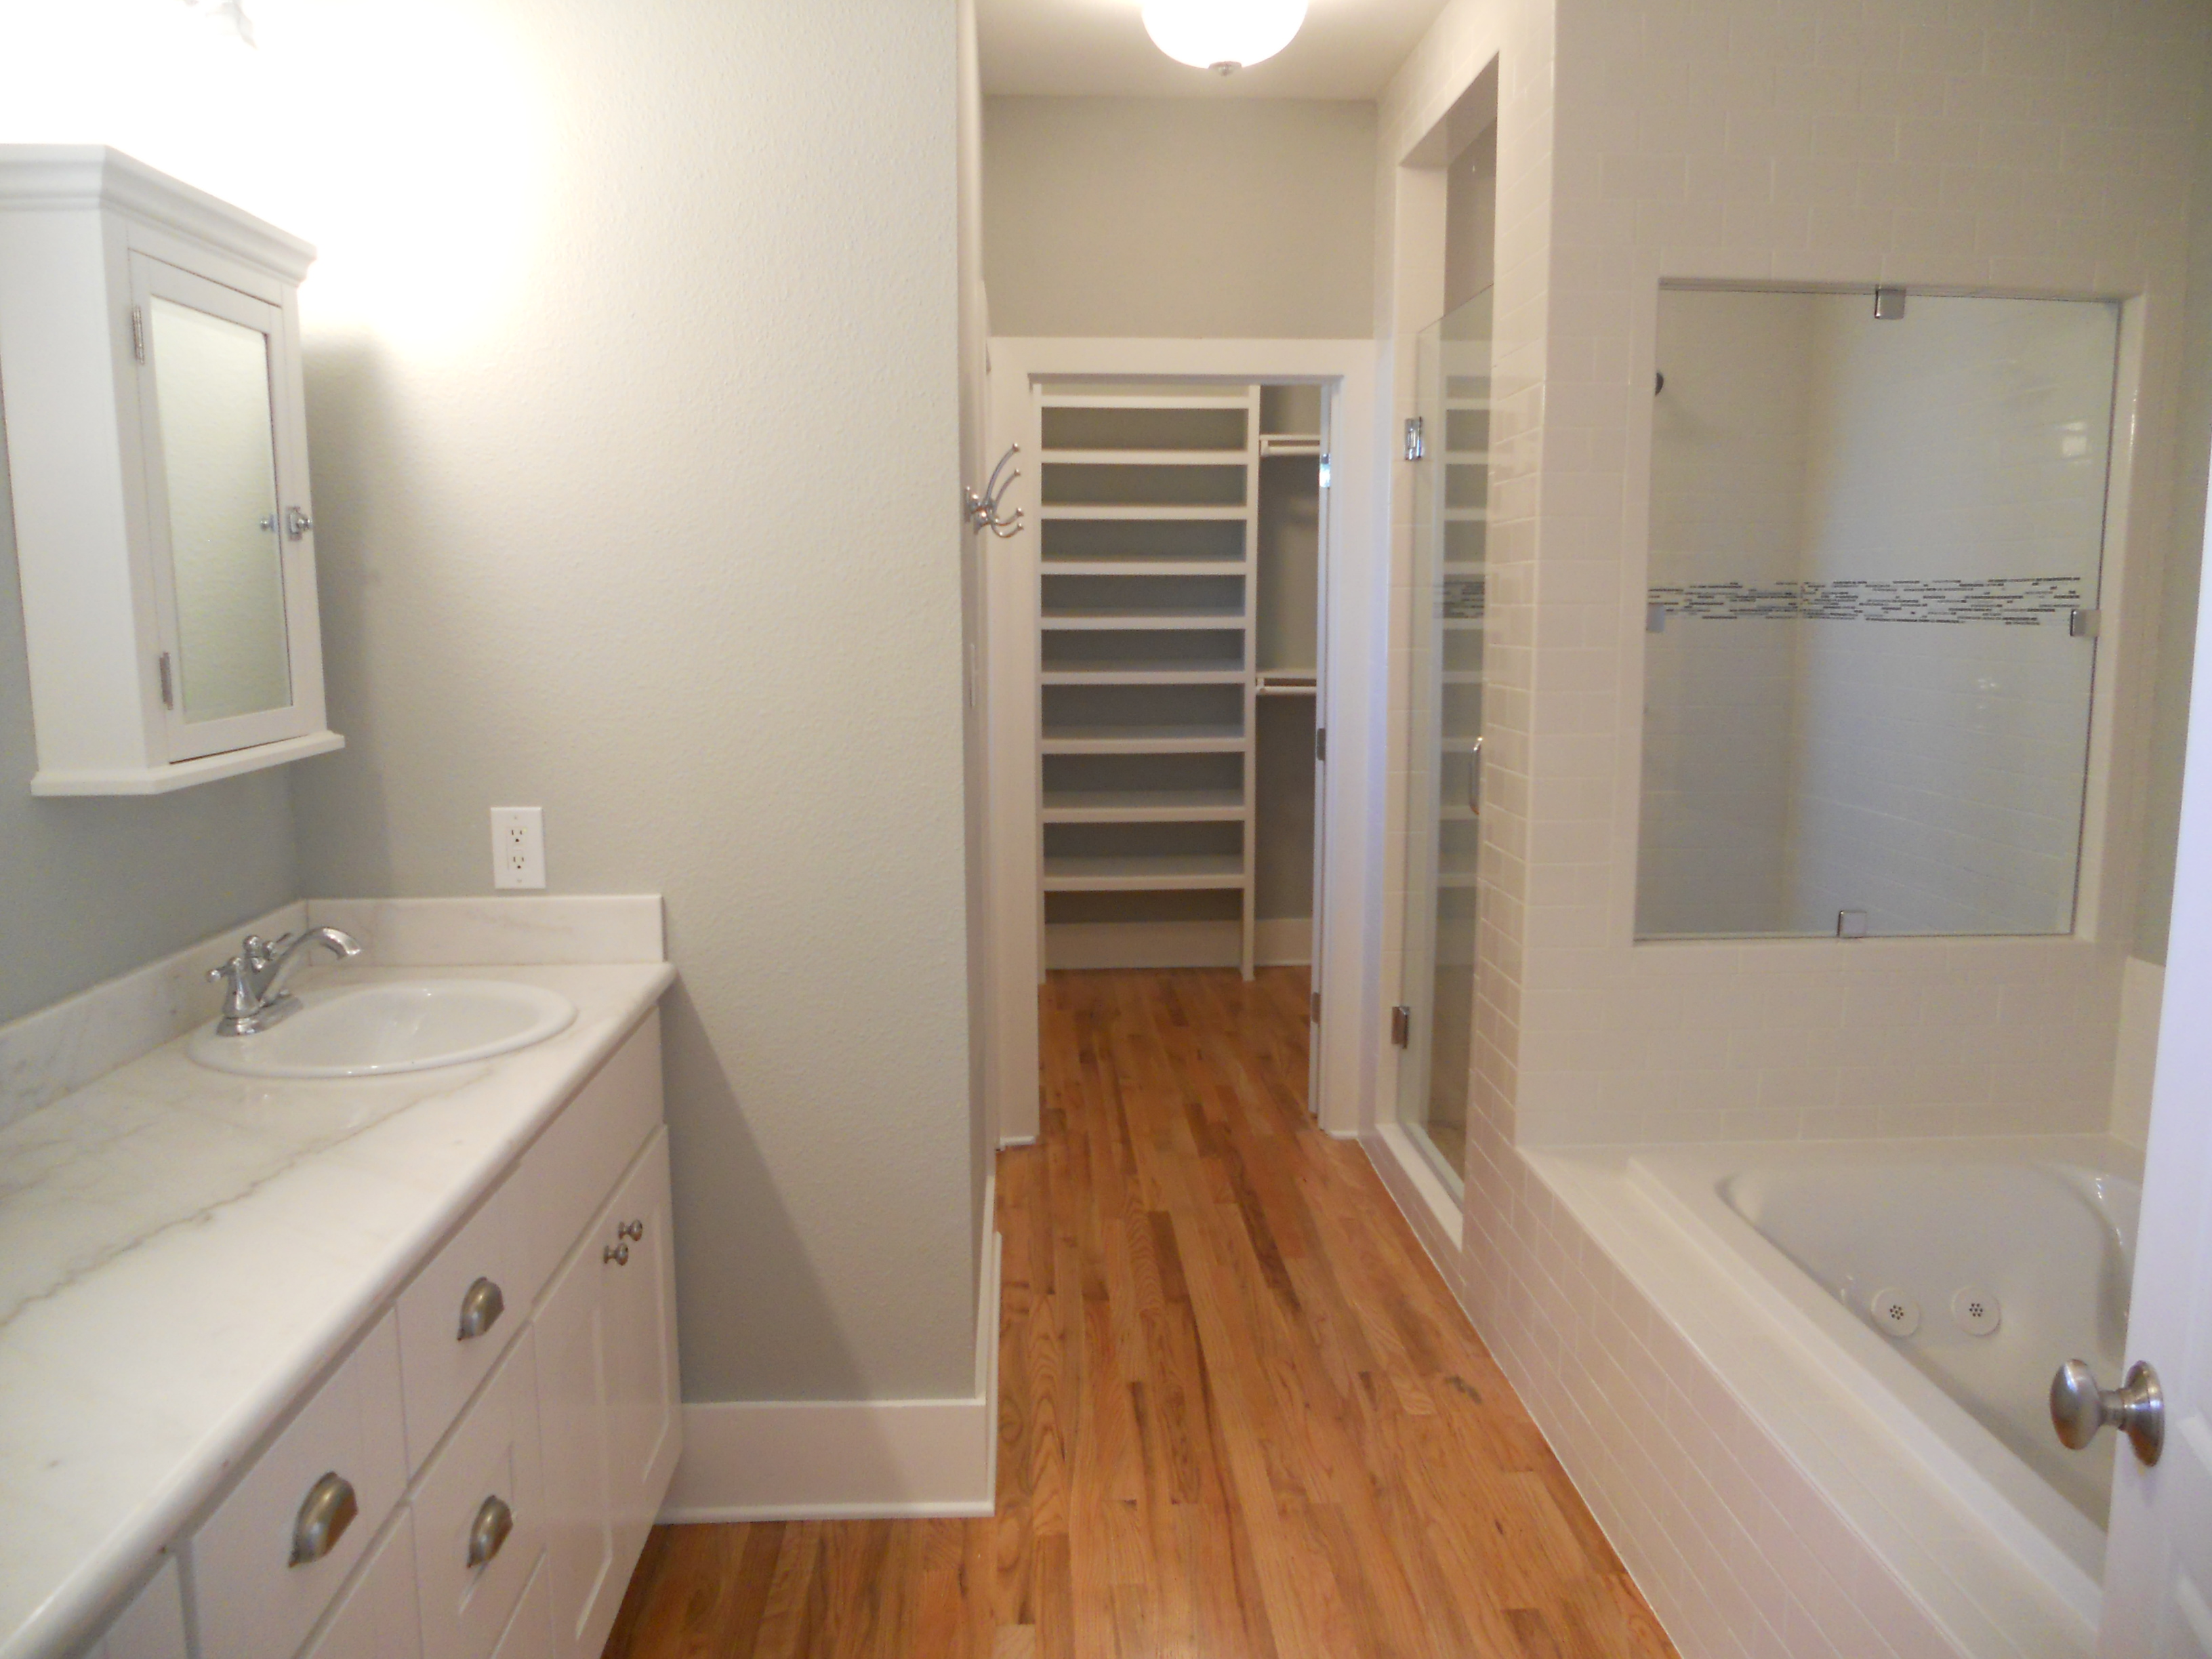
My new master bathroom in The Painted Lady is coming together nicely, it’s generous in size at 6′ x 15.’ Every time I frame up one of these tub boxes for the drop in tub I get a sense of Deja Vu, like seeing an old friend. It seems like just yesterday when I was doing a similar configuration on the Target House project only this time I’m just going with a standard 3′ high pony wall separating the tub and the shower instead of the full wall with the window opening, which will also also keep my tile price down. Every bathroom I design is a bit different, this time I’ve got everything in a line down the left hand wall and then the water closet at the end on the right. You kinda just gottta play with the space and do what works best. I’ve also got the whole right hand wall available for towel bars with this design, I’ve learned this the hard way after doing killer bathrooms and then finding out there no place for towel bars. The door swings in and onto the right hand wall, a 60″ dual vanity is first on the left, then the jacuzzi tub in the middle with a 3′ x 4′ shower at the back. I planned on dropping in a regular soaker tub with no jets to keep the budget down but after pricing them I could get the American Standard Plebe model 32″ x 60″ jetted tub for the same price of $399.00 so it’s a no brainer. There’s a window in the center of the back wall but I’ve got it temporarily sealed now. Natural light is key for bathrooms, ideally I probably would have had another window in the shower and one in the water closet too but I’m trying to stay within budget so I’m forced to pull back in some areas. Code states that if you don’t have an opening window you must have an exhaust fan but I’ll have both.
As you can see we got started roughing in the plumbing this week, I got a great quote of $4800.00 for the complete new system with gas lines, I supply the fixtures. I was also reminded that black ABS is used here in California and not white PVC as in Texas and on the East Coast for the waste lines. I think PVC is better and cheaper but the only upside on ABS is that you don’t have to use primer with the glue. ABS also gets brittle from UV exposure so it’s now common place to paint the roof stacks in California. I still like PVC better, even though it takes more time to install using the primer but I’m sure there’s some tree hugger issue with it so that’s why California uses ABS. After framing I always get the plumber in first before the electrician or hvac sub contractors, it works best because the vent pipes and waste lines are not flexible. I also wait until the plumber is done before putting on the new roof so we don’t have to butcher the new roof for the vent pipe roof jacks. Your roof job comes out far superior if all jacks are in place before install, this trick came with experience. After these waste lines are complete we’ll run the new black pipe gas lines and then finally the copper supply side lines. I’m still going back and forth with the San Diego Historical Review Board, they have made me change 13 items on my plans including window type, siding material, roof type & color and they even want to know the exterior paint colors. Furthermore, they are making me re-stack the exterior brick chimneys even though they’ve been eliminated inside the house. It’s really slowing me down because until I get everything approved from them I cant call for any inspections. As frustrating as it is, I’m stoked to learn exactly what needs to be done to pull off a renovation of this caliber in San Diego so I’ll chalk the delay up to contractor school.
Don’t forget the men and women who died while serving in the American military protecting our great country, this holiday weekend is not just all about beer and barbeques in the park. Have a happy and safe Memorial Day and God Bless our troops!
I’m getting close to the stem wall pour, the guys worked on the forms all week. Inside the forms we hung 12″ j-bolts that will anchor the house to the foundation once it’s poured. Then we laid 4 rows of #5 rebar and secured it to the screw jacks with tie wire. Anywhere the stem wall is more than 24″ high we will hang vertical rebar 24″ on center as well. This is over and above local building codes but worth the extra expense. All the load from the weight of a house is carried on the exterior walls and down to the footings, it’s totally different for me here doing this as in Texas when building a pier and beam room addition you don’t do this perimeter foundation. The plastic sheeting you see is to keep the concrete from blowing out the back once we pump it into the form cavity. All that’s left now is to set the outside forms, we’ll cut windows along the top of the outside so we can pump the concrete in.
I also got the new master suite all framed up, it’s 375 s.f. and includes 9′ ceilings, a big bathroom that fits dual vanities, soaker tub, stand up shower and water closet. There’s also a generous sized walk in closet and french doors off the back. While the framers were there I also had them raise the kitchen ceiling, move some closets around upstairs and add some really cool tray ceilings in the living room and dining room that I’ll use for my mechanicals and central heat ducting to get upstairs. We also added fire blocking to the entire house since I had all the walls open. I bumped up the room addition ceiling joist size to 2×8 and the roof rafters to 2×10 just to ensure the inspector likes what he sees and I get off on the right foot with him. It’s coming out pretty trick, I’m excited about how easy it was to really modernize this 100-year-old floor plan and am confident it’s going to help sell the house. The prices I’m nailing down for mechanicals on this 2000 s.f. house so far are as follows: Complete electrical with new 200 amp service: $5300. Complete plumbing with copper supply, gas lines and all new ABS waste lines: $5000. Complete new central heat system with new furnace and ducting: $1800. New roof: $2000 labor. These are killer prices and all from legal, licensed sub contractors, I couldn’t have done better in Texas. Thanks to everyone locally who has sent me referrals, after this huge project I’ll have a great team ready for any size project!
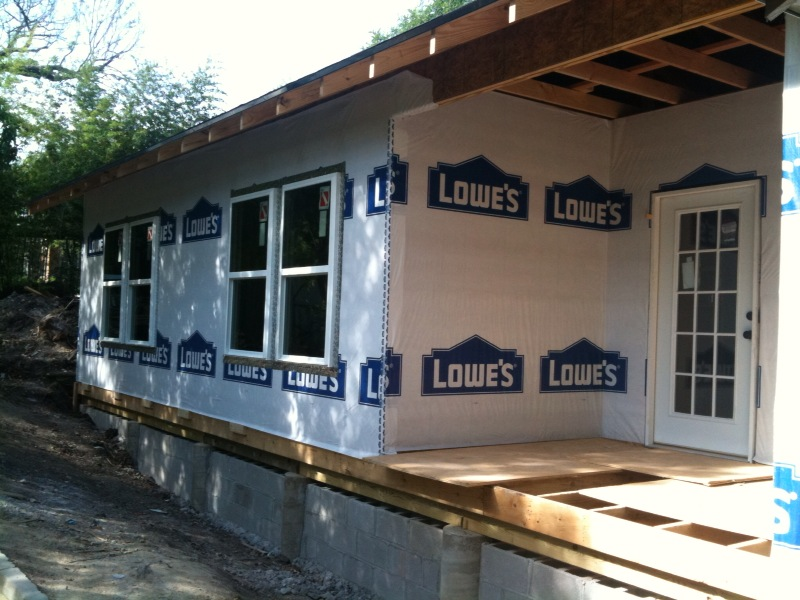
I had a productive week starting out by hanging all the OSB plywood on the room addition exterior, it really starts looking like a house once it has something on the framing. After the OSB I wrapped it with Tyvek, wow does Lowes like to advertise! Its amazing how many local rehabbers I see that dont use house wrapping on their additions. They’ll go straight over the OSB with the siding. For $88 bucks you cant go wrong and it really makes a difference on your electric bill and keeps the drafts out. The windows arrived Friday and I got most of them in along with the back door so now it all locks up again. As you can also see I had a retaining wall built this week from CMU block under the perimeter of the new addition. There was such a deep below grade cavity from my excavation that this was necessary for correct drainage and to prevent water intrusion under the house. I’ll backfill the sides now and we’ll be good to go. Another example of how we are doing things right, some guys would have thrown down some plywood and backfilled. The back porch is really neat, cant wait to see everything now with the historic waterfall style #117 siding on it to match the house.
The original owner of the house stopped by and said that their dad build it back in the 20’s. She’s going to give us all the info on the home and story behind it so we can pass it along to the new owner eventually. I am hoping she has some vintage photos of the front so when I go to rebuild the columns and porch area I can replicate it correctly. While I was under the house this week I found some old moonshine jugs, a 1927 Good Housekeeping magazine and a Texas automobile license plate from 1933. Since last weekend we’ve had 10 showings at Neighbor’s House and more offers as well. Spring buyers are out in full force. Cool stuff, stay tuned …
Here’s how my 900+ s.f. addition came out over at The Target House. The floorplan is flowing nicely even with the change in elevation to the master suite. That hallway is actually 46″ wide even though I mistakenly tell you 42″ in the video so its not cramped at all. As you can see I basically had to rebuild the entire floor in that back room this week because it was originally a screened-in porch so it sloped down for drainage. It’s all straight now and lines up perfectly with the new addition. As far as sales go, we are getting great showings at The Neighbors House, Spring is here, the weather is beautiful, flowers are planted and there is a strong smell of home buyer in the air: ).
For those of you taking notes, I just completed step #4 in my standard order for major renovations.
Step#1 Demo
Step#2 Level the existing structures’ foundation
Step#3 Frame up new construction portion
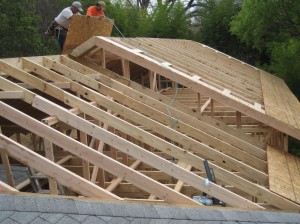
Step#4 Put the roof on
As with any renovation the demo always comes first. Next, I always level the existing house’s foundation so I am starting with something straight before I add on. Thirdly, I frame up the new addition and then finally get the roof on so everything inside will now be dry. After the roof I’ll usually move towards getting the siding on which includes doors and windows then I can have my sub contractors come through and rough-in the electrical, plumbing and hvac. I like to have the house secure before new stuff goes in so this is my reasoning. You can see how the roof gable pops up moving backwards through the addition, this compensates for the interior steps keeping the same 9′ ceiling height throughout.
After my usual price shopping all over town I ended up getting the 30-year roofing material at Lowes for $50/square. If you are spending alot of money at Lowes or Home Depot have them send your quote to the “bid room.” They’ll come back with another 10% off everytime. If you bring in a competitors quote they’ll beat it by 10%. In San Antonio if you can speak a little Spanish you can get a roofing laborer to put on a new layer for $20/square if you supply all the materials whereas roofing contractors charge over $160 with materials. I ended up throwing down about $80/square total after including all new flashings, tar paper and drip edges. I used my favorite color Estate Gray by Owens Corning, it goes with everything and looks rich. This isnt bad and less than half of what a homeowner would pay. This roof is 37 squares so the total price is around $4000 which is a great price for a 30-year shingle with all new metal and added ridge vents on a 2200 s.f. house. Another rain storm caught the guys mid-way Saturday so we’re finishing it up Monday.
We had a buyer come back for a third time on the Neighbor’s House this week as well as tons of calls and another new showing. Nothing in writing yet so we are still patiently waiting.
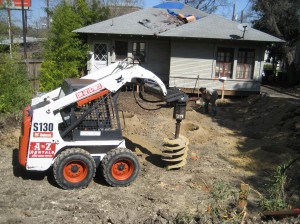
I got alot done this week on the Target House, with another day rental on the Bobcat but this time with the 2 foot auger attachment I drilled the holes for the 28 piers. The City of SA wants to see them 2 feet deep with #4 rebar at the bottom of each hole. I found a new engineer that came out and inspected the footings before the concrete pour. My old guy tried to raise his prices from 400 to 600 bucks for the inspection but the new guy’s price is only 350 so I am happy. The City of SA doesn’t inspect foundations for room additions anymore themselves, it’s up to the builder to supply his or her own engineers cerificate to satisfy that portion of the building permit.
After the footings were finished Friday I placed all the piers on Saturday so now I am all ready for the framers to come in and knock this puppy out. I used 12″ sonitubes for the piers but the City only calls for 8″. For the small extra cost I just think it provides for a way better product with the larger diameter piers so I always upgrade. We hand mixed 48 bags on 4000 psi concrete and poured them to the top. I’ll lay the 4×6 treated sills (beams) across the top next week before the framers get started. Stay tuned, we’ll be showing you some cool videos of the whole framing process soon!

 seems like just yesterday when I was doing a similar configuration on the Target House project only this time I’m just going with a standard 3′ high pony wall separating the tub and the shower instead of the full wall with the window opening, which will also also keep my tile price down. Every bathroom I design is a bit different, this time I’ve got everything in a line down the left hand wall and then the water closet at the end on the right. You kinda just gottta play with the space and do what works best. I’ve also got the whole right hand wall available for towel bars with this design, I’ve learned this the hard way after doing killer bathrooms and then finding out there no place for towel bars. The door swings in and onto the right hand wall, a 60″ dual vanity is first on the left, then the jacuzzi tub in the middle with a 3′ x 4′ shower at the back. I planned on dropping in a regular soaker tub with no jets to keep the budget down but after pricing them I could get the American Standard Plebe model 32″ x 60″ jetted tub for the same price of $399.00 so it’s a no brainer. There’s a window in the center of the back wall but I’ve got it temporarily sealed now. Natural light is key for bathrooms, ideally I probably would have had another window in the shower and one in the water closet too but I’m trying to stay within budget so I’m forced to pull back in some areas. Code states that if you don’t have an opening window you must have an exhaust fan but I’ll have both.
 As you can see we got started roughing in the plumbing this week, I got a great quote of $4800.00 for the complete new system with gas lines, I supply the fixtures. I was also reminded that black ABS is used here in California and not white PVC as in Texas and on the East Coast for the waste lines. I think PVC is better and cheaper but the only upside on ABS is that you don’t have to use primer with the glue. ABS also gets brittle from UV exposure so it’s now common place to paint the roof stacks in California. I still like PVC better, even though it takes more time to install using the primer but I’m sure there’s some tree hugger issue with it so that’s why California uses ABS. After framing I always get the plumber in first before the electrician or hvac sub contractors, it works best because the vent pipes and waste lines are not flexible. I also wait until the plumber is done before putting on the new roof so we don’t have to butcher the new roof for the vent pipe roof jacks. Your roof job comes out far superior if all jacks are in place before install, this trick came with experience. After these waste lines are complete we’ll run the new black pipe gas lines and then finally the copper supply side lines. I’m still going back and forth with the San Diego Historical Review Board, they have made me change 13 items on my plans including window type, siding material, roof type & color and they even want to know the exterior paint colors. Furthermore, they are making me re-stack the exterior brick chimneys even though they’ve been eliminated inside the house. It’s really slowing me down because until I get everything approved from them I cant call for any inspections. As frustrating as it is, I’m stoked to learn exactly what needs to be done to pull off a renovation of this caliber in San Diego so I’ll chalk the delay up to
 contractor school.
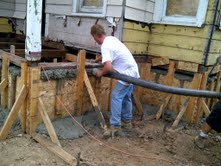


