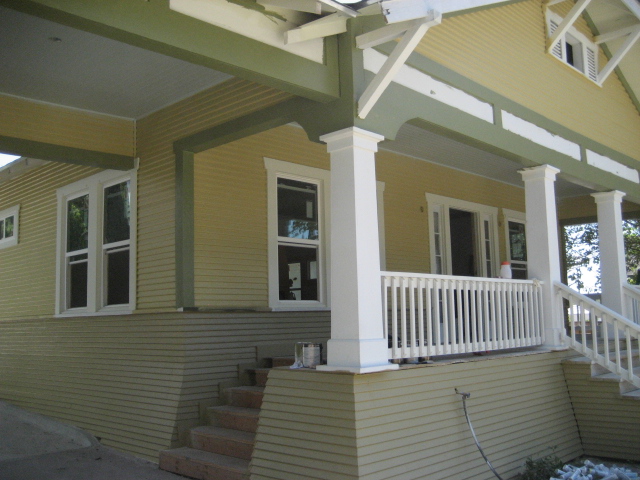
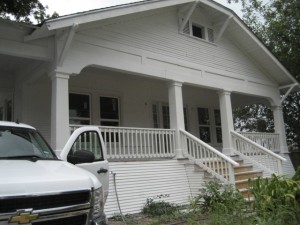
It was a humid sweltering week with temps near 100 and a heat index closer to 110 but we finally got the outside finished. I know it probably seems like it took a long time to paint this house, in fact it did. This was the most intensive exterior coloring I’ve ever done but after all the work I have to say it was worth it. Out of the 7 colors we only got to spray 3 with the airless so the rest was all brush work. There are so many details on the house and with each individual rafter tail getting painted as well as the 1×4 trim in between them a different color and with everything getting 2 coats you can image how much cutting in we did this week. The dark green rafter tails against the cream eaves is really neat and adds a lot of dimension. Thanks to Morgan Penix at DeWitt Architects, she came through for us again with this great color scheme. This week I was also able to get all the miscellaneous trim done that I never finished. I made vents, access doors for the crawl space and finished the skirt siding around the room addition. The rear porch still didn’t have its decking so I laid down some original style long leaf pine to match whats up front, I’m really happy with the way this back covered porch came out, another great historic style detail in our design. The icing on the cake had to be hanging the original window screens Saturday, they made such an impact. I won’t stretch the frames with mesh as my new dual pane windows come with screens, they are only there for the cosmetic appeal and historic correctness plus they cover the modern energy efficient windows that lurk beneath. I was excited this house still had the screens in place, on the last 2 projects I actually had to hand make frames to get the historic look I needed. I think that everyone visiting our house flipping blog will see that we aren’t doing your average rehabs here, there’s a lot of intensive labor that goes into saving one of these historic homes, especially in the condition that we find them. It’s our mission to do these projects correctly and thoughtfully so these great old homes will serve the needs of todays buyers and be around another 100 years.
After all that hard work prepping the house we finally started putting some colors up this week. It’s really an honor to get to spray it after all those hours of sanding. We squeezed 117 tubes of Alex Plus 35-year caulk into every crack known to man, my finger tip might never recover. And of course I had paint samples visible, so the unsolicited comments from neighbors started flying. It’s amazing how people aren’t shy to tell you they don’t like something. On a previous house we did, my wife and I had about 10 samples up on the front trying to decide what looked good. This was back in the day before we used a professional to guide us. Upon arriving the next morning I found that all the neighbors had “voted” in chalk on the sidewalk. What the heck, I mean they are the ones who’ll have to live with it after I’m long gone but mind your own business people! I learned long ago when house flipping don’t piss off the neighbors so I try and bite my tongue now. You can see here we’ve got 5 of the 7 colors up already. I know it sounds like a lot of colors but really its only various shades of brown and green. These historic homes can handle a lot of color easily as well but most homeowners would be frightened by the thought of using that many. I think when you see the finished product you wont even realize there’s 7 colors. The last color is going to be the most dramatic so I’ll show you guys as soon as it’s done. It’s going on the knee braces, barge rafters and each individual rafter tail will also be hand painted. A lot of work but it’s going to be crazy when it’s done. I also have the original 1923 window screens that I’ll be painting and hanging back over my new windows, this always gives such a killer detail in the color blocking. In the pic here the columns and porch railings are still in primer. The ceiling for the porches on historic homes are always painted light blue. This keeps wasps from building nests and it really works!
I’ve switched helpers now, my last guy who helped with all the prep started to look like he was going to pass out. After going home last week at lunch from being too tired I decided it was time for the second shift. My new guy is super pro, he’s been painting for 30 years and I’ve used him before. After we are done with the outside this week we’ll roll straight inside and start catching the interior up. I’m still trying to pick granite and tile colors but for sure I’ll be going white shaker style on the cabinets.
The hard part of this paint job is done. After 9.5 days of grinding and sanding we broke out the sprayer and put up 35 gallons of Kilz2 latex primer in a matter of hours. For a historical paint job on 117 siding I always get the house to primer first so any cracks and holes become visible and then start caulking and dialing it in getting ready for the colors. I estimate about 4-5 days of caulking now and then we’ll be ready for the 7 color paint job. Every piece of siding will get caulked so there’s no seams and the tiny holes from the trim nailer all get filled as well. A paint job like this goes against any typical house flip theory but then again we aren’t doing your average flips either. This paint job will pay off.
While the paint job is a huge undertaking for only 2 guys, myself and a hired gun, I’ve also been busy on the home front with more important issues. We’ve been spending alot of time getting our personal house ready to put on the market and after finally getting all the odds and ends completed we put it in MLS last weekend and it sold for full price in 3 days! My wife and I have decided that its time to take our real estate investing show on the road and head home to sunny San Diego, Americas Finest City, and the first step we determined is to sell our primary residence. This way we can get into a rental house and be able to leave at the end of any rehab. We came to San Antonio in October 2006 after the real estate market crashed in California. I had done alot of research at the time and we picked SA due to the growth rate, affordability and strong local economy. Our guess worked out great, we’ve had tons of success here but now its time to take on a new challenge, we’ll be returning to ground zero for the real estate bubble. Remember, the markets that crashed first will be the first to recover. SD has now seen 11 straight months of price appreciation. California unlike Texas has wild swings in home prices, the largest transfer of wealth in our lifetime is taking place right now and we want to get in at the bottom again. We’ll miss San Antone as there have been alot of fond memories created here, namely the birth of our beautiful baby boy! Thank you Texas!
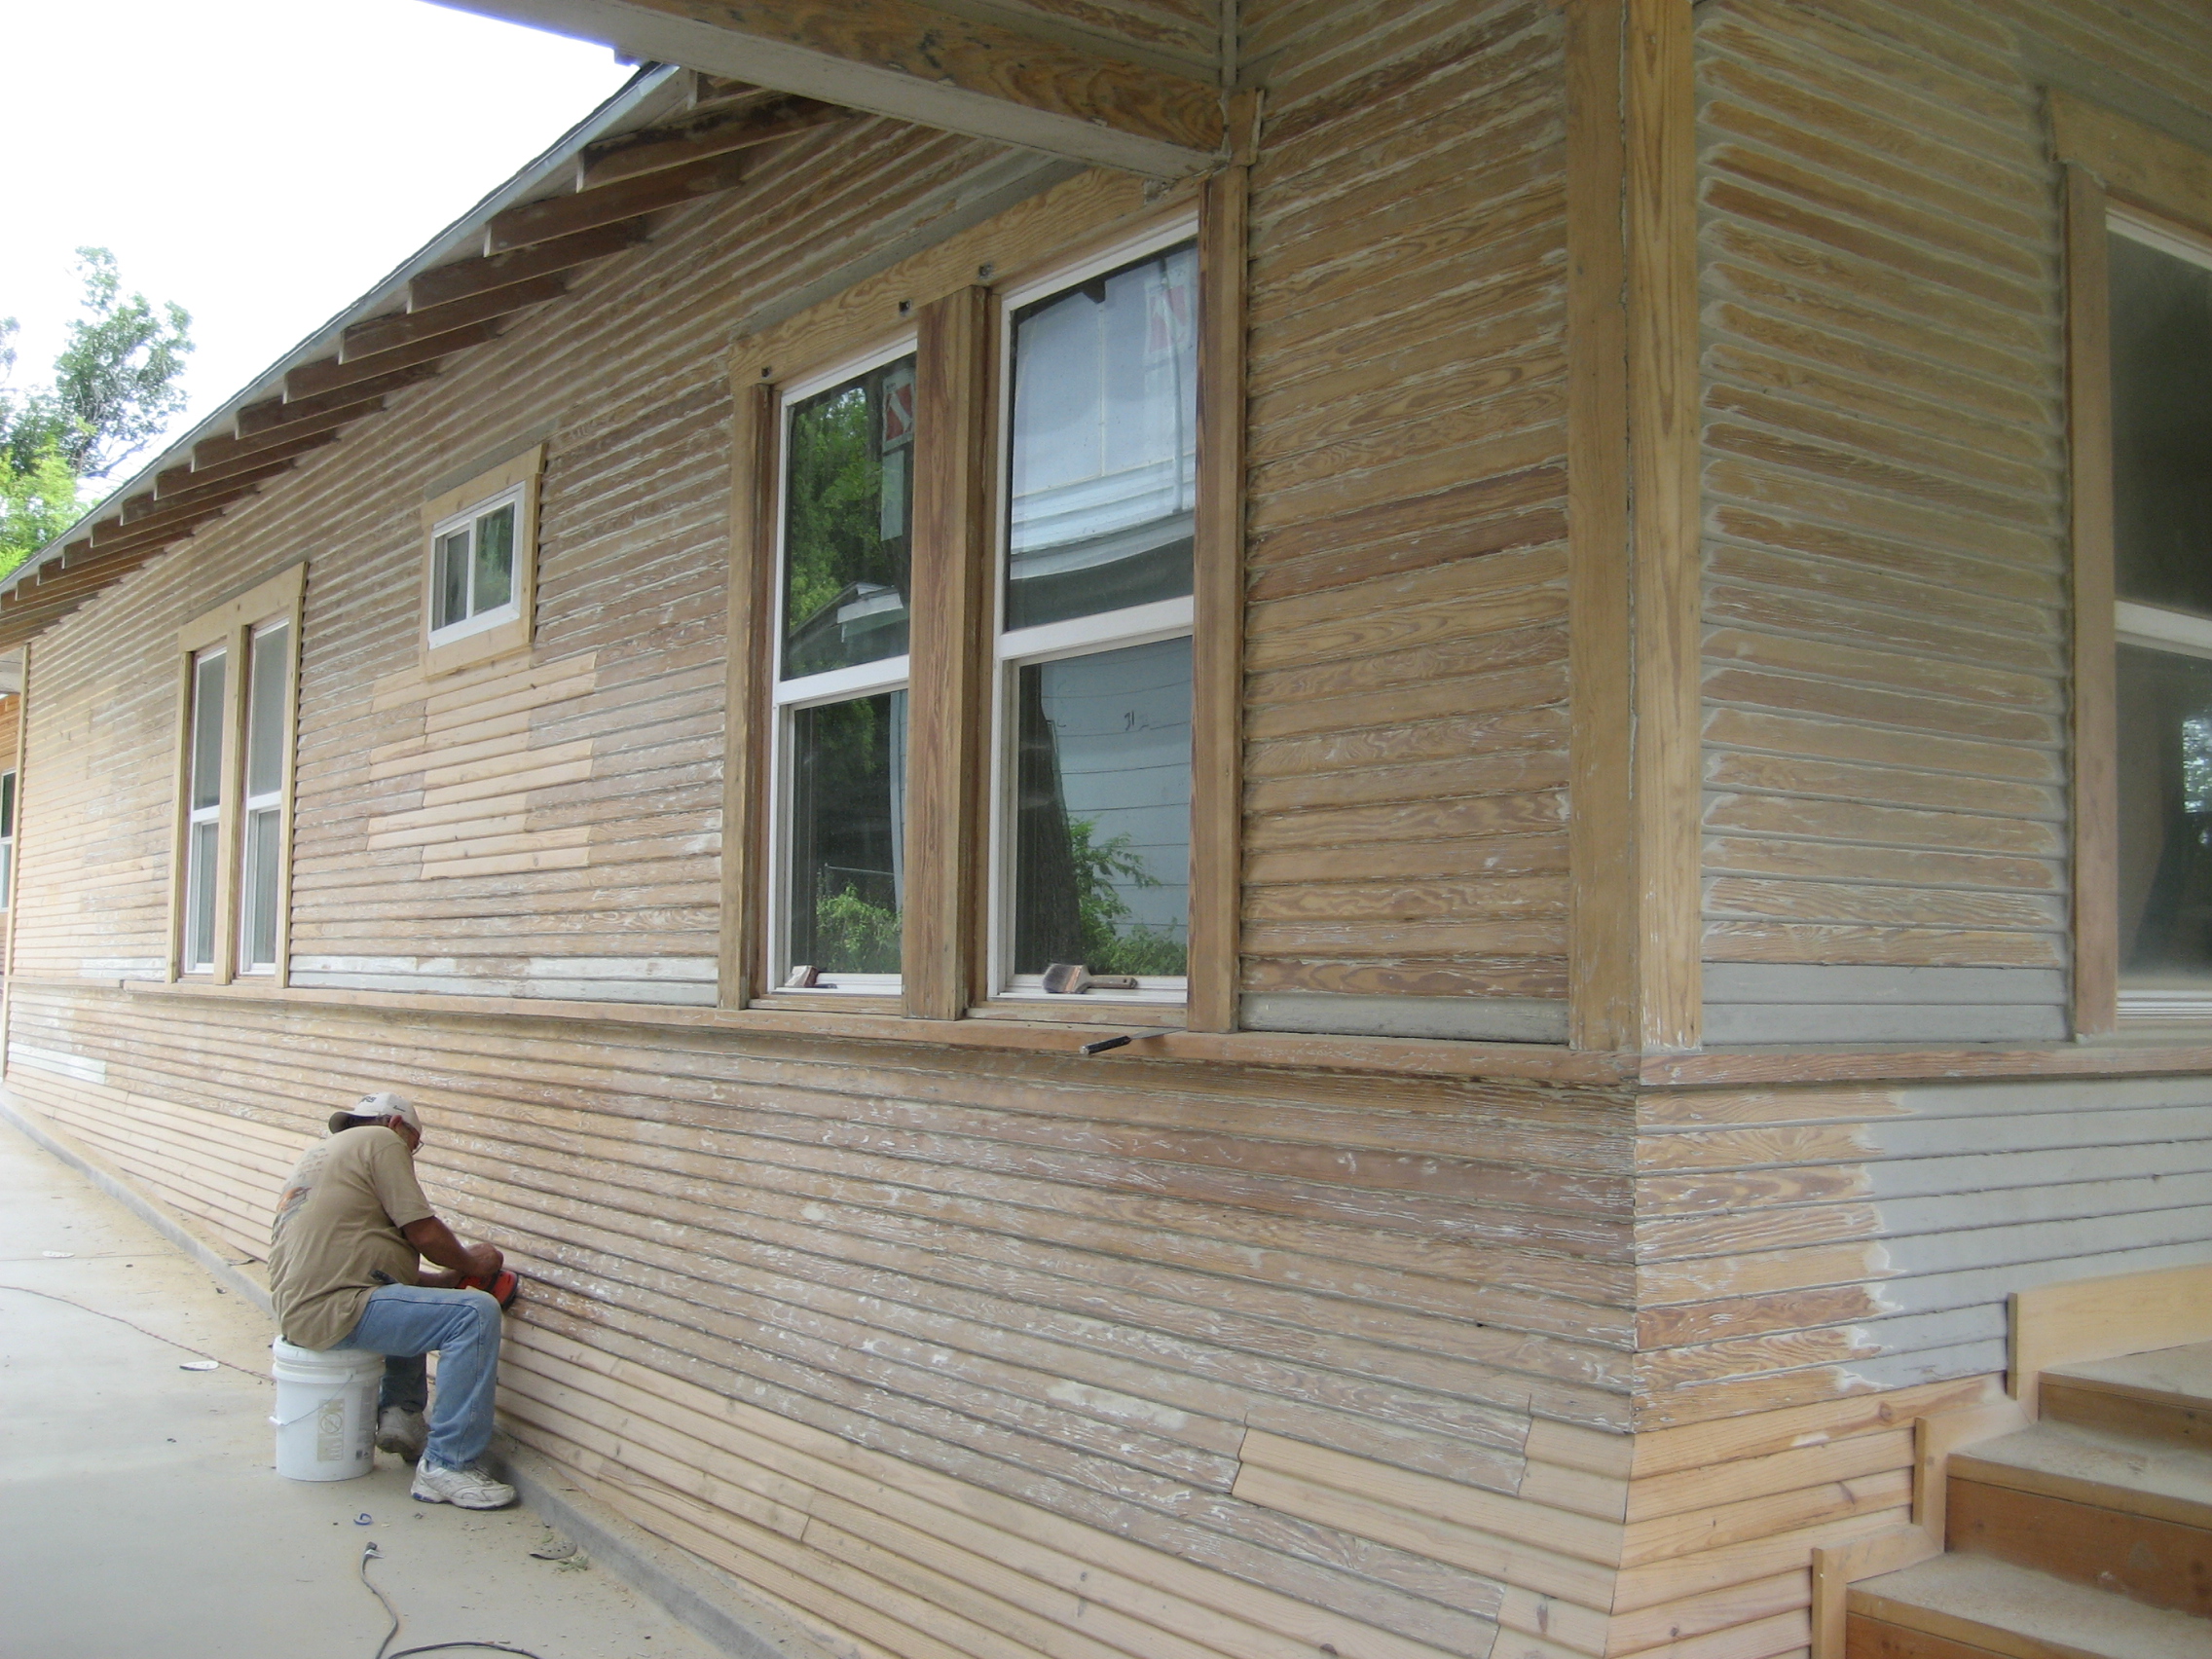
90 man hours and $400 bucks in sandpaper and we haven’t even started shooting the primer or caulking yet. A good paint job is all in the prep, as you can see here we’ve been giving this grand old lady some love this week. You cant just paint over 90 years of multiple peeling paint jobs on one of these historic houses and a scraper wont faze it. We stripped this T 117 siding down bare. Don’t worry, we used full protective gear and the lead paint remediation process. My guy is posing here for the photo!
I’ve seen people pay $18-20k for a paint job like this, stay tuned we’ve got 7 great colors going up playing off the colors in the original stained glass windows still present. Oddly enough after first picking the colors we found that our trim choice was exactly the same as what was underneath all those layers of paint. I guess the builder had the same idea about matching the windows. You can also see here where we found replica T 117 siding and patched some areas.
Just wait until you see it with the original decorative window screens over these new windows. Would have been better to save the original sashed wooden windows but they were too far gone and replacement TM Cobb was not in the budget for this price point.
Exterior paint jobs on historic homes are probably one of the most satisfying jobs we do!
Happy 4th! Here’s a construction update for our big rehab, the Target House. It rained all week from Hurricane Alex so we got skunked out on the exterior prep for paint but at least I saw some progress with the interior trim-out that’s now complete. I used a cool new 5 panel style door from Masonite called “Riverside” and a complete custom MDF trim out. Walk through the project with me below and see how our progress is coming along. There’s a house for sale on our street that just went under contract, cant wait to see the sales price as that will be the nearest comp. It’s listed for $300k but its hardly updated at all. With this in mind, I think our list price will be close to $399k for this project when its completed later this summer. In other news, our House Flipping Blog got chosen this week for “Top 20 Real Estate Investing Blogs”over at Biggerpockets.com. Thanks to Joshua Dorkin for the recognition! PS, keep the comments/questions coming as well! Thanks for following along with me on our 1923 Arts and Crafts Bungalow renovation.
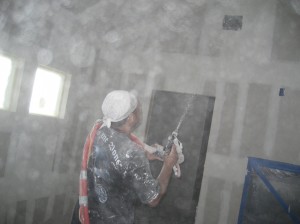
It’s finally starting to look like a house again. As I’ve said before its always fun to see it with drywall so you can get a feel for the new spaces you’ve created and how they flow together, the new master suite I built is definately going to sell this house. I’m very particular on the drywall job for these big projects, I use a new construction crew that specialize in this trade and do it all day long, every day. Of course every tom, dick and harry out there can hang drywall and tape and float it (including me) but this important step really dictates how your final finish out will appear. My guys use all the latest tools like roto zips to cut out the boxes and mud bazookas and taping machines to float it out. There’s literally no sanding when the mud is applied correctly. Tons of other rehabbers here locally are going “handyman” style and having painters hang their drywall, tape and float it and use a hopper to spray the texture. The texture on your rehab is a very important detail, some buyers probably wont notice bad texture but the 20% who are in the know will recognize the quality. Plus, after all that work to get to this point who would want a chunky uneven surface on your walls that looks like old drywall thats been retextured and patched? Hoppers are o.k. for small jobs but for a big house it will be hard to get even coverage and mix it consistently one bucket at a time. A professional crew will bring in a truck with a spray rig, one mixture and they spray the whole house evenly without stopping.
Once again, that’s what these guys do for a living. Once the texture truck pulls up 3 guys start running around masking off all the windows and can lights while the sprayer starts at the back of the house and works his way forward. The whole house takes about 2 hours to complete. For a professional drywall job like this we pay $10.00 per sheet for labor. That includes the hanging crew, tape and floating as well as the texture. I supplied the drywall itself, this house ate up 270 4×8 sheets. Of course we don’t use 8 footers so as to minimize the joints but thats how the labor is calculated, what actually went in was 180 12 footers. Per building code we use 5/8 on the ceiling and 1/2 on the walls. If you hire someone to do the drywall in your big rehab and he shows up with a texture hopper, run!


