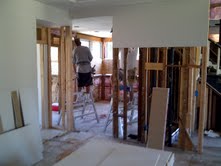
This big fully permitted Modern Farmhouse remodel in Oceanside is now well underway. We moved a lot of walls around and are doing major structural changes to convert this dated 5 bedroom, 3 bath into an open concept floor plan 4 bedroom, 2 bath with huge 9′ island kitchen and expansive master suite upstairs.
The style is “Modern Farmhouse” where we will run an all White and Black color theme with some industrial fixtures and gold hardware. Inside paint colors will also be all white with warm wood floors to anchor the space. Extensive use of subway tile and white shaker will complete the look, wait until you see the unique industrial pendant lights we are dropping over the island.
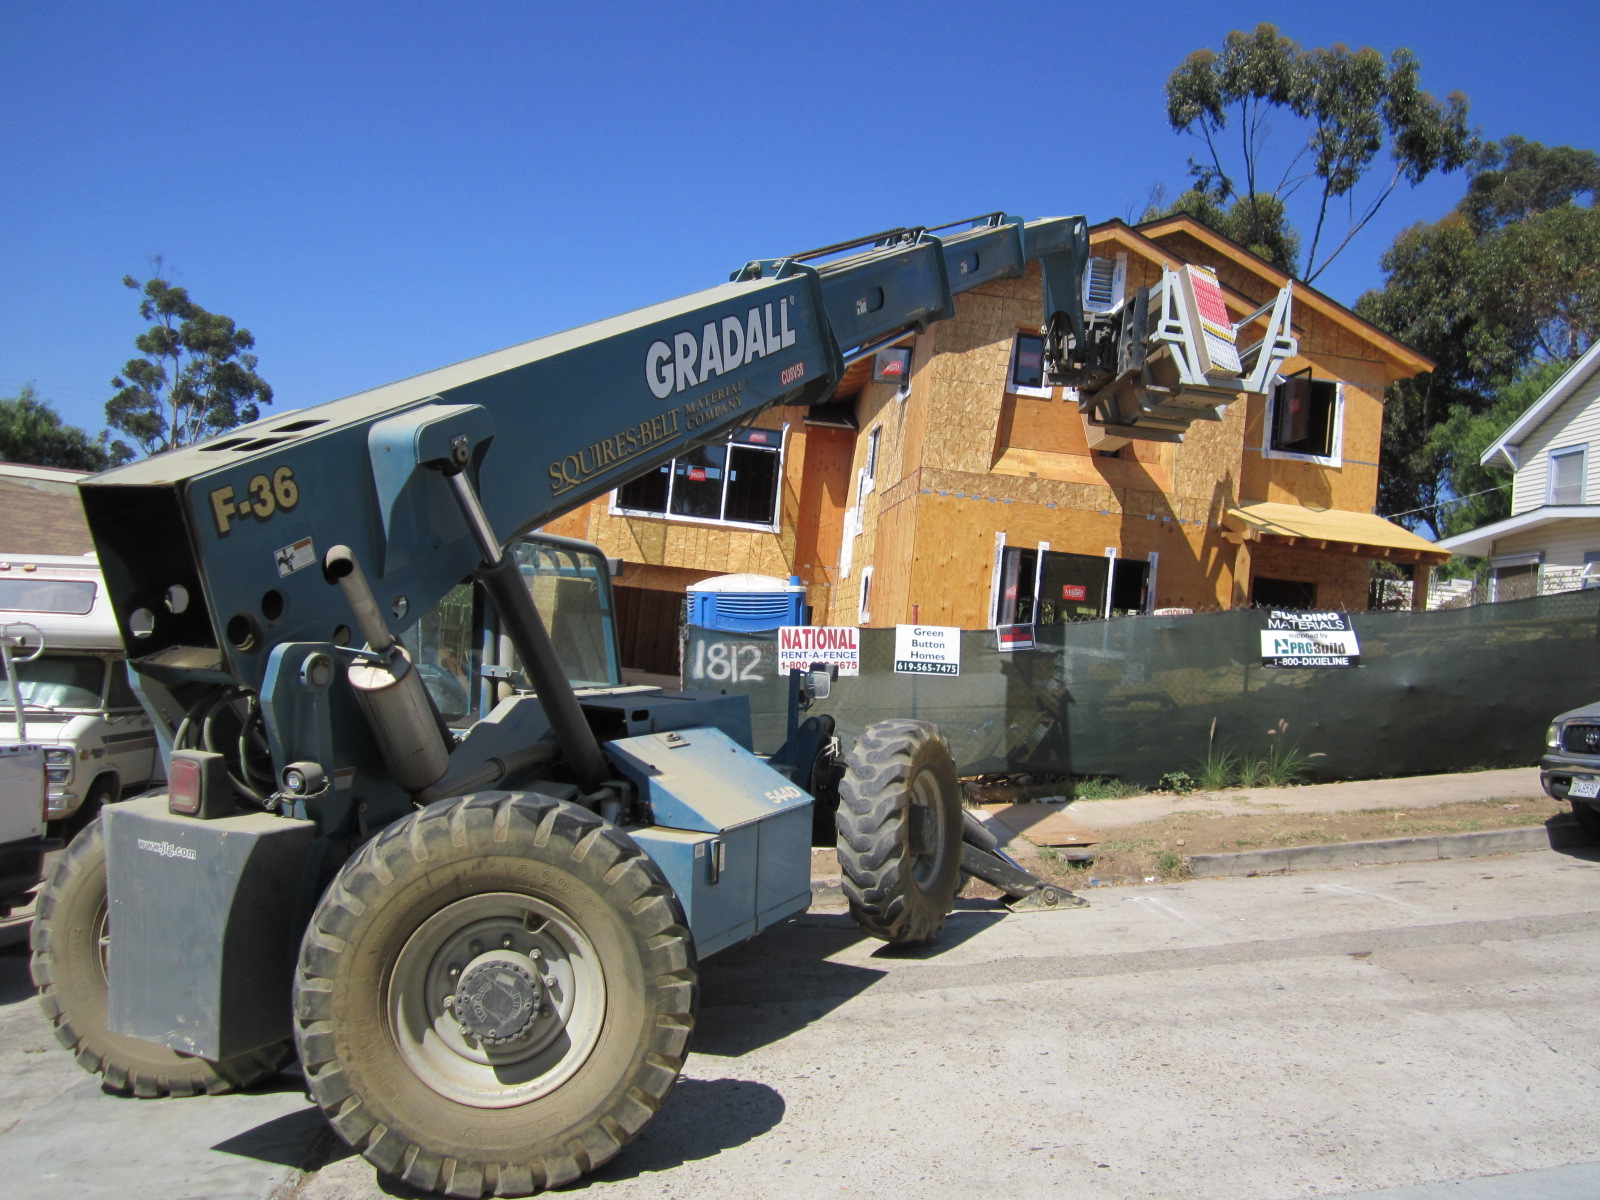
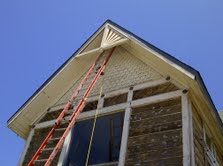
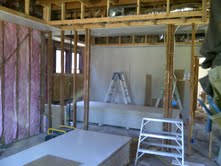
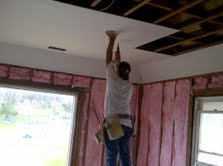
This is Part 1 which got us through the demo, permitting, rough framing, mechanical upgrades, central air, roof, insulation and drywall. Notice the awesome Shed Dormers I designed on the roof which gives it the Agrarian look we are going for.
This style is hot right now in LA and North County San Diego so it will be exciting to leave this mark on the hip South Oceanside neighborhood for years to come. Subscribe to our YouTube channel so you don’t miss the final video to see how it comes out!
Outside we are now into the second week of the siding job while the drywall crew finished up on the inside of our Modern South Park Bungalow. I ended up going with a 90% smooth, hand-troweled texture on the entire house and garage. It took 165 sheets of drywall, a case of tape and 30 boxes of mud for the entire job on this 1850 s.f. house. My guys do an incredible flawless job so I’m happy once again.
Now that the drywall is done, we are going straight into laying the hardwood floors this week. These are the real deal, 2 1/4″ x 3/4″ Red Oak unfinished hardwood.
Once the house is all done, one of the last things we’ll do is then sand and stain them. These are the best hardwood floors you could ask for, they’ll last 100 years and you can refinish them many times and always change the stain color.
Laying unfinished Red Oak hardwoods and then paying someone to refinish it, is a little more expensive than just laying a pre-finished engineered hardwood, but the quality is second to none. After the hardwoods go in, I’ll then trim out the house on top of them.
What you see here is about half of the red oak hardwood I bought, I am doing 1200 of the 1850 s.f., which is the whole house minus the two secondary bedrooms.
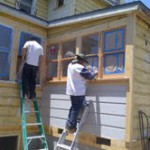
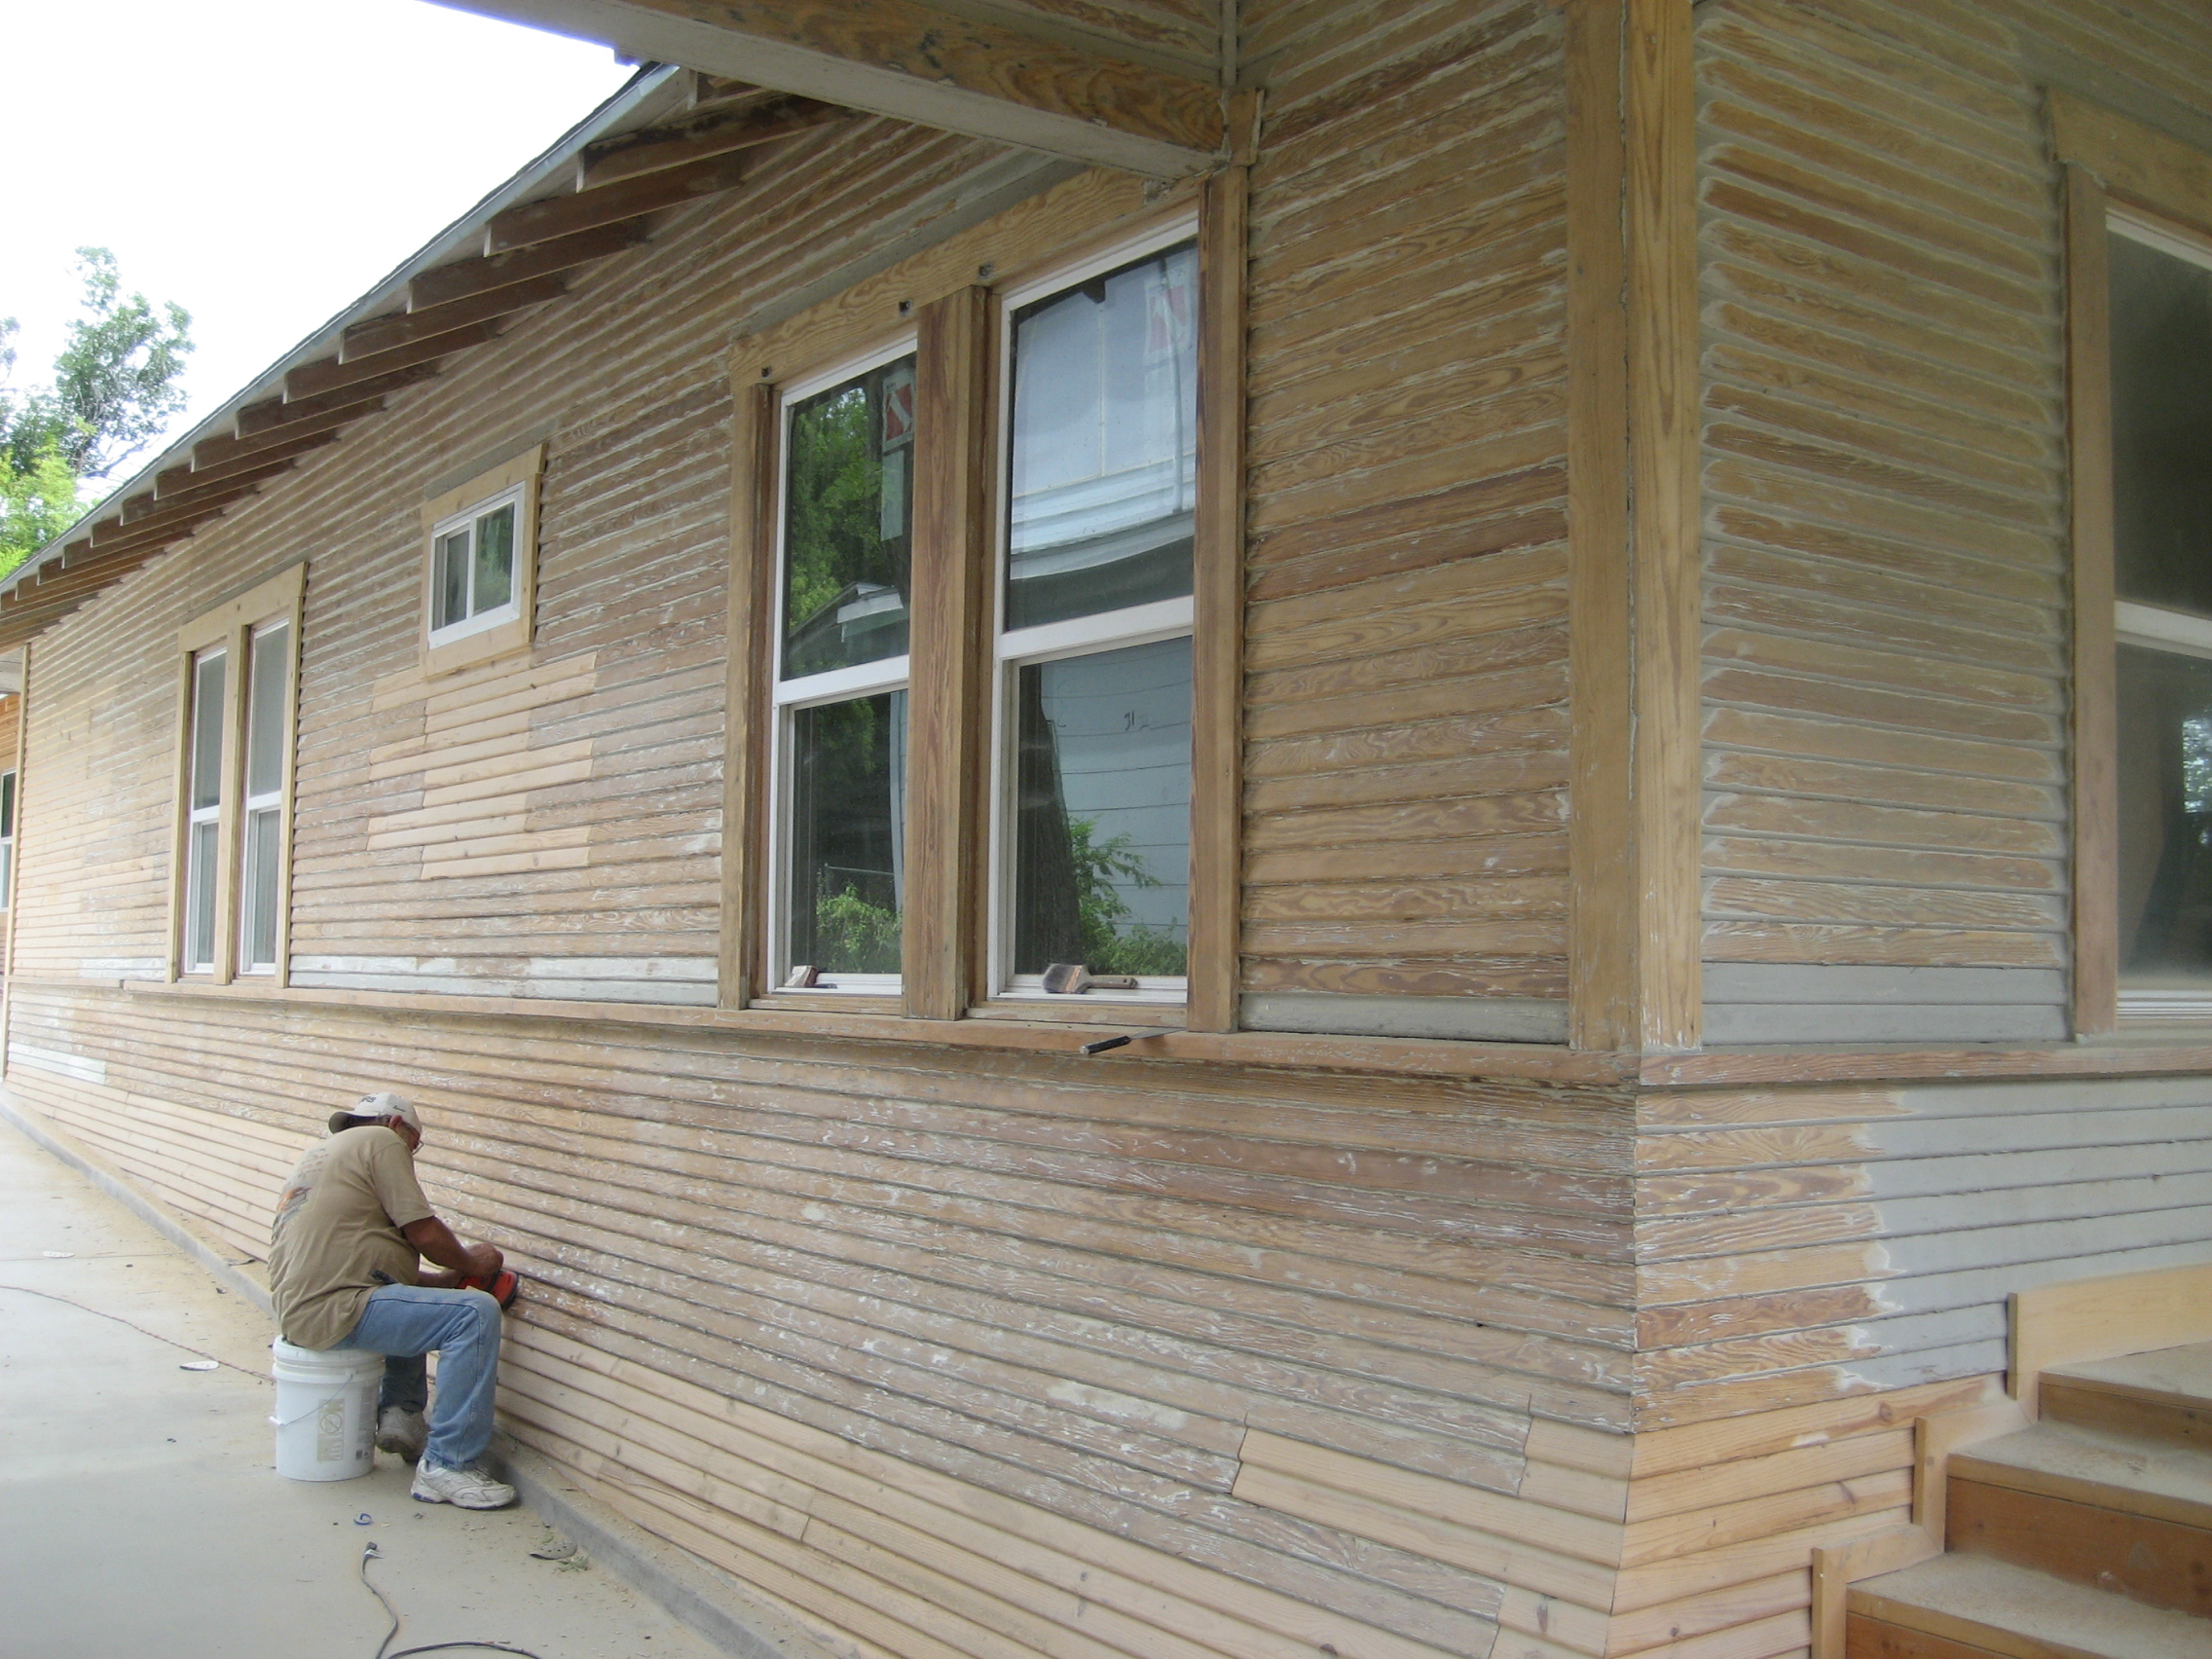
My new construction project is running very smoothly. After passing the inspection on my house wrap Monday, we were finally able to start putting the Hardi Siding up. I have really been anxious to see what the house will finally look like after all the rough work that gets buried and nobody will see. Now comes the fun part, which actually gives the house its personality. What’s inside the walls is just as good as you guys know, but this part is what I’ll look at every day.
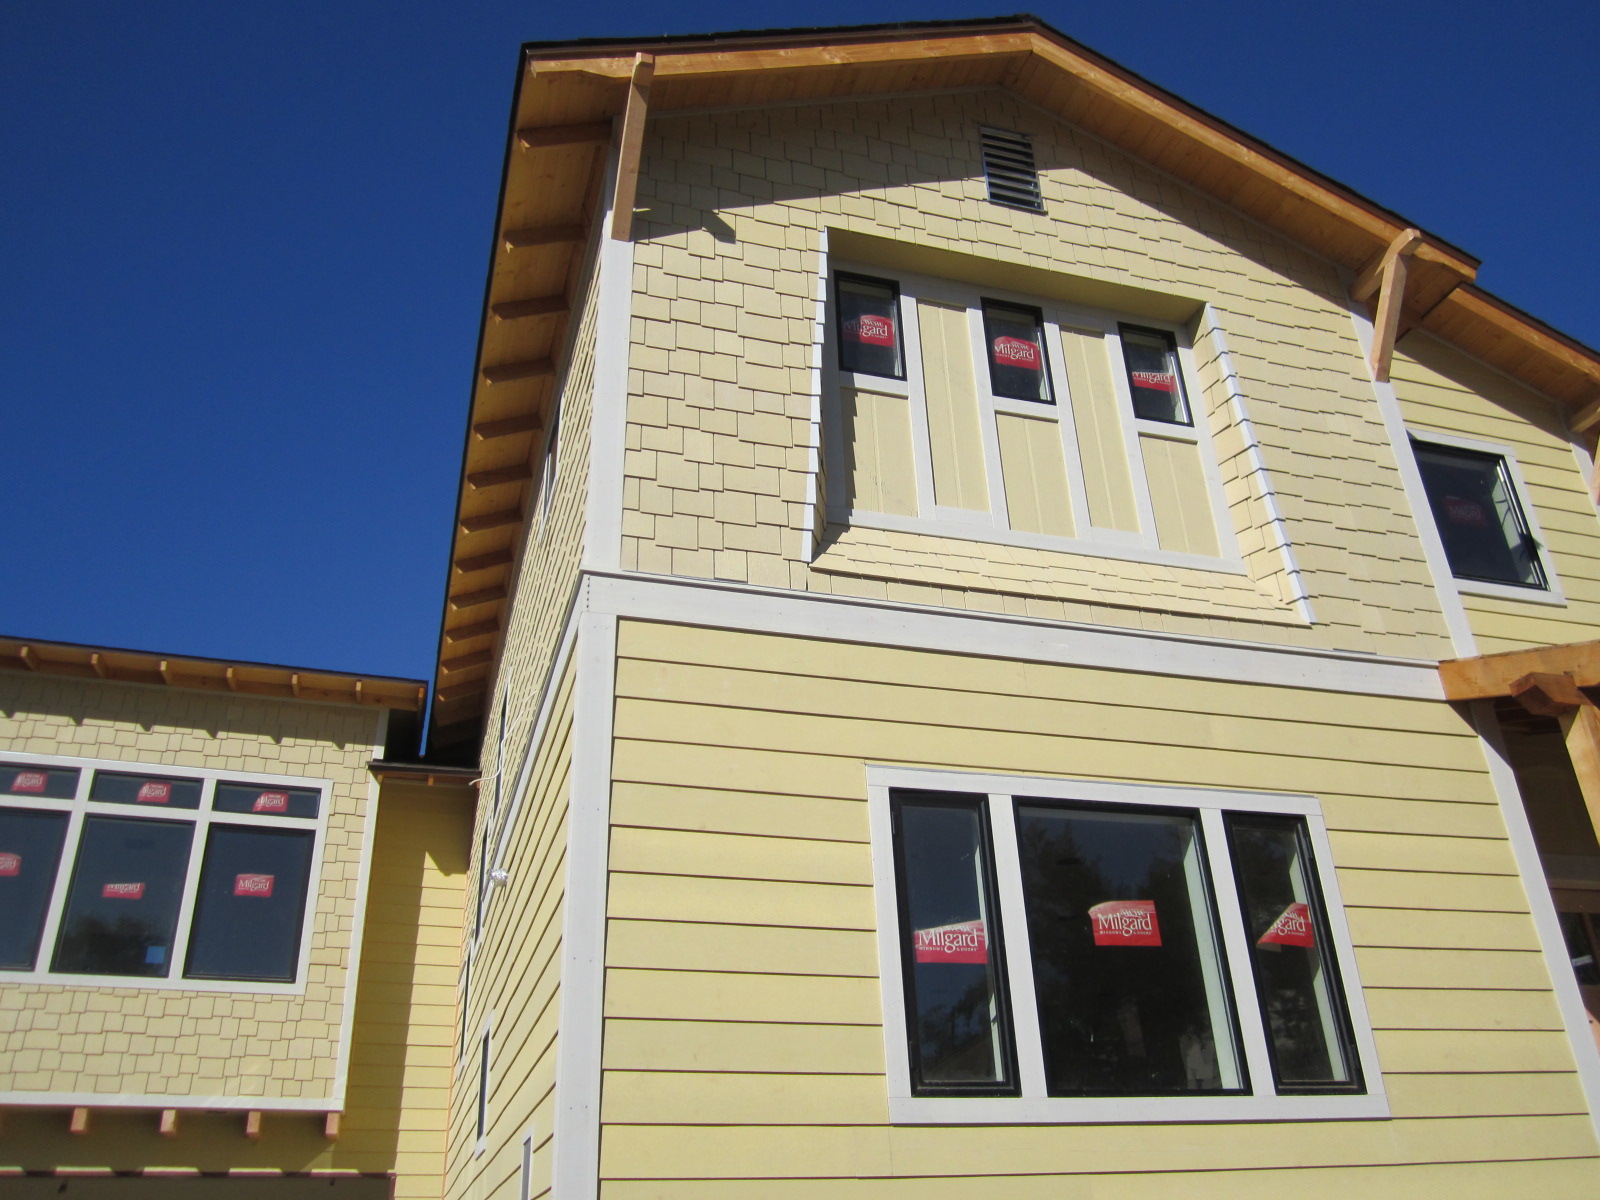
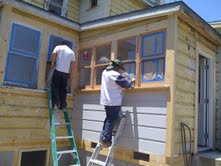
First, I framed the windows with 1 x4″ Hardi Trim. The Hardi Lap Siding on the bottom goes up pretty fast in 12 foot lengths with a 7″ reveal, I went with the smooth version to look clean. The Hardishingle Staggered Edge style up top on the other hand, is quite labor intensive. The pieces are only 48″ wide and go up with a 6″ reveal, but really give the house some dimension and texture.
I ran a 1×8″ dividing band board with a 1×2″ shelf on top to separate the styles and add even more detail. The siding comes in primer, but oddly enough the color is similar to what we will actually be using for paint. We are now on our second wall, I can see this siding project stretching out to several weeks as there is tons of detail work and not much room around the house for the scaffolding, but its looking great!
The second inspection we passed this week was on Thursday, for the drywall screw spacing. The mud crew was on standby to start taping and floating everything once the inspector signed off on the hanging job. Once again, this is an extremely specialized crew. Different guys than the drywall hangers last week. We are putting one of the best drywall crews in San Diego on this project and after the whole house is taped and floated we’ll be doing 2 coats of a level 4 smooth hand-troweled texture.
In order to keep up my construction pace, I ordered all the pre-hung interior doors last week, bought the Red Oak unfinished hardwood flooring material this week, and am currently about ready to pull the trigger on the millworks package. It’s all about thinking 2 steps ahead to make sure you don’t run into a 3-week wait for a special order, which in my case is just about everything.
Rough Inspection in San Diego. I’m rockin’ and rollin’ baby! Monday I passed the huge, monumental Frame and Rough inspection. The inspector looks at how the whole house was framed, Simpson hardware installations, shear panel nailing and then electrical, plumbing, hvac duct work, ventilation and fire sprinklers.
There are so many little things that he looks for, that its easy to fail but I’ve been through this so many times we’ve got it dialed now. He was very impressed with the quality of my work and how fast we built the house, we just passed the 2-month mark from when we got our permit stamps and poured the foundation.
I had the insulation company ready to come in Tuesday morning so we didn’t lose any time.
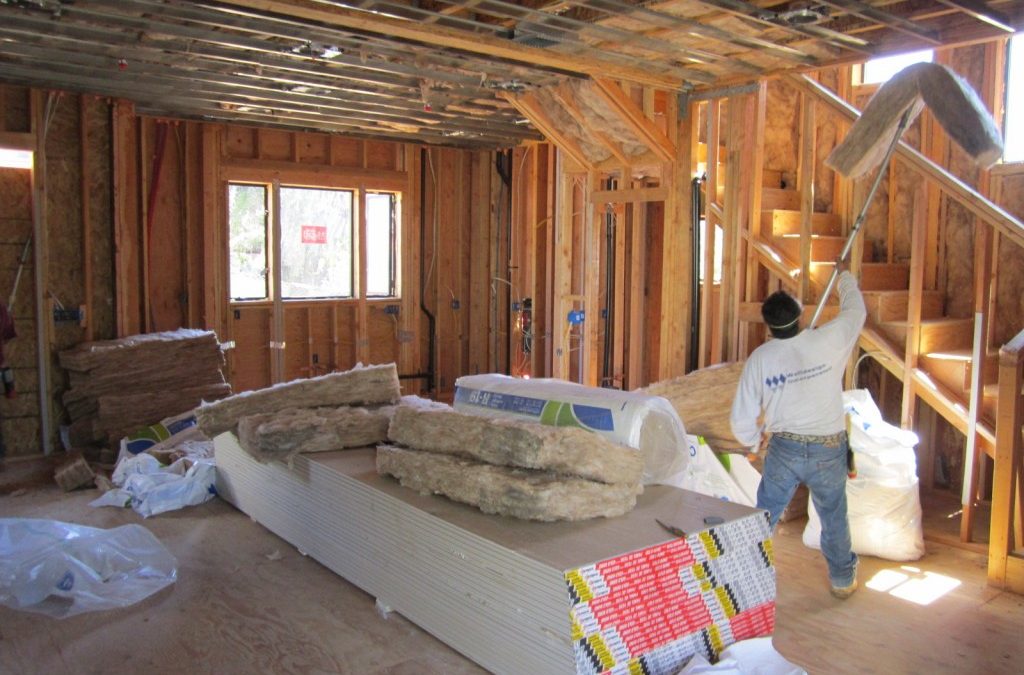
I use Tracy at OJ Insulation out of Escondido, I would pay the same money just buying the insulation at Home Depot for what it costs to have them do it. Since I went 2×6 on my exterior walls I was able to upgrade the standard R 13 wall insulation to twice-as-thick R 19, this is going to be a huge energy saver.
The guys hung all exterior walls, between floors, attic, HVAC closet and bathrooms for noise reduction, in a day so I could call in the insulation inspection. The insulation job ran about $1500 bucks for materials and labor.
Here in San Diego the inspector wants to verify the insulation before you can hang drywall, we passed this second inspection on Wednesday this week and I had the drywall hangers ready to come in on Thursday.
I’m using the same drywall crew that did my big historic project last summer The Painted Lady. There are less expensive guys I know that were chomping at the bit to do it, but this crew specializes in smooth hand troweled texture and I want the best for this house.
They do all the custom spec houses and million-dollar Coronado remodels. I didn’t want the skip trowel or birdseye finish that most guys do, it costs more to go smooth because you are basically doing 2 coats of mud on the whole house and using lights at night to make sure everything is flat. The drywall hangers are old guys, one guy is 62 and another is 71 years old.
I didn’t have to ask how long they’ve been hanging drywall but the texture guys wont use anybody else because the better its hung, the easier it is to get perfect smooth walls. The extra time we spent “straight edging” the walls is paying off. We took an 8-foot level and went around the whole house planing down high wall studs and shimming low ones to prep for the drywall.
The next inspection I have next week is for drywall screw spacing before we can tape and float. At the same time the inspector will sign off on the exterior moisture barrier so we can start installing the Hardi Siding on the house. I used the best product out there, Tyvek Home Wrap.
My siding delivery comes on Monday so we’ll be off to the races on the exterior siding while the drywall guys continue inside. This project is running like a machine, its all production work and as long as you have the materials ordered and ready, pass inspections in a timely manner and have sub-contractors lined up, its like running a factory, I should know from my old days from the snowboard factory. Thanks for following!
The painters I hired for The Lady turned out to be a little in over their heads. Throughout the week I found myself initially letting some poor prep slide, then finally by the end of the week I was actually showing them how I wanted things done and had my hourly helper doing their work. Since we had agreed on a contract price and not hourly, I told them it just wasn’t working out and I wanted to break up.
The straw that broke the camels back is when I had my guy re-sand a whole wall because they didn’t prep it good enough and then before we could even put some primer on it, they sprayed color right over the raw wood. I feel much better now after letting them go, me and my guy will probably just finish it off ourselves.
The paint job is real important on this house and as you know its all in the prep, but even though I had not planned nor budgeted for the caliber of work we’ve done in the past, it still needed to be better than what I was getting. This is the first sub contractor who hasn’t worked out so I’ve been really lucky getting back here to San Diego and having to build a new team and at least the error is on something I can fix.
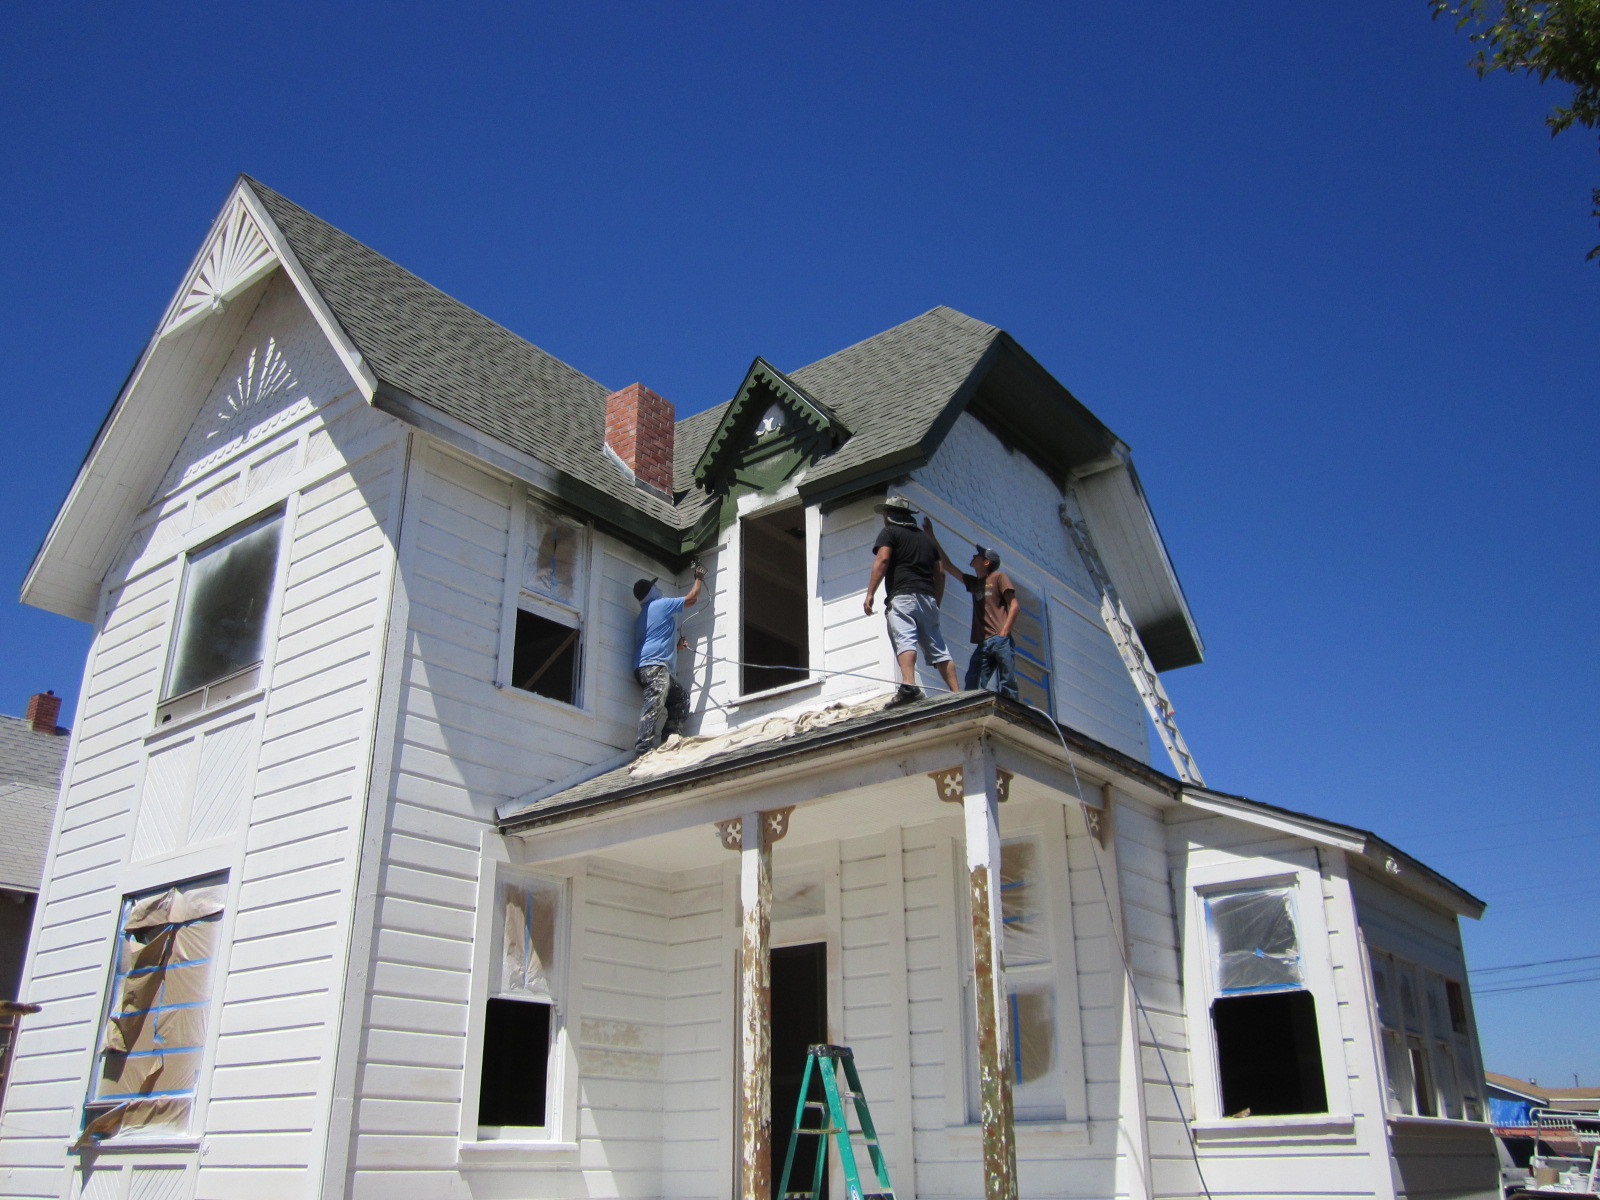
I am super excited with my colors, the first one we put up after primer is the dark green on the big eaves. Victorian color schemes are known for dark eaves and trim and lighter body colors. The pictures are large format again so make sure and click on them if you want to zoom in: )
The second color we sprayed was on the gable shingles. This accent color will also be carried down to a few other spots later. Notice the ornamental rosette discs I found online to replace what must have been there originally. When we pulled the siding off last month I noticed these circle marks and figured out what had been there years ago. These little details are going to pop after all the colors are up. I’ve got one more period detail big surprise with the front porch handrail, the house is looking really good now but only half way to the impact I’ve got planned!
The drywall crew is doing a great job and should be finished in a few more days. The hand troweled smooth texture is coming out perfect so that’s my good news for the week. Here are a few pics before the texturing went on, the huge tray ceilings are really dramatic. I also went with the new style “mini-bullnose” for the corners, its smaller than your typical rounded corner but very sharp and clean and usually reserved for high end custom homes.
My plan is to keep pushing on the exterior so we can get all the colors up before coming back inside to do window trim, interior paint and flooring. We had a good home sale a few blocks over, its another historic 2 story rehab, 500 square feet smaller and only a 2 bedroom went pending after only 5 days on the market for $425k. We’ll have to see what it closes for but I’m sure they didn’t take too much less with that short market time. This Grant Hill project will be one of the nicest historic preservations in the area.
After having 6-7 drywall contractors bid the Painted Lady I finally pulled the trigger. With the lack of new housing starts in this town a lot of the high volume big specialty crews are not around anymore. Of course there are drywall “companies” here but they all charge more than I want to pay. Any handyman can hang your drywall so it can be tricky to get a good price yet also get a good job, its one of the most important things to get right in order to have a nice finished product. We always say you can only get 2 out of 3; fast, good and cheap. It might get done fast and be cheap but it wont be good. It might be good and cheap but it wont be fast. Lastly, it might get done fast and good but it certainly wont be cheap!
In searching for drywall sub contractors I relied on referrals primarily. In our business we always break costs down to price per square foot on anything in order to budget for things. In Texas everyone used a labor price per sheet which was around 11.00. Here in San Diego all the contractors are using price per square foot and quoting .45 to .65 cents for labor which includes hanging, tape an float and texture. Out of all the rehabbers and other investors I spoke to nobody knew how much they were paying but just agreeing on one price. Things they take into consideration are the ceiling height and any other details that might slow them down. Our house has 11 foot ceilings with trays downstairs and coves upstairs so it adds a lot of time to the job. While a lot of bids came in at .59 cents I ended up getting it finally from a highly recommended guy for .40 cents. Another thing that’s driving my price up is because I am going with a smooth finish texture to replicate the old plaster found in these homes originally. A quick light orange peel spray job would have been way cheaper but I couldn’t do that to this house. At 10,000 s.f. of drywall I’m paying $4k for labor. I’m pretty happy, the hanging crew is done now after 2.5 days with 5 guys and we have the inspection on Monday for screw spacing then Tuesday we can start taping.
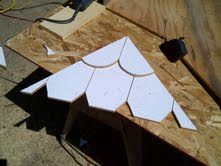
On the outside of the house I stayed busy with recreating some more of the missing details that make this house so cool while the painters started prepping. The biggest thing was that the sunburst under the front gable was broken so we had to scale a 32 foot ladder and take it down to copy it. I made a sweet new one and got it back up there in place, its weird to think that the last person who touched this was over 100 years ago and nobody will touch what we did for probably another hundred years. I’m putting in a little extra effort to make sure the front of this house and all its historical little ornaments are intact. We installed the TM Cobb Victorian front door with stained glass window and rebuilt the original transom as well. I also hand made some cool brackets for under the front porch. Since the original ones were missing I used the mini gable facia for inspiration and came up with a heart-Celtic-clover design, they came out cool and are now in place. Its neat when the sun hits the front of this house all these details create shadows on the siding. I also made some fake scalloped shingles for the top of the mini gable that were missing. I cut them out of 1/4 plywood and even put grooves in them to make them look real, another small detail that will pay off. We are getting color on the outside this week, stay tuned to see some Lady paint.


