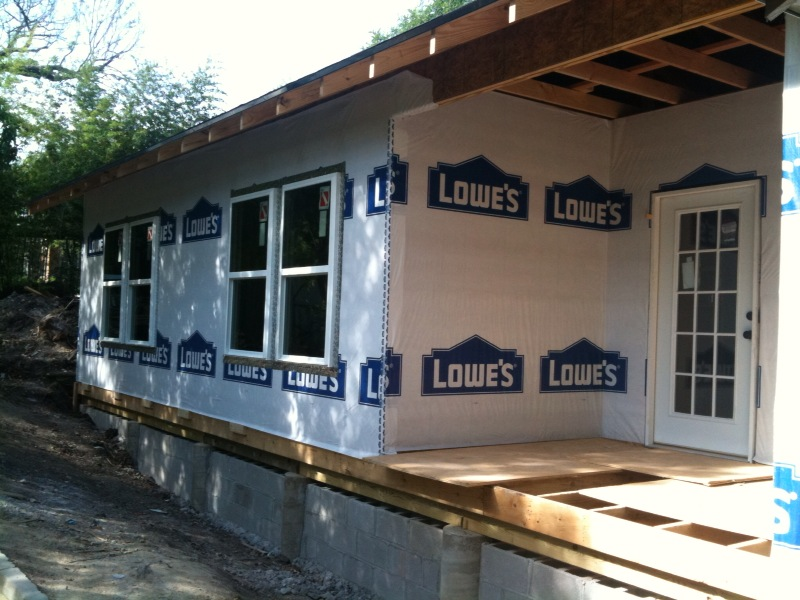
I had a productive week starting out by hanging all the OSB plywood on the room addition exterior, it really starts looking like a house once it has something on the framing. After the OSB I wrapped it with Tyvek, wow does Lowes like to advertise! Its amazing how many local rehabbers I see that dont use house wrapping on their additions. They’ll go straight over the OSB with the siding. For $88 bucks you cant go wrong and it really makes a difference on your electric bill and keeps the drafts out. The windows arrived Friday and I got most of them in along with the back door so now it all locks up again. As you can also see I had a retaining wall built this week from CMU block under the perimeter of the new addition. There was such a deep below grade cavity from my excavation that this was necessary for correct drainage and to prevent water intrusion under the house. I’ll backfill the sides now and we’ll be good to go. Another example of how we are doing things right, some guys would have thrown down some plywood and backfilled. The back porch is really neat, cant wait to see everything now with the historic waterfall style #117 siding on it to match the house.
The original owner of the house stopped by and said that their dad build it back in the 20’s. She’s going to give us all the info on the home and story behind it so we can pass it along to the new owner eventually. I am hoping she has some vintage photos of the front so when I go to rebuild the columns and porch area I can replicate it correctly. While I was under the house this week I found some old moonshine jugs, a 1927 Good Housekeeping magazine and a Texas automobile license plate from 1933. Since last weekend we’ve had 10 showings at Neighbor’s House and more offers as well. Spring buyers are out in full force. Cool stuff, stay tuned …
We had a buyer come back for a third time on the Neighbor’s House this week as well as tons of calls and another new showing. Nothing in writing yet so we are still patiently waiting.
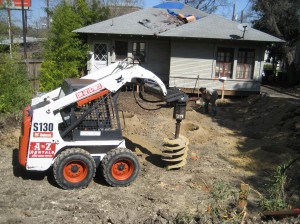
I got alot done this week on the Target House, with another day rental on the Bobcat but this time with the 2 foot auger attachment I drilled the holes for the 28 piers. The City of SA wants to see them 2 feet deep with #4 rebar at the bottom of each hole. I found a new engineer that came out and inspected the footings before the concrete pour. My old guy tried to raise his prices from 400 to 600 bucks for the inspection but the new guy’s price is only 350 so I am happy. The City of SA doesn’t inspect foundations for room additions anymore themselves, it’s up to the builder to supply his or her own engineers cerificate to satisfy that portion of the building permit.
After the footings were finished Friday I placed all the piers on Saturday so now I am all ready for the framers to come in and knock this puppy out. I used 12″ sonitubes for the piers but the City only calls for 8″. For the small extra cost I just think it provides for a way better product with the larger diameter piers so I always upgrade. We hand mixed 48 bags on 4000 psi concrete and poured them to the top. I’ll lay the 4×6 treated sills (beams) across the top next week before the framers get started. Stay tuned, we’ll be showing you some cool videos of the whole framing process soon!
After completing the bulk of the demo last week my main goal has been towards getting the new roof on. I always start with the new roof first (and foundation if needed) on any major remodel so if there were any leaks previously it wont trash any new stuff going in. Before I can get the roof on this house, I have to add the porch and room addition so it’s been my main focus to get these taken care of first. I had to move the gas meter back 40 feet from the house but luckily the power company showed up Monday and obliged so I got started with no delay. The porch came out really good as it completely changed the look of our house. In this historic neighborhood everyone loves the big front porches and they are an important feature in order to maximize retail sales price. I mimicked the original house design with the 30” eaves and open rafter tails. There are about 10 different Craftsman style home models in our neighborhood but unfortunately this one doesn’t come with the traditional porch so we knew we had to add it. The rear addition is the major change of this house, it will be approximately 620 square feet and contain a utility room, master bedroom, master bath, hallway and walk in closet. Once again to obtain maximum retail sales price these are things that today’s buyer will expect. We will also be giving them a walk-in food pantry and double vanities in the bath, all popular amenities to consider when given the opportunity to remodel. I was fortunately able to design around the big pecan tree so after we are done I plan to do a cool deck around the tree with a circular bench and French doors leading from the master suite. We’ve gone through 6 dumpsters so far, 3 being filled with dirt from the excavation I had to do with the Bobcat for the addition. Monday I have an engineer inspecting my foundation and issuing a certificate, which the City of San Antonio requires for our permit and then we’ll be free to start framing. Do you want to learn exactly how someone pulled down $155,510 his first year Flipping Houses in a recession? Visit our friend’s blog and see. Congratulations bro!
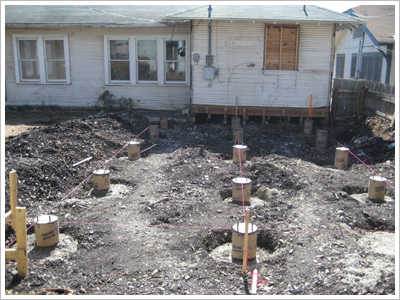
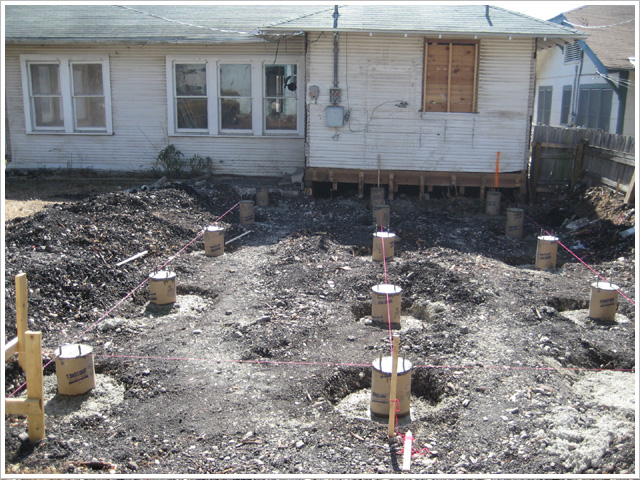
I finished the 15 concrete piers today for the 435 s.f. master suite addition. There are 3 rows of 5 with 7 foot spacing. After the bobcat grading I dug 24” holes, 2 feet deep with an auger.
At the bottom of the holes I placed #4 rebar in a tic tac toe pattern, 3 pcs each way. Then I filled the holes up 18” with 4000 psi concrete to make the footing. For the pier I placed 2 more pieces of rebar sticking straight up through 10” sonitubes.
I left these 2 pieces of rebar a little high so the sill beams can lay inside them. Finally I filled the sonitubes with more concrete to complete the pier. I have to reflect for a minute on how easy this is in Texas vs. California which has all the earthquake codes and bureaucratic red tape.
The City of San Antonio only requires an Engineer’s approval letter for the foundation inspection of my building permit, (which I pulled over the counter). He comes out twice, once to inspect the hole depth then secondly after the beams are sitting on the piers.
Try pulling a permit in San Diego. Drop off your plans, wait for months and prepare to jump through some hoops! The framing will start on Monday. Stay tuned.
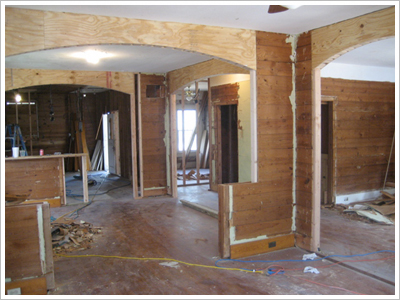
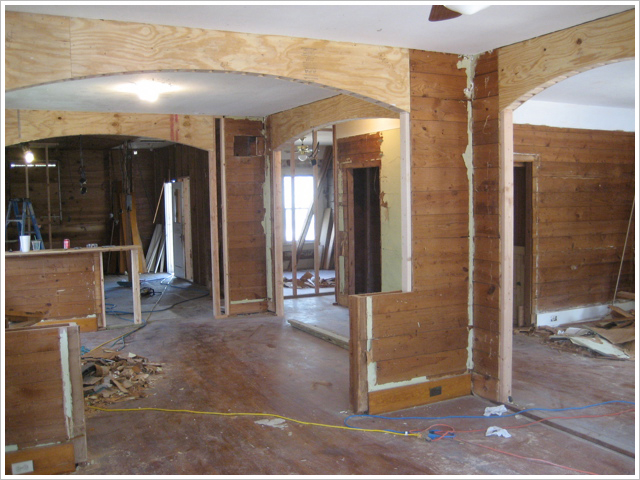
Here’s how the new floorplan is playing out after our drastic changes. As you can see we’ve opened up 4 main walls with dramatic arches. It has really given the home a more functional layout and brings in a lot more light.
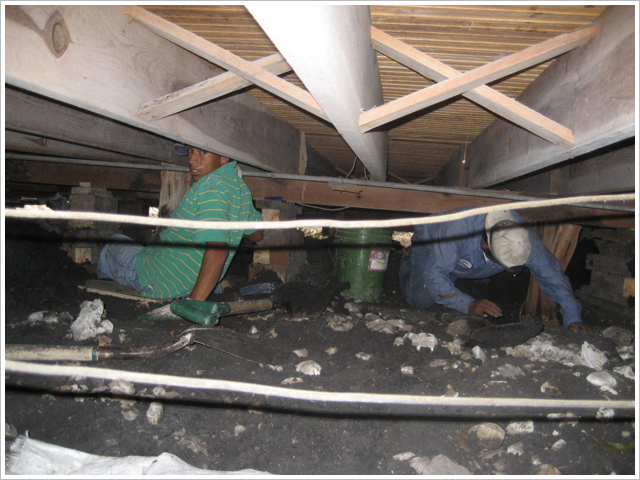
We also got started on the foundation repair which is always 2nd on our list to do after demo. It was important on this project to get everything level before we even start the room addition and it needs to be lifted 3 inches in some areas. The house sits on 38 cedar posts, these posts are actually trunks of cedar trees which is common in this part of Texas.
Each post is 5 feet tall, 3 feet of which is buried in the ground sitting on a concrete pad. Cedar is naturally resistant to termites, however, after 85 years and possible drainage problems the cedar gets rotten as you can see in the above photo.
In order for us to level the house, we are replacing all 38 posts. We had 4 workers under the house digging the holes to pull out the rotten posts. How would you like to have to crawl under the house with only a damp dark 24 inches of clearance and dig 38 3-foot deep holes? These guys are rad.