by Tom | Jun 1, 2008 | Bathrooms, Craftsman Bungalow, Framing, Tubs and Showers
This week I spent a lot of time sanding and mudding to get the drywall ready for texture. After taping the baseboards and door casings off yesterday I sprayed a light pattern of orange peel texture with my hopper on the entire interior of the house, walls and ceiling.
We’re ready tomorrow to go in there and spray a good coat of primer on everything and then spray the ceilings only with flat white ceiling paint. I’ll use a brush and roller for all the rest of the interior walls a little later in the project.
I also put a lot of work into the bathroom this week. I started out by putting in a new plywood subfloor and a toilet ring. I also framed out a box for the new jetted tub.
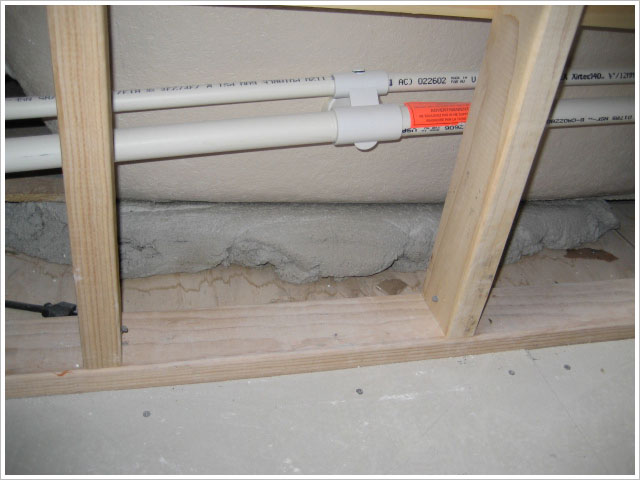
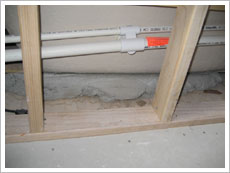
This tub requires a designated 110 circuit so we pulled a wire from under the house into the tub box. Code calls for a GFI protection but you don’t want to use a receptacle underneath the tub where the motor plugs in becuase if it trips you won’t be able to get in there to reset it.
We’ll obtain our protection from a GFCI breaker on the panel instead. I had to go under the house to remove the old lead drum trap and change the system over to PVC with a P-trap.
After tying in the plumbing I mixed up 2 bags of mortar and dumped it into the tub box as a big blob. I then dropped in the tub and while doing so I pushed down gently and it squeezed the mortar bed out to a perfect thickness to fill the gap between the bottom of the tub and the subfloor.
This is really important so when you’re standing in the tub and using it as a shower the bottom won’t flex and all the weight of the water and the person isn’t supported by the outer rim of the tub. This is the correct way to install a jetted tub as per the manufacturer’s instructions.
I’ve seen other people use spray foam as a fill but it doesn’t provide as much support. I dropped in the tub unit and used hardibacker for the surround as well as the floor. For the walls in the bathroom I used blue board tile backer since these aren’t in direct wet areas. Now the bathroom is completely ready for tile.


by Tom | May 25, 2008 | Craftsman Bungalow, Drywall and Texture
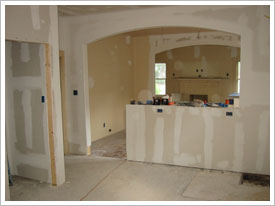
We passed our electrical rough-in inspection on Tuesday. My helper Nacho and I started right away hanging the drywall and we finished the tape and float on Friday. You can really start to see how the new kitchen is going to look and it’s exciting.
All the “old house smells” are now gone as the walls are all sealed up. Additionally, I put in a new back door on the kitchen and a new sub floor in the bath. My A/C guy is coming Tuesday to start running all the duct work and install the furnace in the attic for new central air conditioning.
I originally planned to place the compressor on the side of the house so I had the electrician run the power there, but after pulling the permit we were advised that since we are in a historic neighborhood we couldn’t have the equipment visible from the street so I decided to put it in the backyard.
Another neighbor stopped by today to tell me how happy she was to see someone finally doing something with this old house.

by Tom | May 8, 2008 | Craftsman Bungalow, Roofs
This week we roughed in all the plumbing as we had to relocate supply and drainage for the kitchen sink and the new washer & dryer location. One nice thing about pier & beam homes is that it’s relatively simple to relocate appliances because there’s more room underneath the house to crawl around and move any lines.
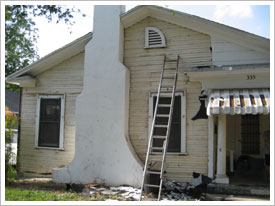
On Friday and Saturday we handled the roof. It was a 2 day project because we had to tear off 2 layers which included the original cedar shake shingle below. We found one more dead raccoon when we took off the old roof bringing the count to 5! After redecking the roof with plywood I chose a 30-year dimensional shingle in the color Estate Grey.
It’s always good to do the roof before you start any of your drywall repair, that way you won’t have any surprises on your new tape and float job after a rain.
You’ll notice from the photo below that I also retrimmed the windows. The electrical inspection is set for Tuesday so once that’s clear we can start hanging the drywall.
by Tom | May 7, 2008 | Craftsman Bungalow, Demolition, Framing, Siding
We had a good first week. Outside I trimmed up the landscaping so you can actually see the house now and also removed all the asbestos siding to expose the original waterfall siding.
Inside we took care of all the demo which included a complete kitchen and bath gut as well as a makeshift rear addition that was on the back of the house. We filled up a dumpster and a half with all of that.
Upon tearing out the kitchen cabinets we discovered what the horrible smell was that we had originally thought might be a dead rat in the wall…there were dead raccoons above the cabinets as well as in the attic.
After the demo we tackled the foundation. Since there was a previous foundation job done on the house which included 45 concrete piers we only had to use steel shims to lift it 2″ max in some areas.
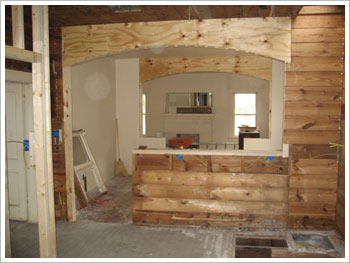
All the framing also went really smoothly. As planned, we opened up the kitchen to the dining room and the dining room to the living room with two dramatic arches. Inside the kitchen we furred out a wall to accommodate a stacked washer & dryer as well as a food pantry.
We also closed up the 2nd front door to the house and installed a pull-down attic ladder. Additionally, the electrical is now all roughed in including flat-screen, surround sound and cat-5 wiring throughout.
by Tom | May 5, 2008 | Craftsman Bungalow, Kitchens
Ikea kitchens are now officially out of style in 2019. After taking exact measurements of the kitchen space and window locations, I went to my Swedish friend Ikea’s website to get an easy look in 3-D at how my kitchen cabinets from China would look.
We were able to play around with different configurations until we got the best use of our space. These cabinets are horrible but it was worth a try.
Since cabinet boxes come in standard sizes this tool is a good way to lay out your options whether you end up buying the cabinets from there or not. We suggest look elsewhere after putting 6-7 kitchens together in the past.