James Hardi Siding

James Hardi Siding

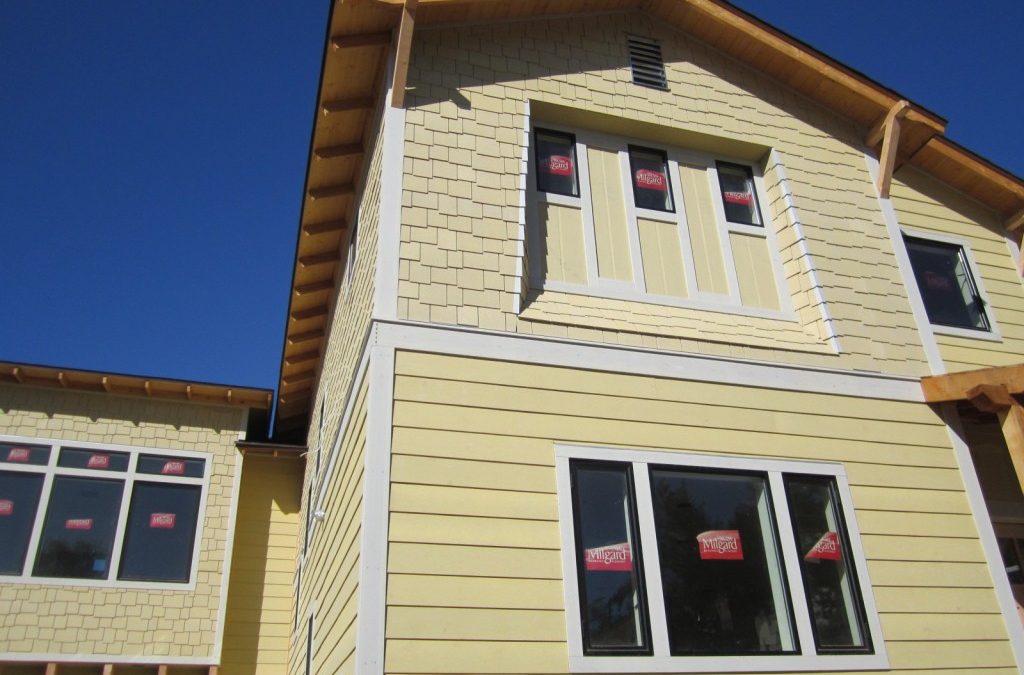
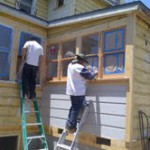
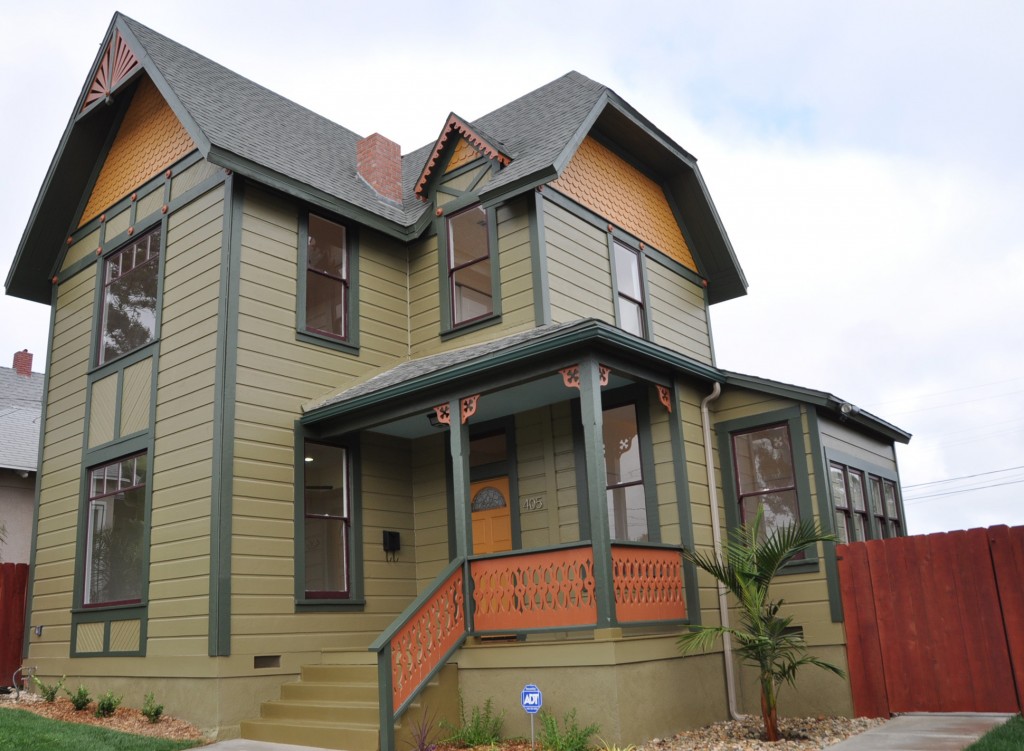
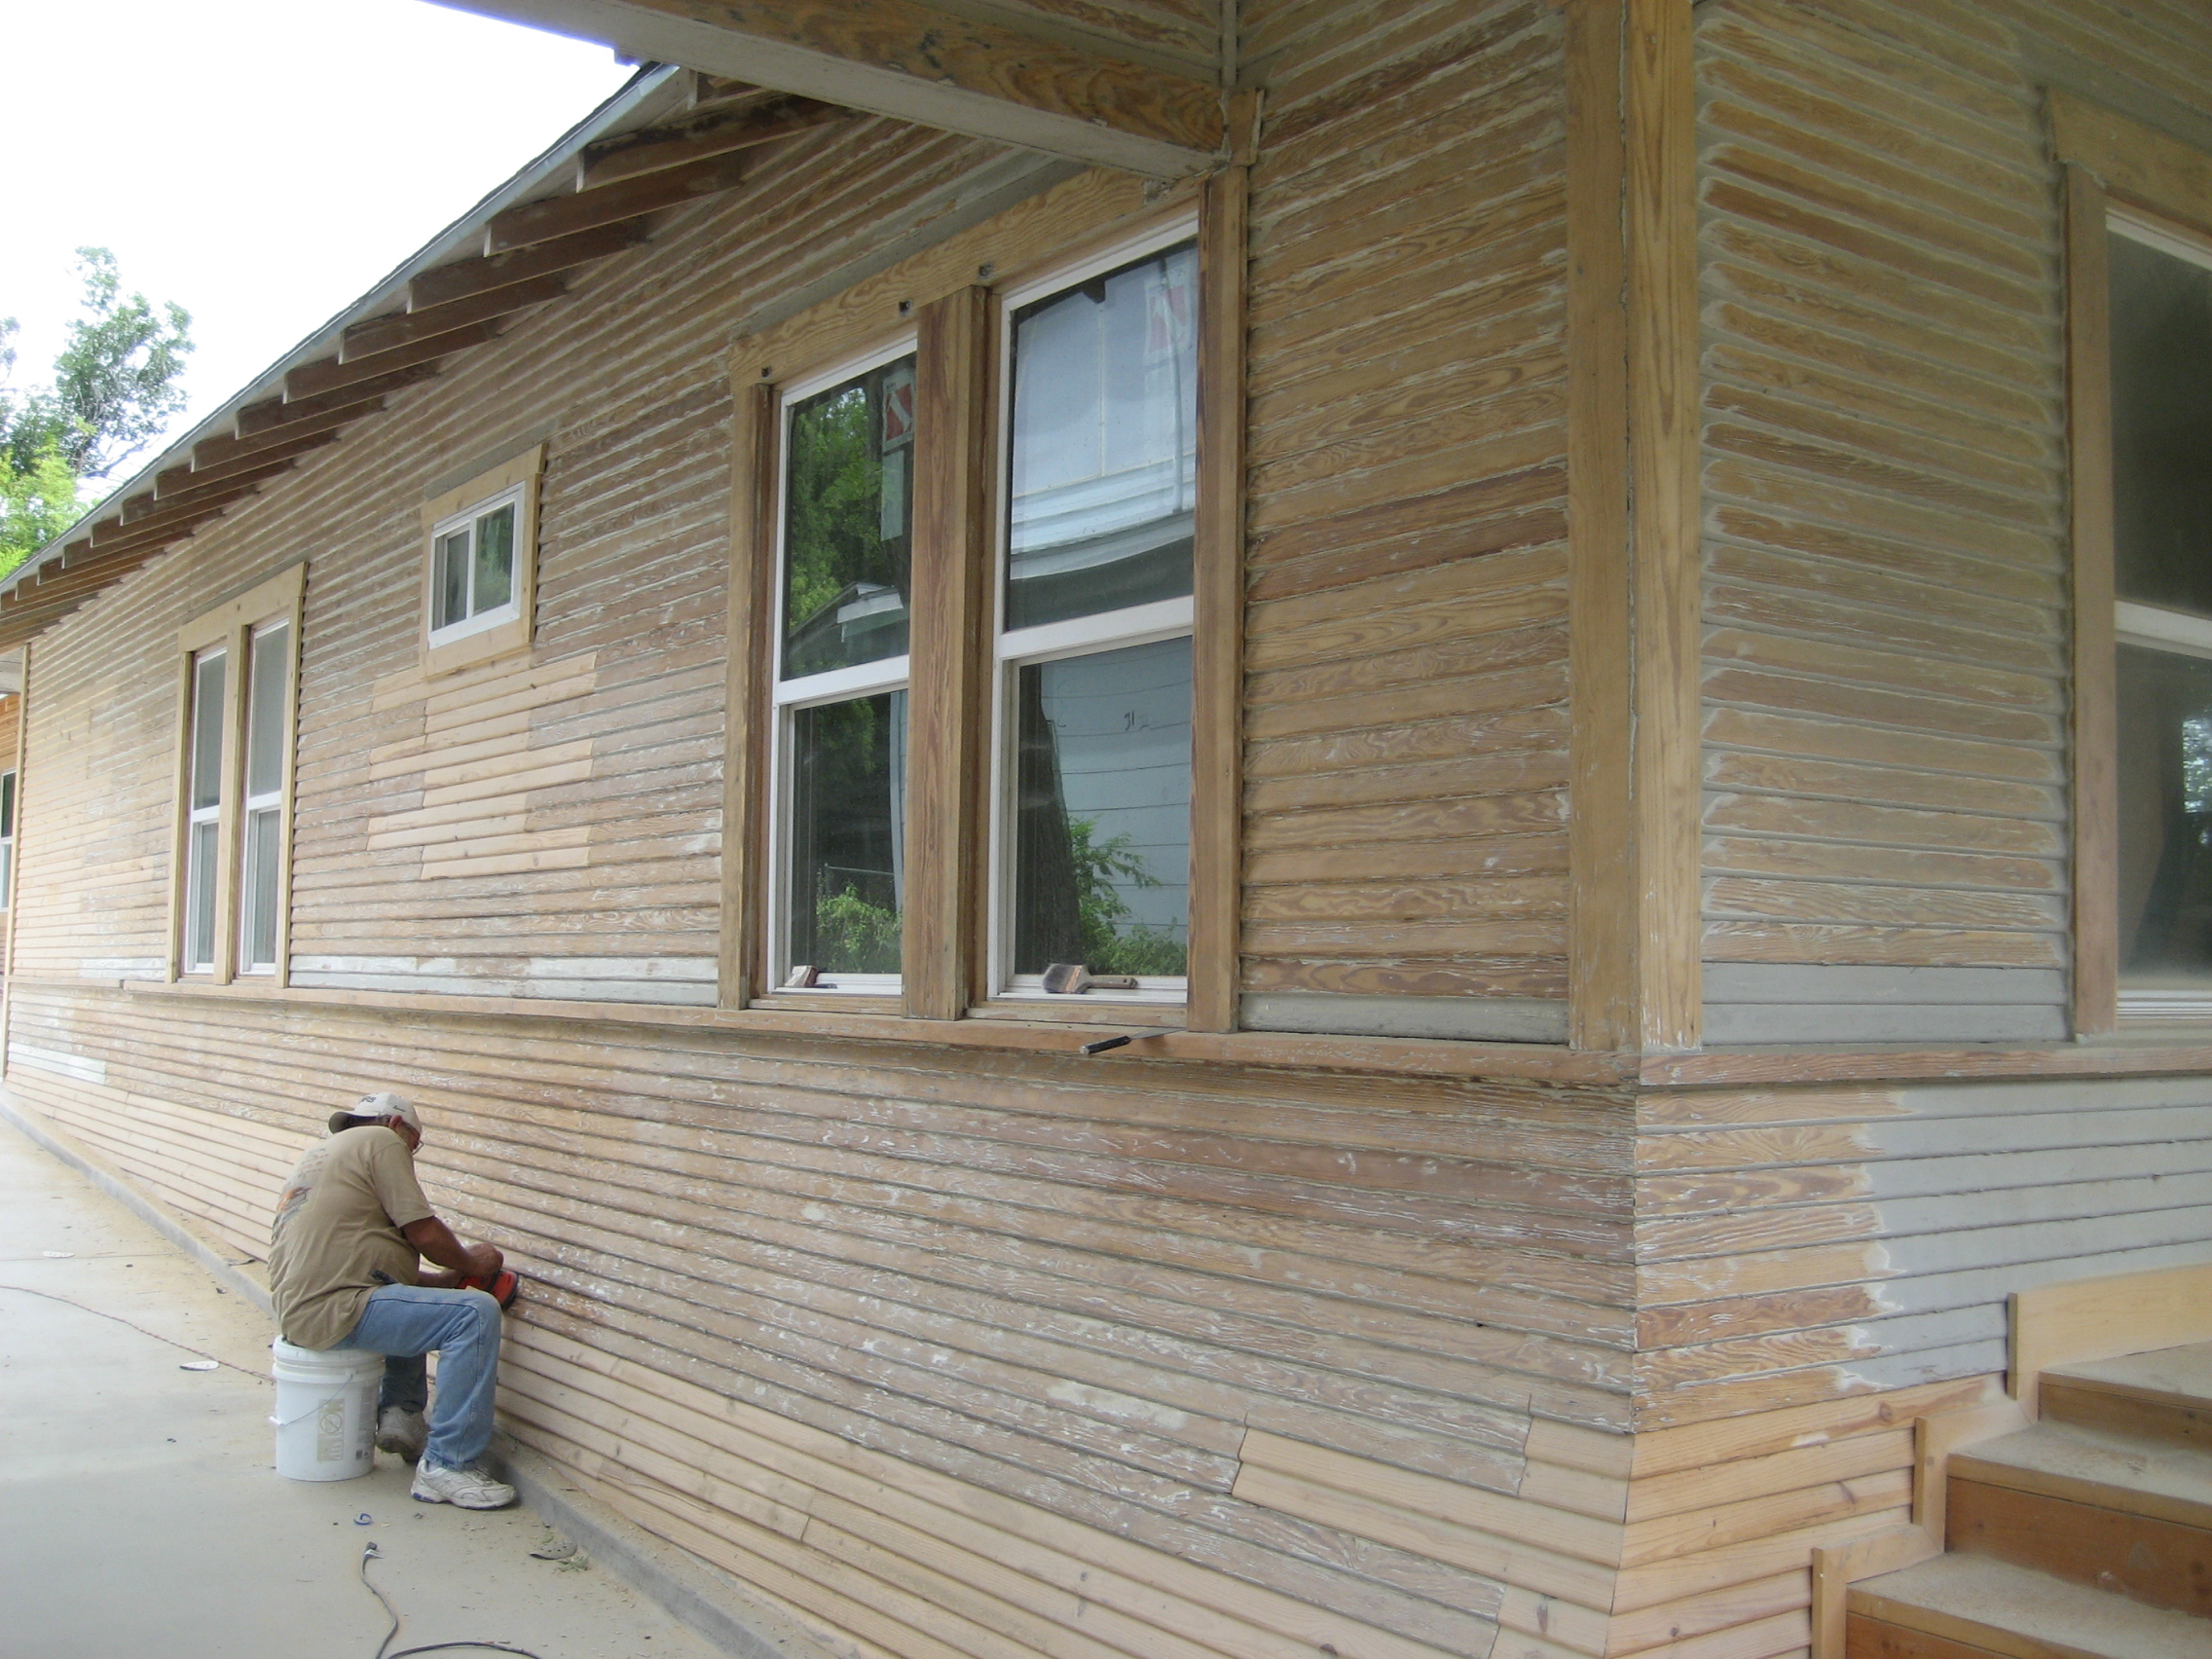
The James Hardi Siding on My South Park Modern Bungalow new build is finally ready for paint, take one last look because the next time you see her she’ll have 3 shades of green, grey rafter tails and cedar stained eaves. It took me and a helper just over 3 weeks to do all the siding, knee braces and corbels but it was worth it.

hardi staggered shingle

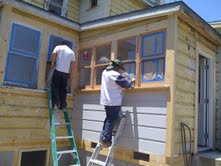
The James Hardi staggered shingle is very labor intensive but it paid off. It gives some great depth and adds texture while defining the pop out shed dormer too. You can see I separated the siding styles with a Hardi Trim 1×8.

hardi siding

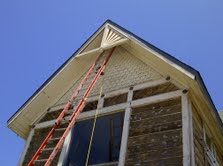
We kept the corbels very simple to match the knee braces. I used Douglas Fir 4×8 and had it re-sawn at my local lumber yard. They will get a cedar stain to match the tongue and groove eaves and porch posts and beam. I’m really liking the big overhang look and all the open rafter tails, cant wait to see them individually painted.

hardi siding

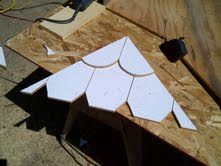
I left the roof off the porch until after paint so I didn’t mess it up by walking on it. It’s going to be a Bronze standing seam metal roof that will be close in color to my aluminum windows. The James Hardi reveal for the 3 small bathroom fixed windows was quite challenging to pull off but it looks very organic. You’ll notice the angle changes from the top as you go down. We used aluminum corners made especially for the Hardi staggered shingle to hide the edge seams and protect it from moisture.

Here are the 4 colors we picked for the house, The body is 2 shades of green, Edgy Gold and Wheat Grass by Sherwin Williams. The trim is a very light green that almost looks white, its Ionic Ivory. The rafter tails, barge rafters and knee braces will be Benjamin Moore Cromwell Grey. All the tongue and groove eaves, corbels and porch post and beam will get that cedar stain.  This is the first time we’ve stained the eaves on top of painted rafter tails so I’m pretty excited to see the results.

Wet Paint

Wet Paint

It was time to give the exterior of our MCM project some love this week to catch it up to the inside. We spent a day prepping the wood trim and then I sprayed it with primer and finally 2 shades of grey paint. Most of the house is stucco except for the t&g eaves and wood trim around the front windows and garage, its nice to see all of the old colors go away. I wanted to paint everything first before the stucco color coat so there would be no possibility of over spraying it and minimize taping stuff off. This house was in really good shape and with all the wood we replaced it really was a breeze to prep for paint.

The stucco guys came on Friday right behind us and color coated the whole house. I decided against the white stucco and want to stay with modern shades of grey so I picked Cloud Grey stucco color. After it dried, it ended up being a little too close to the rest of my trim colors so I think next week we’ll go back with a darker grey to accent the beams and rafter tails which will give me more dimension.

Since we are painting ourselves its really no big deal to make changes on the fly, its sometimes really hard to get it right without putting colors up to see how they look together. I had big plans on getting the kitchen put together now then jumping outside and doing the fence while we waited for our counter tops to get fabricated, but Ikea is having a 20% off sale that starts Friday so I’ll be saving $1,000 by waiting until Friday morning to buy the cabinets.

It looks like now we’ll stay outside all week and do the fence, weather permitting. The garage door gets installed Tuesday and we’ll probably put the front door on right after that too, to get the full new frosted affect. My electrician is also coming back this week to put in all the fixtures and trim everything out. A little change in the order of doing things but as long as we keep busy knocking out big stuff we’ll get there soon.

MCM Window Shopping

MCM Window Shopping

I’m really excited about the Milgard aluminum windows I picked out for this house and have to say I’ve removed tons of aluminum windows but this is the first time I’ve ever put them In. They are a modern energy efficient version of what we took out. With my right hand man Barney, we got them all installed including the 6 foot and 8 foot patio doors in a day and a half. These are new construction windows meaning you have to break the stucco back to install them using nailing fins. Putting them in is easy but the most important part is getting new flashing behind the old felt paper and using Jiffy Seal around them for a good seal. When breaking out your old ones try not to damage the wire mesh or felt paper. There’s a lot of guys flipping houses in San Diego and throwing in retrofit or vinyl lip windows. Believe me, you don’t want to put in vinyl retrofit windows, they will not hold air and warp in less than 10 years. I know because I have them in my house!

For our Mid Century project I wanted to get the stream-lined modern minimalist look so the aluminum was a clear choice. I wanted to use a mixture of casement and awning windows on this project so the master bedroom window was a perfect candidate to replace the old huge slider with a fixed window and 2 casements on the sides. I was able to put together a custom front window also with an awning on the bottom and slider on the top as seen here. I almost went with a really cool look – triple awning on the front, but thought there might not be enough air flow on those hot San Diego summer nights with no A/C so I played it functionally safe and put sliders in the secondary bedrooms as well. Since we are re-stuccoing the whole house I also took this opportunity to break out and replace all the old crawl space vents as you can see at the bottom of the top picture.

After price shopping around at 4 places I ended up getting the best deal at Home Depot. These are special order windows and take 3-4 weeks to arrive so you want to order them as soon as possible so they don’t slow your project down. For orders over $2500 you can request special pricing from the Home Depot Bid Room. Just ask to do so at the Millworks or Contractors desk. In my case they knocked off another 14% and with no delivery charge I ended up paying about $3600 for all the windows including a 6 foot and 8 foot patio door. These windows are of course low E and dual pane. The patio doors were a little more tricky because the frames come in 4 pieces but easy for anyone to do and they installed like a dream. They shut so good it sounds like an airplane door.

I tried out a new drywall patching crew this time and am super happy with the results. They cut out everything square, patched all my Swiss cheese holes from running the mechanicals, and then skim coated the entire house with a new 90% smooth texture. They also had to redo some of the window and door returns from our install, so it was nice to have them there fixing stuff as we were putting in the windows. The inside is ready for paint now, everything is really going smooth with this house. I’m off to the recycle yard with the old aluminum windows now for a nice bonus check for helping the environment!

Victorian House Colors

Victorian House Colors

Of course its not done yet but we’re 90% there on our Victorian paint job and its really looking good. The steps and front porch will be green and all the windows are still missing the plum color but if you look closely you can see we put it up on one of the porch windows to get a visual. I still have to figure out which color I’ll bring down to the front door, the decorative brackets as well as the two-toned porch railing I’m still going to make. The last 2 remaining big aluminum windows on the front of the house are also getting changed out this week which will complete the package. I’ve got a guy hand making 2 custom big wood frame plate glass windows with mullions on the top. I honestly thought this color scheme might be too crazy but once it went up it didn’t look that loud at all. They are all rich tones and together work perfectly. The missing plum on the windows is really going to give it the finishing accent it needs. I love the way the sunburst, scalloped shingles and gingerbread all contrast on the green body and trim colors and the light blue front porch ceiling looks great with the greens as well. All the little details I fixed are really standing out now. Here are the 6 colors I used, all from Sherwin Williams Victorian House palette:

1. Body: Renwick Olive SW2815

2. Trim: Rookwood Dark Green SW2816

3. Accent 1 (gable shingles, front door) Rookwood Amber SW2817

4. Accent 2 (sunburst, brackets, porch, rosettes, porch detail) Rookwood Terra Cotta SW 2803

5. Accent 3 (windows) Rookwood dark Red SW 2801

6. Accent 3 (porch ceiling) Bluebird

EDIT 11/2011 If you want to see how the finished house looks here’s a link     https://tomtarrant.com/wp-content/uploads/2011/10/painted-lady1-1024×751.jpg

I bought the floors this week as well, they will be delivered Thursday and we’ll start installing them. I’m doing something different this time and mixing it up. I went with a more modern 5″ wide hand-scraped and distressed hardwood, kinda Jeff Lewis style from Flipping Out, and on my wall color I’m going to keep it white and clean, just softened up enough to make the white trim contrast. With the smooth hand troweled wall texture its going to look really modern and high end. I think that with the size of the rooms and the abundance of light coming in that these floors are going to be killer even though normally they are reserved for Tuscan or Old World interior designs. Your typical Red Oak flooring with the expansiveness of the space just wouldn’t have given me what I’m looking for.  And, at $2.60 / s.f. its more budget friendly compared to unfinished Red Oak at $1.99 plus another $2.00 to finish it. After all, the name of the game is to keep the exterior historic but have the inside modern and up to date. What do you guys think of the colors?

Paint on the Lady

Paint on the Lady

The painters I hired for The Lady turned out to be a little in over their heads. Throughout the week I found myself initially letting some poor prep slide, then finally by the end of the week I was actually showing them how I wanted things done and had my hourly helper doing their work. Since we had agreed on a contract price and not hourly, I told them it just wasn’t working out and I wanted to break up.

The straw that broke the camels back is when I had my guy re-sand a whole wall because they didn’t prep it good enough and then before we could even put some primer on it, they sprayed color right over the raw wood. I feel much better now after letting them go, me and my guy will probably just finish it off ourselves.

The paint job is real important on this house and as you know its all in the prep, but even though I had not planned nor budgeted for the caliber of work we’ve done in the past, it still needed to be better than what I was getting.  This is the first sub contractor who hasn’t worked out so I’ve been really lucky getting back here to San Diego and having to build a new team and at least the error is on something I can fix.

I am super excited with my colors, the first one we put up after primer is the dark green on the big eaves. Victorian color schemes are known for dark eaves and trim and lighter body colors. The pictures are large format again so make sure and click on them if you want to zoom in: )

The second color we sprayed was on the gable shingles. This accent color will also be carried down to a few other spots later. Notice the ornamental rosette discs I found online to replace what must have been there originally. When we pulled the siding off last month I noticed these circle marks and figured out what had been there years ago. These little details are going to pop after all the colors are up. I’ve got one more period detail big surprise with the front porch handrail, the house is looking really good now but only half way to the impact I’ve got planned!

The drywall crew is doing a great job and should be finished in a few more days. The hand troweled smooth texture is coming out perfect so that’s my good news for the week. Here are a few pics before the texturing went on, the huge tray ceilings are really dramatic. I also went with the new style “mini-bullnose” for the corners, its smaller than your typical rounded corner but very sharp and clean and usually reserved for high end custom homes.

My plan is to keep pushing on the exterior so we can get all the colors up before coming back inside to do window trim, interior paint and flooring. We had a good home sale a few blocks over, its another historic 2 story rehab, 500 square feet smaller and only a 2 bedroom went pending after only 5 days on the market for $425k. We’ll have to see what it closes for but I’m sure they didn’t take too much less with that short market time. This Grant Hill project will be one of the nicest historic preservations in the area.

Drywall and Exterior Prep

Drywall and Exterior Prep

After having 6-7 drywall contractors bid the Painted Lady I finally pulled the trigger. With the lack of new housing starts in this town a lot of the high volume big specialty crews are not around anymore. Of course there are drywall “companies” here but they all charge more than I want to pay. Any handyman can hang your drywall so it can be tricky to get a good price yet also get a good job, its one of the most important things to get right in order to have a nice finished product.  We always say you can only get 2 out of 3;  fast, good and cheap. It might get done fast and be cheap but it wont be good. It might be good and cheap but it wont be fast. Lastly, it might get done fast and good but it certainly wont be cheap!

In searching for drywall sub contractors I relied on referrals primarily. In our business we always break costs down to price per square foot on anything in order to budget for things. In Texas everyone used a labor price per sheet which was around 11.00. Here in San Diego all the contractors are using price per square foot and quoting .45 to .65 cents for labor which includes hanging, tape an float and texture. Out of all the rehabbers and other investors I spoke to nobody knew how much they were paying but just agreeing on one price.  Things they take into consideration are the ceiling height and any other details that might slow them down. Our house has 11 foot ceilings with trays downstairs and coves upstairs so it adds a lot of time to the job. While a lot of bids came in at .59 cents I ended up getting it finally from a highly recommended guy for .40 cents. Another thing that’s driving my price up is because I am going with a smooth finish texture to replicate the old plaster found in these homes originally. A quick light orange peel spray job would have been way cheaper but I couldn’t do that to this house. At 10,000 s.f. of drywall I’m paying $4k for labor. I’m pretty happy, the hanging crew is done now after 2.5 days with 5 guys and we have the inspection on Monday for screw spacing then Tuesday we can start taping.

On the outside of the house I stayed busy with recreating some more of the missing details that make this house so cool while the painters started prepping. The biggest thing was that the sunburst under the front gable was broken so we had to scale a 32 foot ladder and take it down to copy it. I made a sweet new one and got it back up there in place, its weird to think that the last person who touched this was over 100 years ago and nobody will touch what we did for probably another hundred years. I’m putting in a little extra effort to make sure the front of this house and all its historical little ornaments are intact. We installed the TM Cobb Victorian front door with stained glass window and rebuilt the original transom as well. I also hand made some cool brackets for under the front porch. Since the original ones were missing I used the mini gable facia for inspiration and came up with a heart-Celtic-clover design, they came out cool and are now in place. Its neat when the sun hits the front of this house all these details create shadows on the siding. I also made some fake scalloped shingles for the top of the mini gable that were missing. I cut them out of 1/4 plywood and even put grooves in them to make them look real, another small detail that will pay off. We are getting color on the outside this week, stay tuned to see some Lady paint.