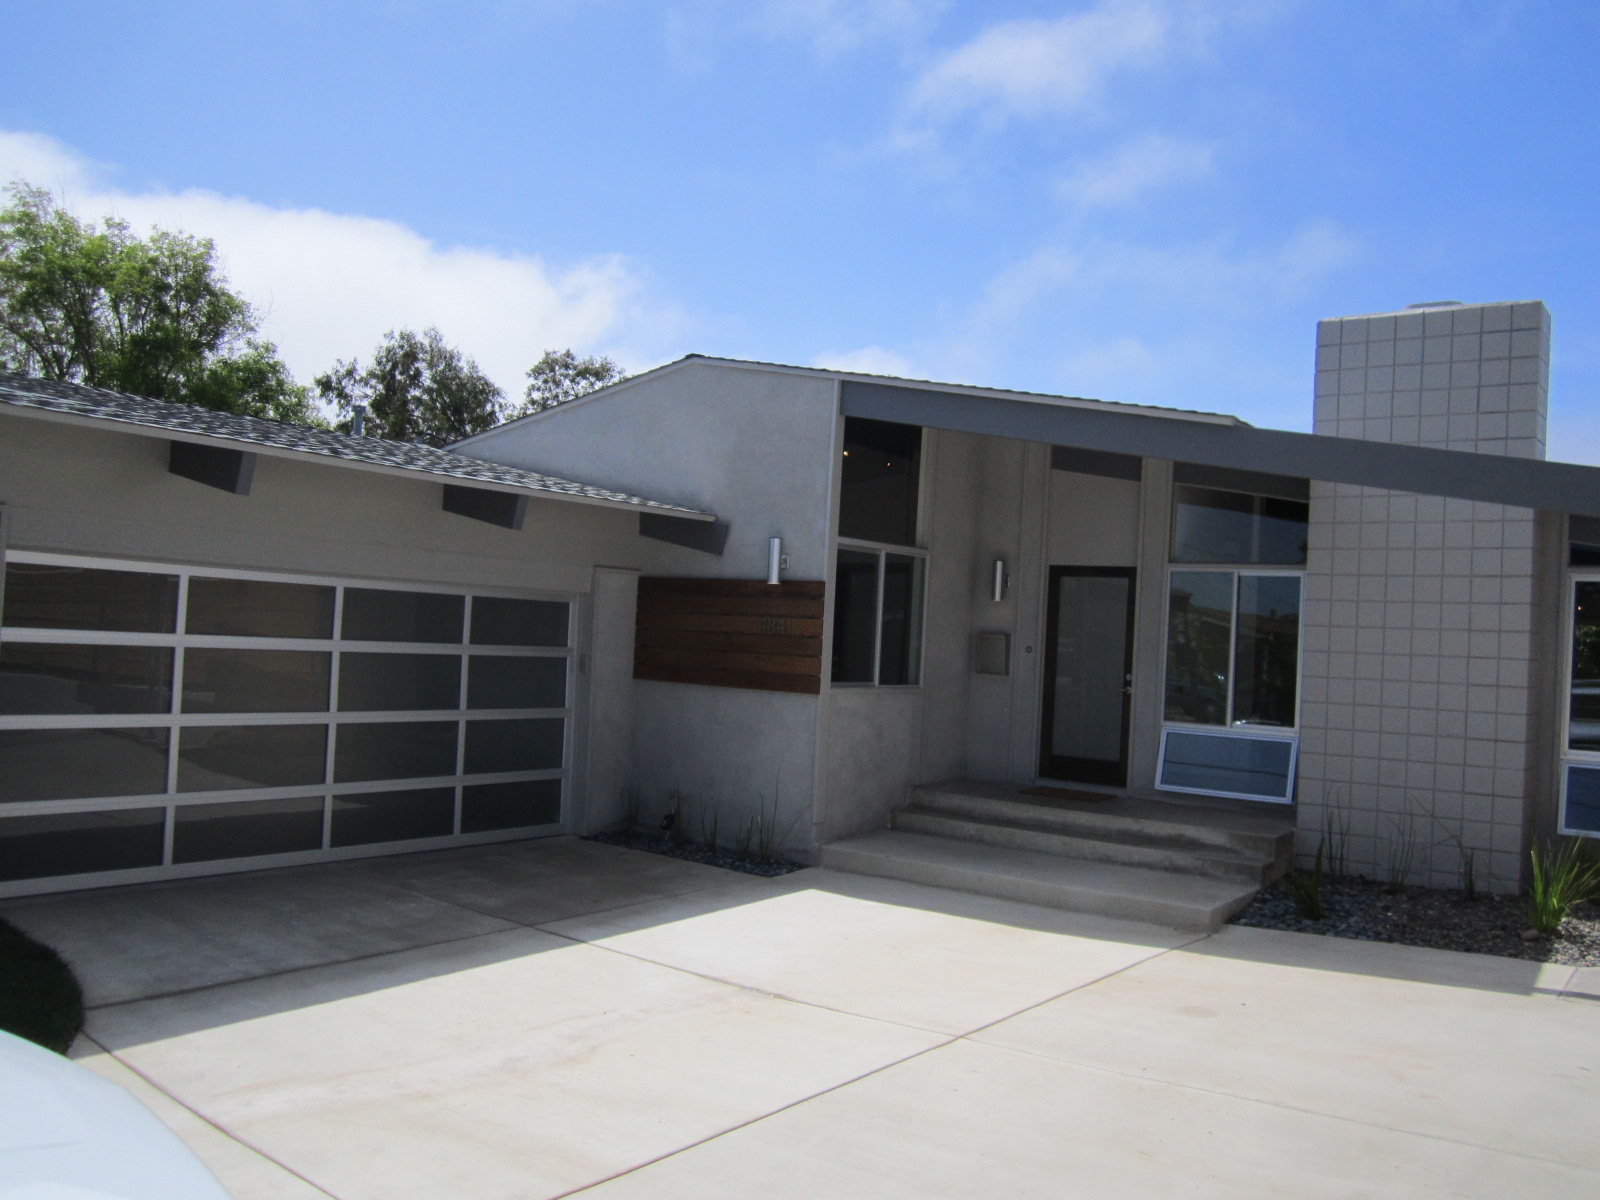
My 1962 Leonard Drogin MCM remodel in the San Diego neighborhood of Bay Park is really coming together!
Since my last blog post we totally transformed the outside of our Atomic Ranch House/Mid Century Modern project. I built a modern horizontal wood fence for the first time, it was way more labor intensive because the boards were all custom cut and had to be pre-drilled and screwed rather than using a nail gun.
I used 1″x8″ cedar for the fence boards and 2″x2″ ledgers on my posts to secure them. I didn’t use pressure treated posts because I wanted to stain them to match the boards so the ends had to be treated before we set them. When I set the posts I also kept the span under 7 feet so the span wasn’t too long which would let the boards warp out.
I sprayed a Behr semi-transparent fence stain in Natural color to seal the wood. Its looks great, kind of a modern style privacy screen rather than a fence and because the yard isn’t that big it provides privacy while still not making you feel boxed in. The fence is classy and sleek, the horizontal lines totally compliment the architecture I feel. After building the fence I had the stucco guy come back and do the retaining wall along the driveway to match the house as it was sticking out like a sore thumb after everything else looked so great.
Out front I had to terrace the yard a little because of the challenging hill we had to deal with. My favorite look with modern house design is the river rock combo with the Horse Tail plants. These are the reed type that I planted along the front of the garage and house. I added just one obligatory Queen Palm on an island to give a tad of privacy between the street and the front door.
Here’s another sizzle feature, check out this cool satellite shower head I put in both bathrooms. The spacey design looks like it belongs in orbit with my other light fixtures and I felt totally goes well with the MCM design.
I’m down to this final punch list of items that actually fit on one page so we are getting there. I should be close to on track for a March 30 completion as we are in week 10 right now for this rehab. There are still more fun things I’m adding so stay tuned, a couple more weeks and you’ll see all the bells and whistles. See the final finished pictures here.
We are staying pretty much on track at the Mid Century Modern renovation, this week we updated and changed around the mechanicals of the house to fit our new design. After my old plumber didn’t show up, I moved on and hired a new guy which really handled business. To prep the exterior for the new stucco job we also had the house sand blasted. You cant put new stucco over paint. I always find it best to do this before you put your new windows in if possible so you don’t accidentally blast them too! Next up for this week is put the new windows and rear sliders in, patch all the drywall and then we’ll be ready for interior paint and tile. We’ve had several interested buyers already stopping by, just wait until they see the dramatic change that will soon take place!
On Monday, February 13, 2012 at 8:00 pm PST I’ll be doing a live interview on Blog Talk Radio hosted by Jim The Realtor.
Jim will be asking me tons of house flipping questions relating to how I got started, what I look for in houses to flip, how I find deals and stories about some of the huge rehab projects we’ve showed you on this site. There’s tons of great stuff that never makes it online so make sure and tune in if you want to hear Jim and I talk about my house flipping business. My regular blog readers know I love to share, so this should be pretty entertaining and educational.
Click on the Blog Talk Radio icon to listen to the show.
I’m real honored to be asked to do this interview, especially coming third up to bat after heavy hitting interviews from Rich Toscano of Piggington.com and this weeks guest Bill McBride of Calculatedrisk.com.
If there are some questions or topics you would like us to cover, please leave them here in the comment section, or over at Jim’s site www.bubbleinfo.com, or listen live and call in to the show and ask them yourself!
This was the real first week inside our MCM renovation now that the concrete guys are out of the way. The first thing I did was to get my roofer started, it turned out to be a little larger job than anticipated, 3 layers of tear off instead of what I thought was only 2. I put a GAF lifetime roof on and used a lighter color, Birchwood this time. Its going to go well with my grey tones on the exterior. While the roof was getting done we also finally did the demo inside.
During the week I also did some minor framing changes as previously discussed. An opening between the kitchen and living room was the most dramatic but from a functional standpoint the bathroom changes were probably more important. Both bath doors got enlarged and moved over to accommodate larger vanities and I ended up vaulting the hall bath lid to give a larger feel. The wall between the hall bath and the utility room also got moved over 6 inches to make enough room for the tub with the new door opening location. I also changed all the rotten sub floors in the wet locations. All this is stuff that you’ll never see but its really more important than the nice stuff that covers it up. The electrician and plumber also got started roughing in the new mechanical upgrades, a new 200 amp service and the water heater relocation to the garage to make more room for the kitchen cabinetry.
Primarily, to get the ceilings ready for my new stain I had my sandblasting guy, who normally does exteriors for stucco prep, come and blast the tongue and groove cedar and exposed beams. They came out killer now as you can see. I’m still pretty sure I’m going to go with a transparent green stain but I’ll do a test area and see how it looks. Its so clean now even just a clear coat would be cool but it might look too “rustic mountain cabin” for my taste..
Over in South Park we had the big time survey done by Mike Curren for the site plan. This survey measures your lot by satellites down to the fraction of the inch and he marks the property lines. He also established the benchmark for grade for use on the building plan elevations. This way there is no question when we go to submit plans to the City. After playing with several floorplan options this week it became apparent we have to go 2-story to get the square footage I need as well as a garage. We also got the necessary Soils Report performed this week. I had to have a hole dug 2’x3′ and 4′ deep. Then we hired Soiltesters to come out and do the test. I was worried that because of the canyon location and slope of the lot that we could have had fill in some areas which would cause us to use deeper footings, but as it turns out the fill is only 18″ deep. The soil report will call for the new footing to be at least 12″ into native soils, which are the sandstone that is redish in appearance. You can see in the hole I dug where the soil changes color about 18″ down. This guy looks like a soil tester doesn’t he? We are still working on the floorplan, I’ll share the preliminary version as soon as we get close. Finally we get to build a house for ourselves! Thanks for following!
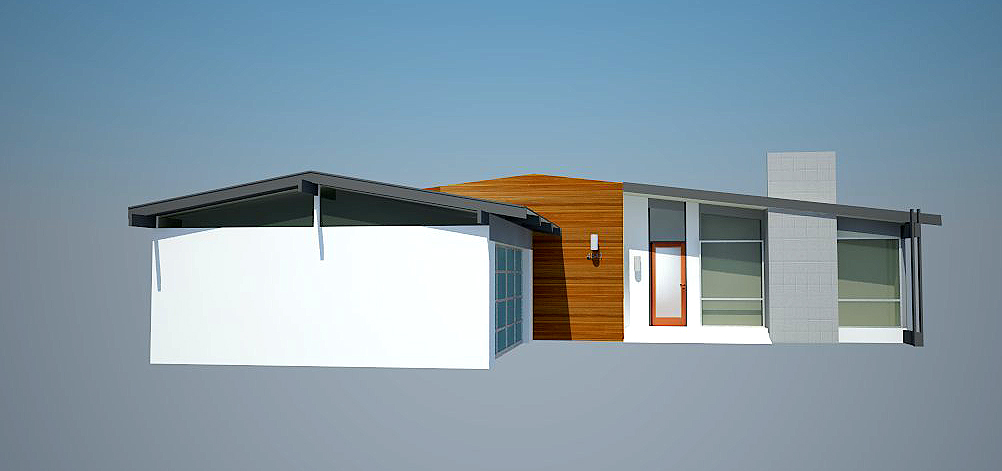
Here’s the house design I came up with for my new Mid-Century Modern project. As you can see I’m breathing some modern life into the great house while leaving the original lines untouched. All these materials I’m adding really play well with the space-age architecture of the 1960’s and should hit a young, hip & sophisticated buyer perfectly.
I love this style house, American culture was obsessed with space travel in the 1960’s and it showed through in a lot of house and furniture design. Some of the interior fixtures like the Sputnik Light I’m considering look like something out of George Jetson’s house. My big change to the facade is the tongue and groove Cedar siding that I’m strategically placing in the center, the stained Cedar warms up the stark white modern stucco and sterile aluminum windows and garage door, while still following the horizontal planes of the original architecture.
I’m going frosted glass on the front door with a little more matching wood on the frame to tie it in. The house numbers and front porch lights will also be brushed aluminum to add a nice finishing modern touch.
I did a walk through video also to show the scope of work. Evidently we’ve started to develop a little bit of a following here in San Diego for our home remodeling, 2 interested parties have already emerged and showed interest in buying this home when its completed. As we get in the home stretch anyone is welcome to come see it before it hits the market. Demo started today on the garage floor and driveway, stay tuned and follow along as we get into some Mid-Century Modern fun for 2012. Happy New Year and We Buy Houses also! Call for a cash Offer (619) 438-0234.
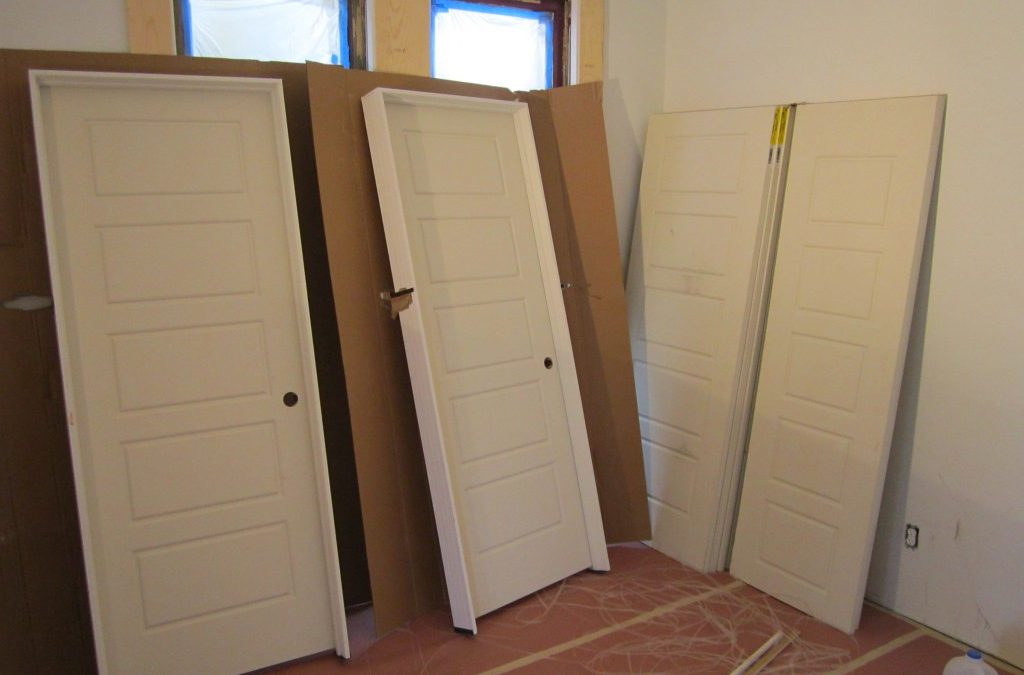
My special order interior doors from Home Depot came in so I jumped right into trim carpentry all week so I could get one step closer to painting the inside of the house. As you saw last week, my hardwood floors went in first, after protecting them with rosin paper I then trimmed out the entire house on top of the floors (baseboards, doors and door casings). That way you don’t have to notch the floors around door jambs and casings or undercut everything and you actually get the wood floors under the baseboards for a better finished product. I am using the same style door as on the Target House called “Riverside” from the Masonite Anniversary Collection. They are a 5-panel raised profile that look good with historic homes. These hollow core MDF doors are cool and are fit within my budget at $80.00 each for the complete pre-hung door with jamb. I also bought matching door slabs for the bedroom closet sliders so everything is consistent. You get to choose the finish on your hinges so I ordered chrome again so I can use brushed nickel knobs and still match modern chrome bathroom and kitchen hardware. They come pre-primed so after everything is installed, caulked and holes filled I will spray them along with all baseboards, window trims and closet shelving in place then lastly, apply the wall color with brush and roller.
For those of you do-it-your-selfers out there, here’s a good trick for ya. Install one side of the door casing with the door on the ground, then tip the pre-hung unit into place and secure it with the finish nailer. Afterwards go to the other side and install the door casing. This is way faster and easier than hassling with shims and battling it for an hour to get it straight. This is how the pro’s do it so give it a try next time you’re hanging doors and you’ll never use shims again. For my door casings I used square profile MDF in a 1 x 4″ to match the original period mouldings that would have been in the home.
I had to go with the huge 1 x 8″ baseboards on this house, I’ve used them before but with the giant room sizes and high ceilings it was a clear choice, not to mention its close to the size that were originally there. After asking all around town I finally found out where everybody gets their trims and its not Home Depot. Builders Moulding Supply in El Cajon has just about any style and size moulding you could want, that’s all they sell and you get it in bulk 16 footers right on spot from their warehouse at a price 30% less than the big box stores. I spent about $1,000 for everything I needed for my trim job minus the closet build-outs which I’ll use pine for because it seems more durable and holds more weight then the MDF. I was pretty happy to see that they also come pre-primed because my old supplier used to only offer them raw. After everything is painted I’ll peel up the paper on the floor and lastly nail in the shoe moulding on the bottom of the baseboards to complete the historic look I’m going for. We’re getting alot of attention at the house now, several interested parties stopped by this week asking when it was going to be done. I’m pushing for late September but its going to be tight especially because I’m doing an equity grab and not paying out a bunch of labor costs in the final stretch. I figured either way it wont be prime selling season so I might as well save the money. The good thing about the timing is that If I get into the next project soon I can stay busy this winter and hit the Spring selling season perfectly. There are so many things about this project that I write off to warming up in San Diego, I’m ready now to dial in my system on the next house. It’s been 100 degrees for months in Texas, it’s been nice to finally be home and we’re having fun!


