Room Addition Framing
House framing room addition video. Walk through with me and check out my framing for the master suite room addition…this is how we roll.

House framing room addition video. Walk through with me and check out my framing for the master suite room addition…this is how we roll.
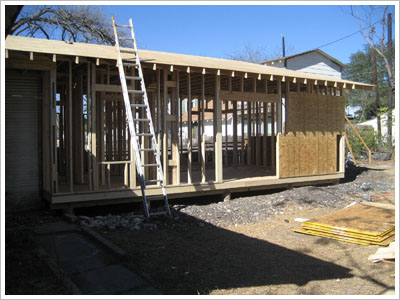
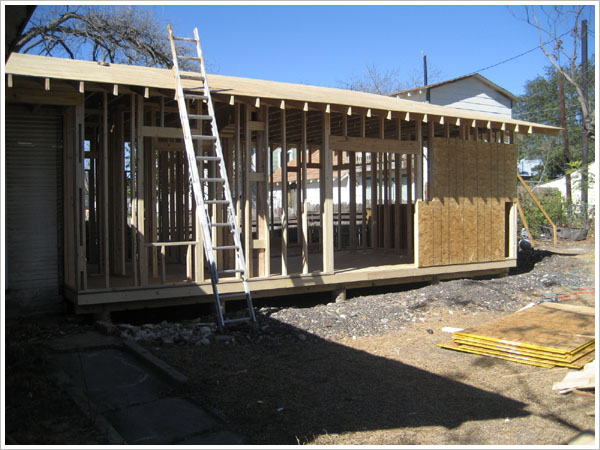
2.5 days and the whole master suite addition is all framed up and dried in. It came out sweet; I am really excited with the reconfigure of the floor plan on the Hat Trick House. I have the roofers coming tomorrow to put down a 30-year dimensional shingle in the color Estate Grey with ridge vents.
My electrician is also getting started in the a.m. roughing everything in for the complete re-wire. I am also planning to call for framing inspection tomorrow as well so let’s hope for a pass, should be no problems as I went with 2×8 for ceiling joists and 2×6 for the roof.
I had a bid yesterday for all new plumbing with permits including tying in the new room addition. This character had the nerve to bid $8,000. It’s really crazy now that construction has slowed down; some subs are actually raising their prices to make up for less work.
I had him down to $3,500 by the time we got outside to the curb. I’m still getting bids and trying to hit $2,500 max.

When my wife and I first moved to San Antonio 2 years ago an insurance agent told us the city’s nickname was “Land Of Mañana.”
We’ve found this to be totally true, it seems most workers are satisfied to poke along and only do what’s necessary to keep their family fed and stay semi-busy. Oh, I’ll just finish it tomorrow seems to be the consensus. Since the cost of living is low here there’s really no sense of urgency to get anything done.
Although we do most of the rehab work ourselves there are still sub contractors who we depend on and recently we’ve had our pace slowed down a bit.
The foundation guys disappeared for a week after there was a water leak under the house and things got a little muddy. You can’t lift the house to level it if it’s muddy because the hydraulic jacks will sink on you.
I had the meter off but it turns out it was faulty so some water was getting by even though it didn’t show it. I had SAWS come out for free and replace the water meter so we are all dry now and the guys finally got the house level and are almost done.
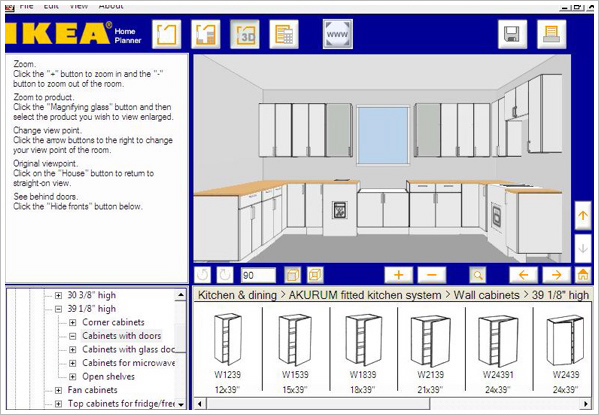
The design of the kitchen cabinet layout is complete thanks again to our Swedish friend’s website. Last time we wrote that we had some people email us and ask who our Swedish friend is…for all of you who don’t get that joke our friend is Ikea! Yuk yuk yuk.
The design required us to remove the 3 existing kitchen windows and put one back in with a new location so it’s centered over where the sink will be.
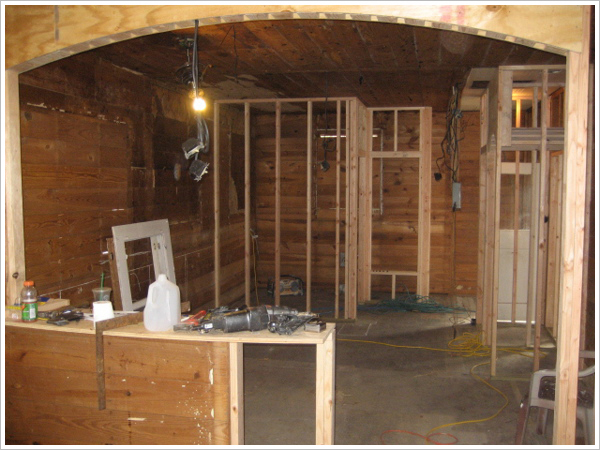
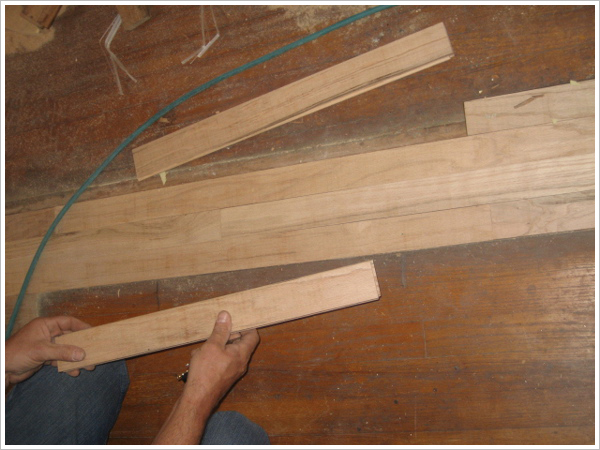
I finished the entire interior framing this week so the new laundry room, hot water heater closet, refrigerator cubby, food pantry, hallways and relocated doorways are all complete. I also patched the wood floors with Red Oak in the areas where I opened up interior walls. Once the floors are refinished you won’t be able to see the patched areas.
We are ready to start on the master suite room addition this week. To prepare for the room addition I had to get a 60-foot pecan tree taken down and then grind the stump down. I got a great deal from some guys to take down the tree but once again they only seemed to want to work half days and spread out a one-day job to 4 days. Getting rock bottom prices from subs is a key to our success but sometimes it slows you down a bit.
The room addition is 29 feet long so I also had CPS Energy come out and move the gas meter from the rear of the house 30 feet back in the yard. This only cost about $200, which I though was surprisingly cheap. They kind of have you over a barrel when it comes to moving their equipment so they could really charge what they want.
CPS is really easy to work with here in SA. They even came out for free when we dropped the big tree and took down the power feed to the house to make it easier and safer.
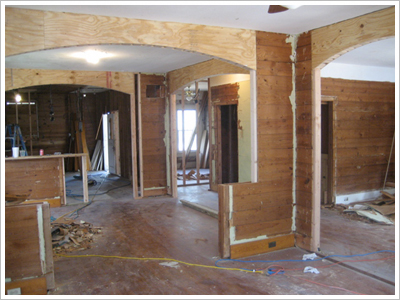
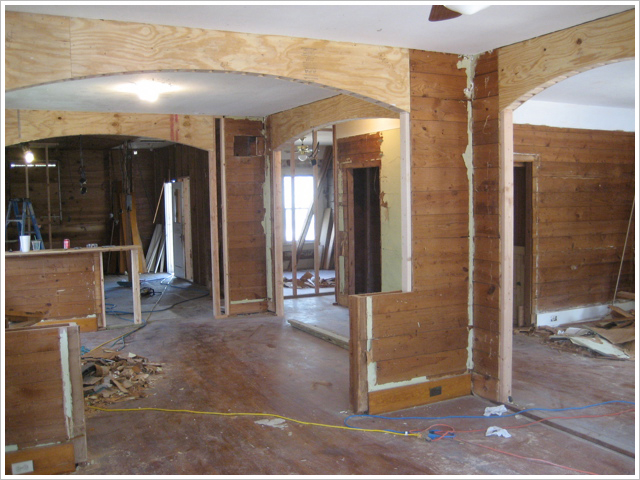
Here’s how the new floorplan is playing out after our drastic changes. As you can see we’ve opened up 4 main walls with dramatic arches. It has really given the home a more functional layout and brings in a lot more light.
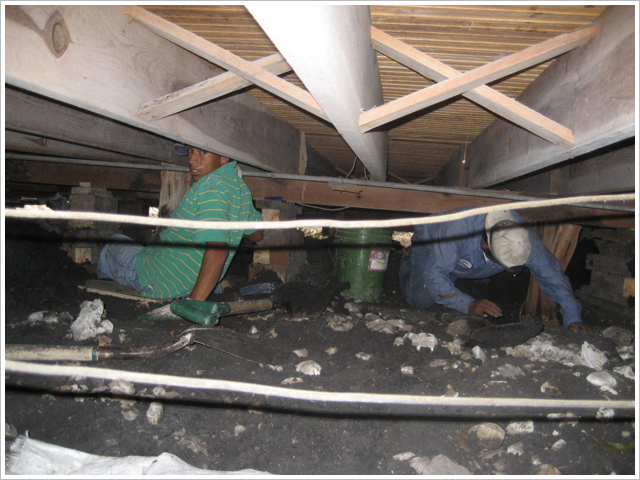
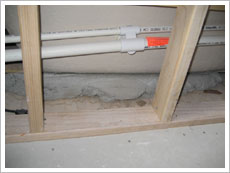
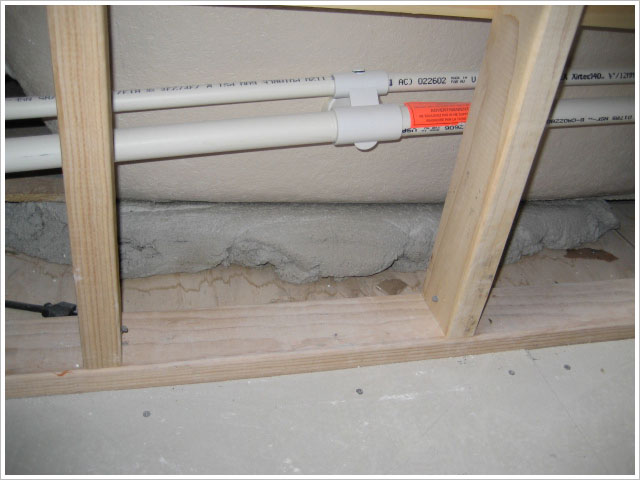
We also got started on the foundation repair which is always 2nd on our list to do after demo. It was important on this project to get everything level before we even start the room addition and it needs to be lifted 3 inches in some areas. The house sits on 38 cedar posts, these posts are actually trunks of cedar trees which is common in this part of Texas.
Each post is 5 feet tall, 3 feet of which is buried in the ground sitting on a concrete pad. Cedar is naturally resistant to termites, however, after 85 years and possible drainage problems the cedar gets rotten as you can see in the above photo.
In order for us to level the house, we are replacing all 38 posts. We had 4 workers under the house digging the holes to pull out the rotten posts. How would you like to have to crawl under the house with only a damp dark 24 inches of clearance and dig 38 3-foot deep holes? These guys are rad.
This week I spent a lot of time sanding and mudding to get the drywall ready for texture. After taping the baseboards and door casings off yesterday I sprayed a light pattern of orange peel texture with my hopper on the entire interior of the house, walls and ceiling.
We’re ready tomorrow to go in there and spray a good coat of primer on everything and then spray the ceilings only with flat white ceiling paint. I’ll use a brush and roller for all the rest of the interior walls a little later in the project.
I also put a lot of work into the bathroom this week. I started out by putting in a new plywood subfloor and a toilet ring. I also framed out a box for the new jetted tub.
This tub requires a designated 110 circuit so we pulled a wire from under the house into the tub box. Code calls for a GFI protection but you don’t want to use a receptacle underneath the tub where the motor plugs in becuase if it trips you won’t be able to get in there to reset it.
We’ll obtain our protection from a GFCI breaker on the panel instead. I had to go under the house to remove the old lead drum trap and change the system over to PVC with a P-trap.
After tying in the plumbing I mixed up 2 bags of mortar and dumped it into the tub box as a big blob. I then dropped in the tub and while doing so I pushed down gently and it squeezed the mortar bed out to a perfect thickness to fill the gap between the bottom of the tub and the subfloor.
This is really important so when you’re standing in the tub and using it as a shower the bottom won’t flex and all the weight of the water and the person isn’t supported by the outer rim of the tub. This is the correct way to install a jetted tub as per the manufacturer’s instructions.
I’ve seen other people use spray foam as a fill but it doesn’t provide as much support. I dropped in the tub unit and used hardibacker for the surround as well as the floor. For the walls in the bathroom I used blue board tile backer since these aren’t in direct wet areas. Now the bathroom is completely ready for tile.

