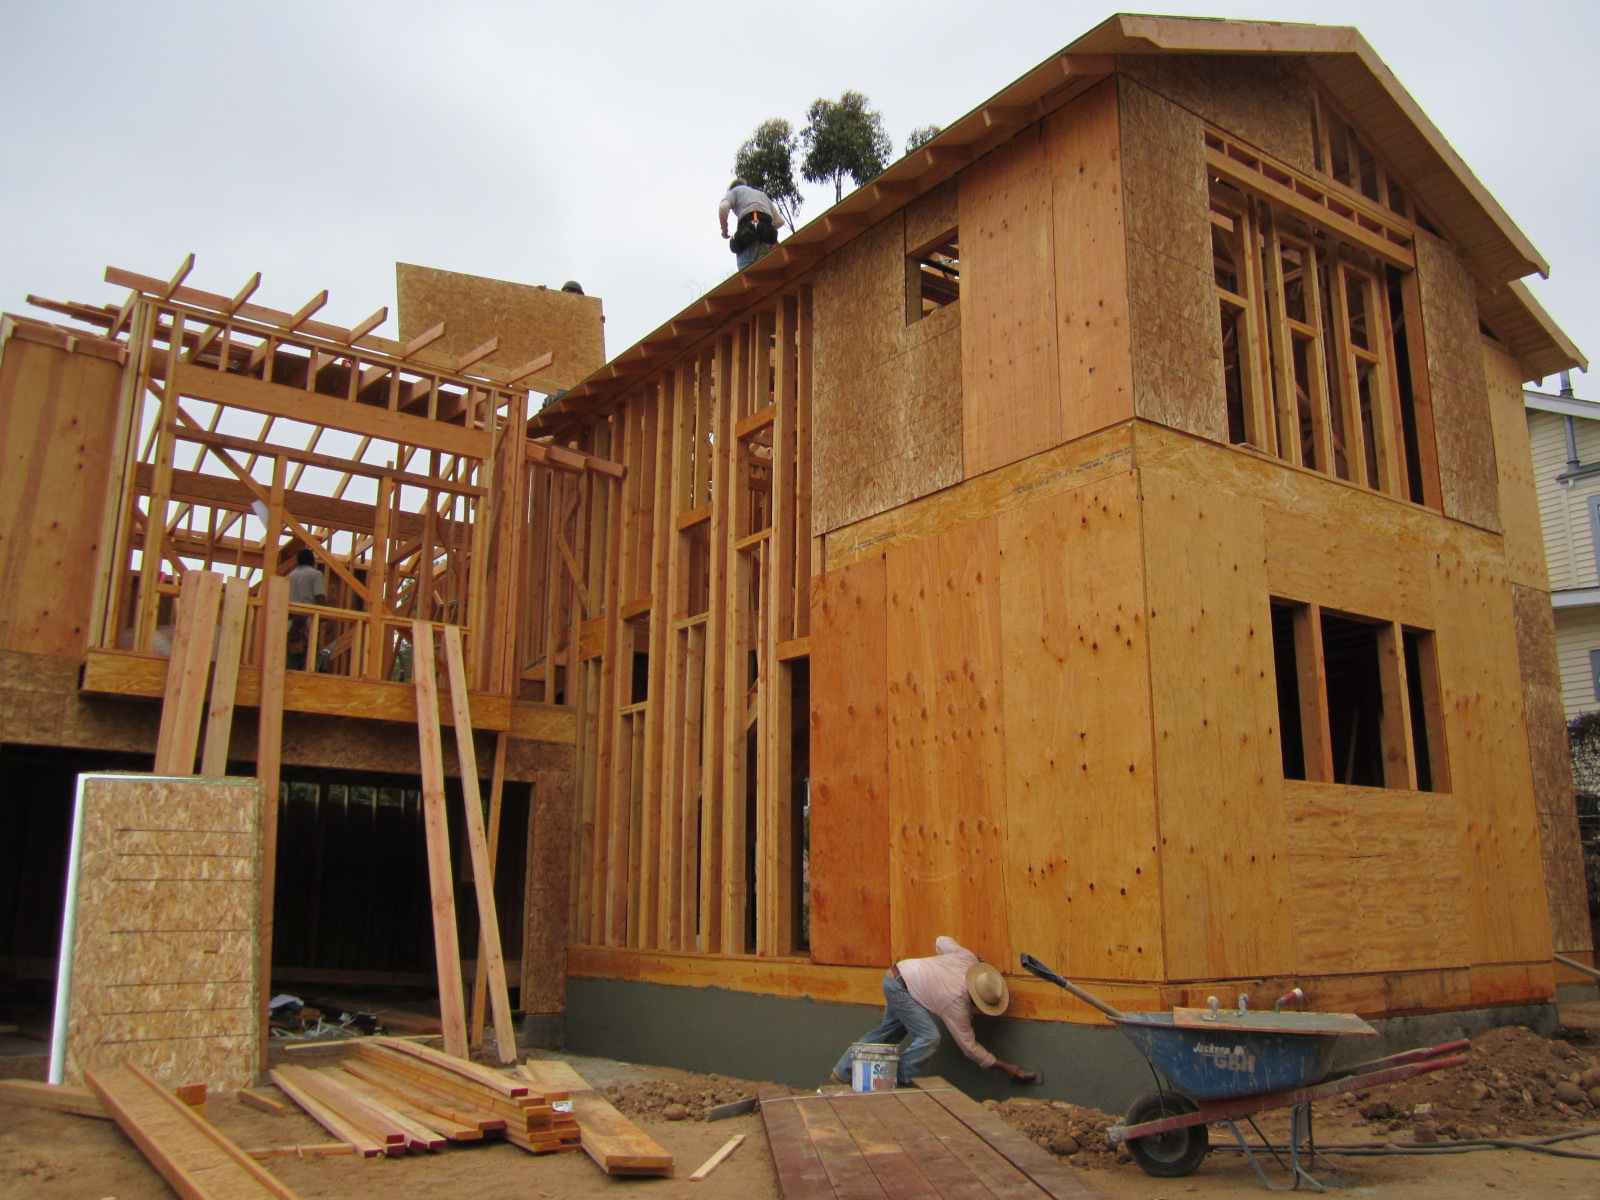
Week 3 got us pretty close to being done with the rough framing on the Modern Bungalow. We have a lot of features and angles with this house, its not just a big box so its taking a little longer than originally planned but well worth it. You can see we got the trusses up and the roof is almost completely sheeted. I left the rafter tails open with no facia board to replicate the craftsman bungalow style. The barge rafter also has a nice detail to add some interest.
The trusses were a breeze and went up really fast, but things slowed down we moved to the conventional “stick” framing of the roof line for the master suite above the garage. There are 3 more big parallam beams up there that allow us some really fun and unique ceiling angles, I’ll save that one to show you in the walk through video.
Under the eaves I used 2×6 tongue and groove on the 18″ rafter tails. It’s a great detail that many guys skip because it adds extra cost but its the right way to do open rafter tails and really also mimics the craftsman style. There are going to be several prominent Modern elements also to the home design, so I thought it was important to have as many period details alongside them to balance the blend.
For the roof sheathing I used OSB with a Tech Shield radiant barrier on the under side. It cost about 2 bucks more per sheet but it will be another huge energy saving feature of the home and save money on electric bills. Keeping your attic cool, and well ventilated is key to saving energy as we learned while building in Texas. This product blocks 97% of the radiant heat from entering through your roof sheathing.
Adding this radiant barrier will reduce attic temperatures by 30 degrees and result in a 17% savings in cooling costs. Before putting the roof on I have to get the nail spacing inspected by the City. You have to have a big ladder available but I don’t see this guy climbing up there its so high, it’ll be fun to see what he does.
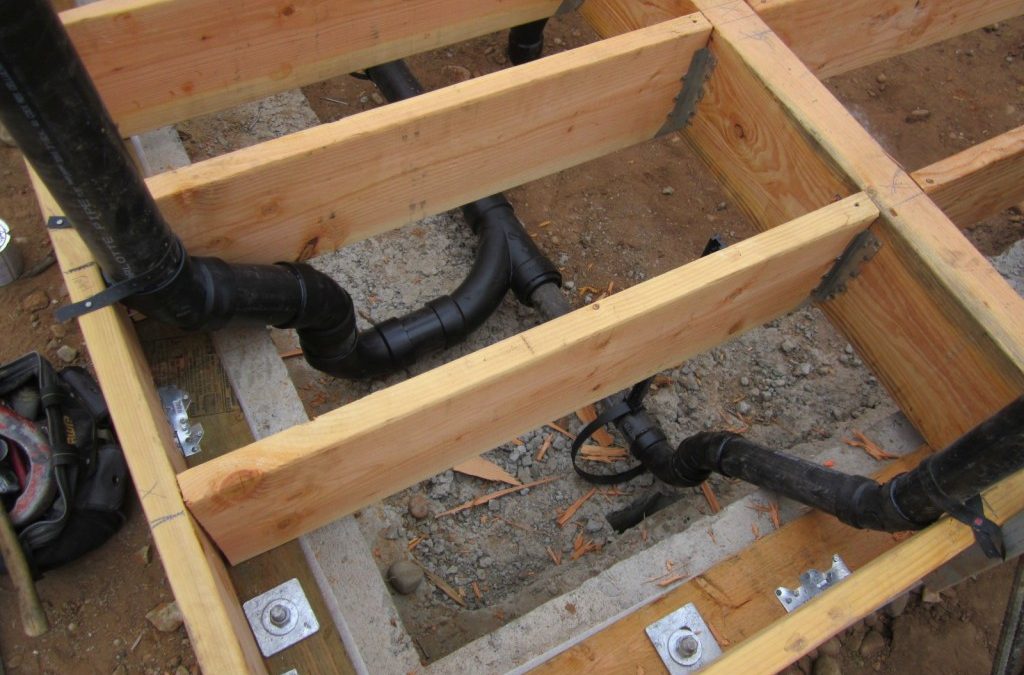
My plumber got a great start too working alongside the framers, all the ABS waste lines and black iron pipe gas lines are done. Everything inside is real close and we even got the stairs finished.
The electrician and HVAC sub contractors can also start once all rough framing is totally done. There’s a cool new construction project in Encinitas called The Leucadia Collection I want to check out, similar idea to what I’m doing. We might drive by this weekend and see if they’ve started framing or have a model home up.
In any other state I could have been all the way up to the second floor framing this week but here in San Diego the City inspector wants to see your floor system framed up first, verify the hold downs and framing, then come back and inspect the underfloor plumbing lines, then come back again and inspect the insulation. You lose a day in between each inspection so this would have dragged out for a week. It really makes sense to do it this way because its easier to do the under house plumbing now, rather than crawling under the house later to do it but the reason the inspector wants it done in this order really just comes down to the fact that he’s not crawling under the house no matter what.
After framing up the floor system in a day I had my plumber come and set all the under floor ABS waste lines and fill them again with water to make sure there’s no leaks. Lastly the insulation got dropped in on nylon netting we strung between the floor joists. Its a real trick way to insulate the floor on a new construction raised foundation house. I’ve used wires in the past but the insulation always ends up falling down in some places. Once we pass then we just sheet over it. The threaded rod you see sticking up is for the Simpson HDU hold downs that secure 4X6 posts in the exterior walls all the way down into the concrete foundation footing. This is to securely hold the structure on the foundation in case of an earthquake and they are strategically placed in shear wall areas by the engineer on the plans.
Of course I had a better idea. I tried to speed things up by only calling once to have him come do all 3 inspections simultaneously. I had the insulation pulled back along the sides so he could see the framing, plumbing and hold downs thinking this would be fine, unfortunately he wasn’t really that excited about my idea. My regular inspector didn’t show up but rather a Senior Inspector who happens to be very thorough and whom I’ve dealt with before. He almost gave me the signature required in order for me to sheet the floor with CDX and start putting walls up, but he found one plumbing fitting that he said wasn’t correct so he’s coming back Monday after we change it and also wants me to pull more of the insulation back for a better look. Uggghhh. My plumber swears the fitting he used is allowed, its a Sanitee on its back for a 2″ vent pipe. The inspector wanted a sweep which is weird cause its only a vent, not a waste line. Who knows but I wasn’t going to argue with him, I told him he’s the boss but I kinda want to check the code book now though just out of curiosity.
The senior inspector asked who the general contractor was. Hesitantly, I told him I was an owner/builder. Seeming surprised he said it looked better than most jobs and kept congratulating me on doing such good work. Maybe he was just trying to make me feel better because he could see it on my face that I was bummed not being able to start putting up the walls. He knew I was totally ready to go, as he was doing his inspection I received the first delivery of truss material for the second story. I should pass on Monday and we’ll be back in action. I’m a Chevy guy but how cool is this early Ford extra cab delivery truck from La Mesa Lumber?
We are staying pretty much on track at the Mid Century Modern renovation, this week we updated and changed around the mechanicals of the house to fit our new design. After my old plumber didn’t show up, I moved on and hired a new guy which really handled business. To prep the exterior for the new stucco job we also had the house sand blasted. You cant put new stucco over paint. I always find it best to do this before you put your new windows in if possible so you don’t accidentally blast them too! Next up for this week is put the new windows and rear sliders in, patch all the drywall and then we’ll be ready for interior paint and tile. We’ve had several interested buyers already stopping by, just wait until they see the dramatic change that will soon take place!
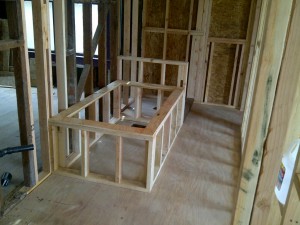
My new master bathroom in The Painted Lady is coming together nicely, it’s generous in size at 6′ x 15.’ Every time I frame up one of these tub boxes for the drop in tub I get a sense of Deja Vu, like seeing an old friend. It seems like just yesterday when I was doing a similar configuration on the Target House project only this time I’m just going with a standard 3′ high pony wall separating the tub and the shower instead of the full wall with the window opening, which will also also keep my tile price down. Every bathroom I design is a bit different, this time I’ve got everything in a line down the left hand wall and then the water closet at the end on the right. You kinda just gottta play with the space and do what works best. I’ve also got the whole right hand wall available for towel bars with this design, I’ve learned this the hard way after doing killer bathrooms and then finding out there no place for towel bars. The door swings in and onto the right hand wall, a 60″ dual vanity is first on the left, then the jacuzzi tub in the middle with a 3′ x 4′ shower at the back. I planned on dropping in a regular soaker tub with no jets to keep the budget down but after pricing them I could get the American Standard Plebe model 32″ x 60″ jetted tub for the same price of $399.00 so it’s a no brainer. There’s a window in the center of the back wall but I’ve got it temporarily sealed now. Natural light is key for bathrooms, ideally I probably would have had another window in the shower and one in the water closet too but I’m trying to stay within budget so I’m forced to pull back in some areas. Code states that if you don’t have an opening window you must have an exhaust fan but I’ll have both.
As you can see we got started roughing in the plumbing this week, I got a great quote of $4800.00 for the complete new system with gas lines, I supply the fixtures. I was also reminded that black ABS is used here in California and not white PVC as in Texas and on the East Coast for the waste lines. I think PVC is better and cheaper but the only upside on ABS is that you don’t have to use primer with the glue. ABS also gets brittle from UV exposure so it’s now common place to paint the roof stacks in California. I still like PVC better, even though it takes more time to install using the primer but I’m sure there’s some tree hugger issue with it so that’s why California uses ABS. After framing I always get the plumber in first before the electrician or hvac sub contractors, it works best because the vent pipes and waste lines are not flexible. I also wait until the plumber is done before putting on the new roof so we don’t have to butcher the new roof for the vent pipe roof jacks. Your roof job comes out far superior if all jacks are in place before install, this trick came with experience. After these waste lines are complete we’ll run the new black pipe gas lines and then finally the copper supply side lines. I’m still going back and forth with the San Diego Historical Review Board, they have made me change 13 items on my plans including window type, siding material, roof type & color and they even want to know the exterior paint colors. Furthermore, they are making me re-stack the exterior brick chimneys even though they’ve been eliminated inside the house. It’s really slowing me down because until I get everything approved from them I cant call for any inspections. As frustrating as it is, I’m stoked to learn exactly what needs to be done to pull off a renovation of this caliber in San Diego so I’ll chalk the delay up to contractor school.
Don’t forget the men and women who died while serving in the American military protecting our great country, this holiday weekend is not just all about beer and barbeques in the park. Have a happy and safe Memorial Day and God Bless our troops!
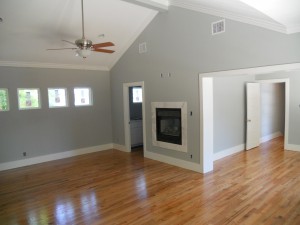
We ended up going with Golden Pecan floor stain after trying about 8 different stain color samples. After applying the stain we used 2 coats of semi gloss polyurethane (buffing between coats) and mixed in a little Colonial Maple color to tint it even more. I’m really happy with the way they came out, only new wood can look like this so I’m sure the future owner will appreciate it. In the original part of the house the floors are almost 100 years old so they aren’t this perfect of course but a little distress look is appropriate due to the style house and age. As I was saying before I didn’t want to stain the whole house dark just to hide a few imperfections up front and not get to appreciate all this new red oak in the addition.
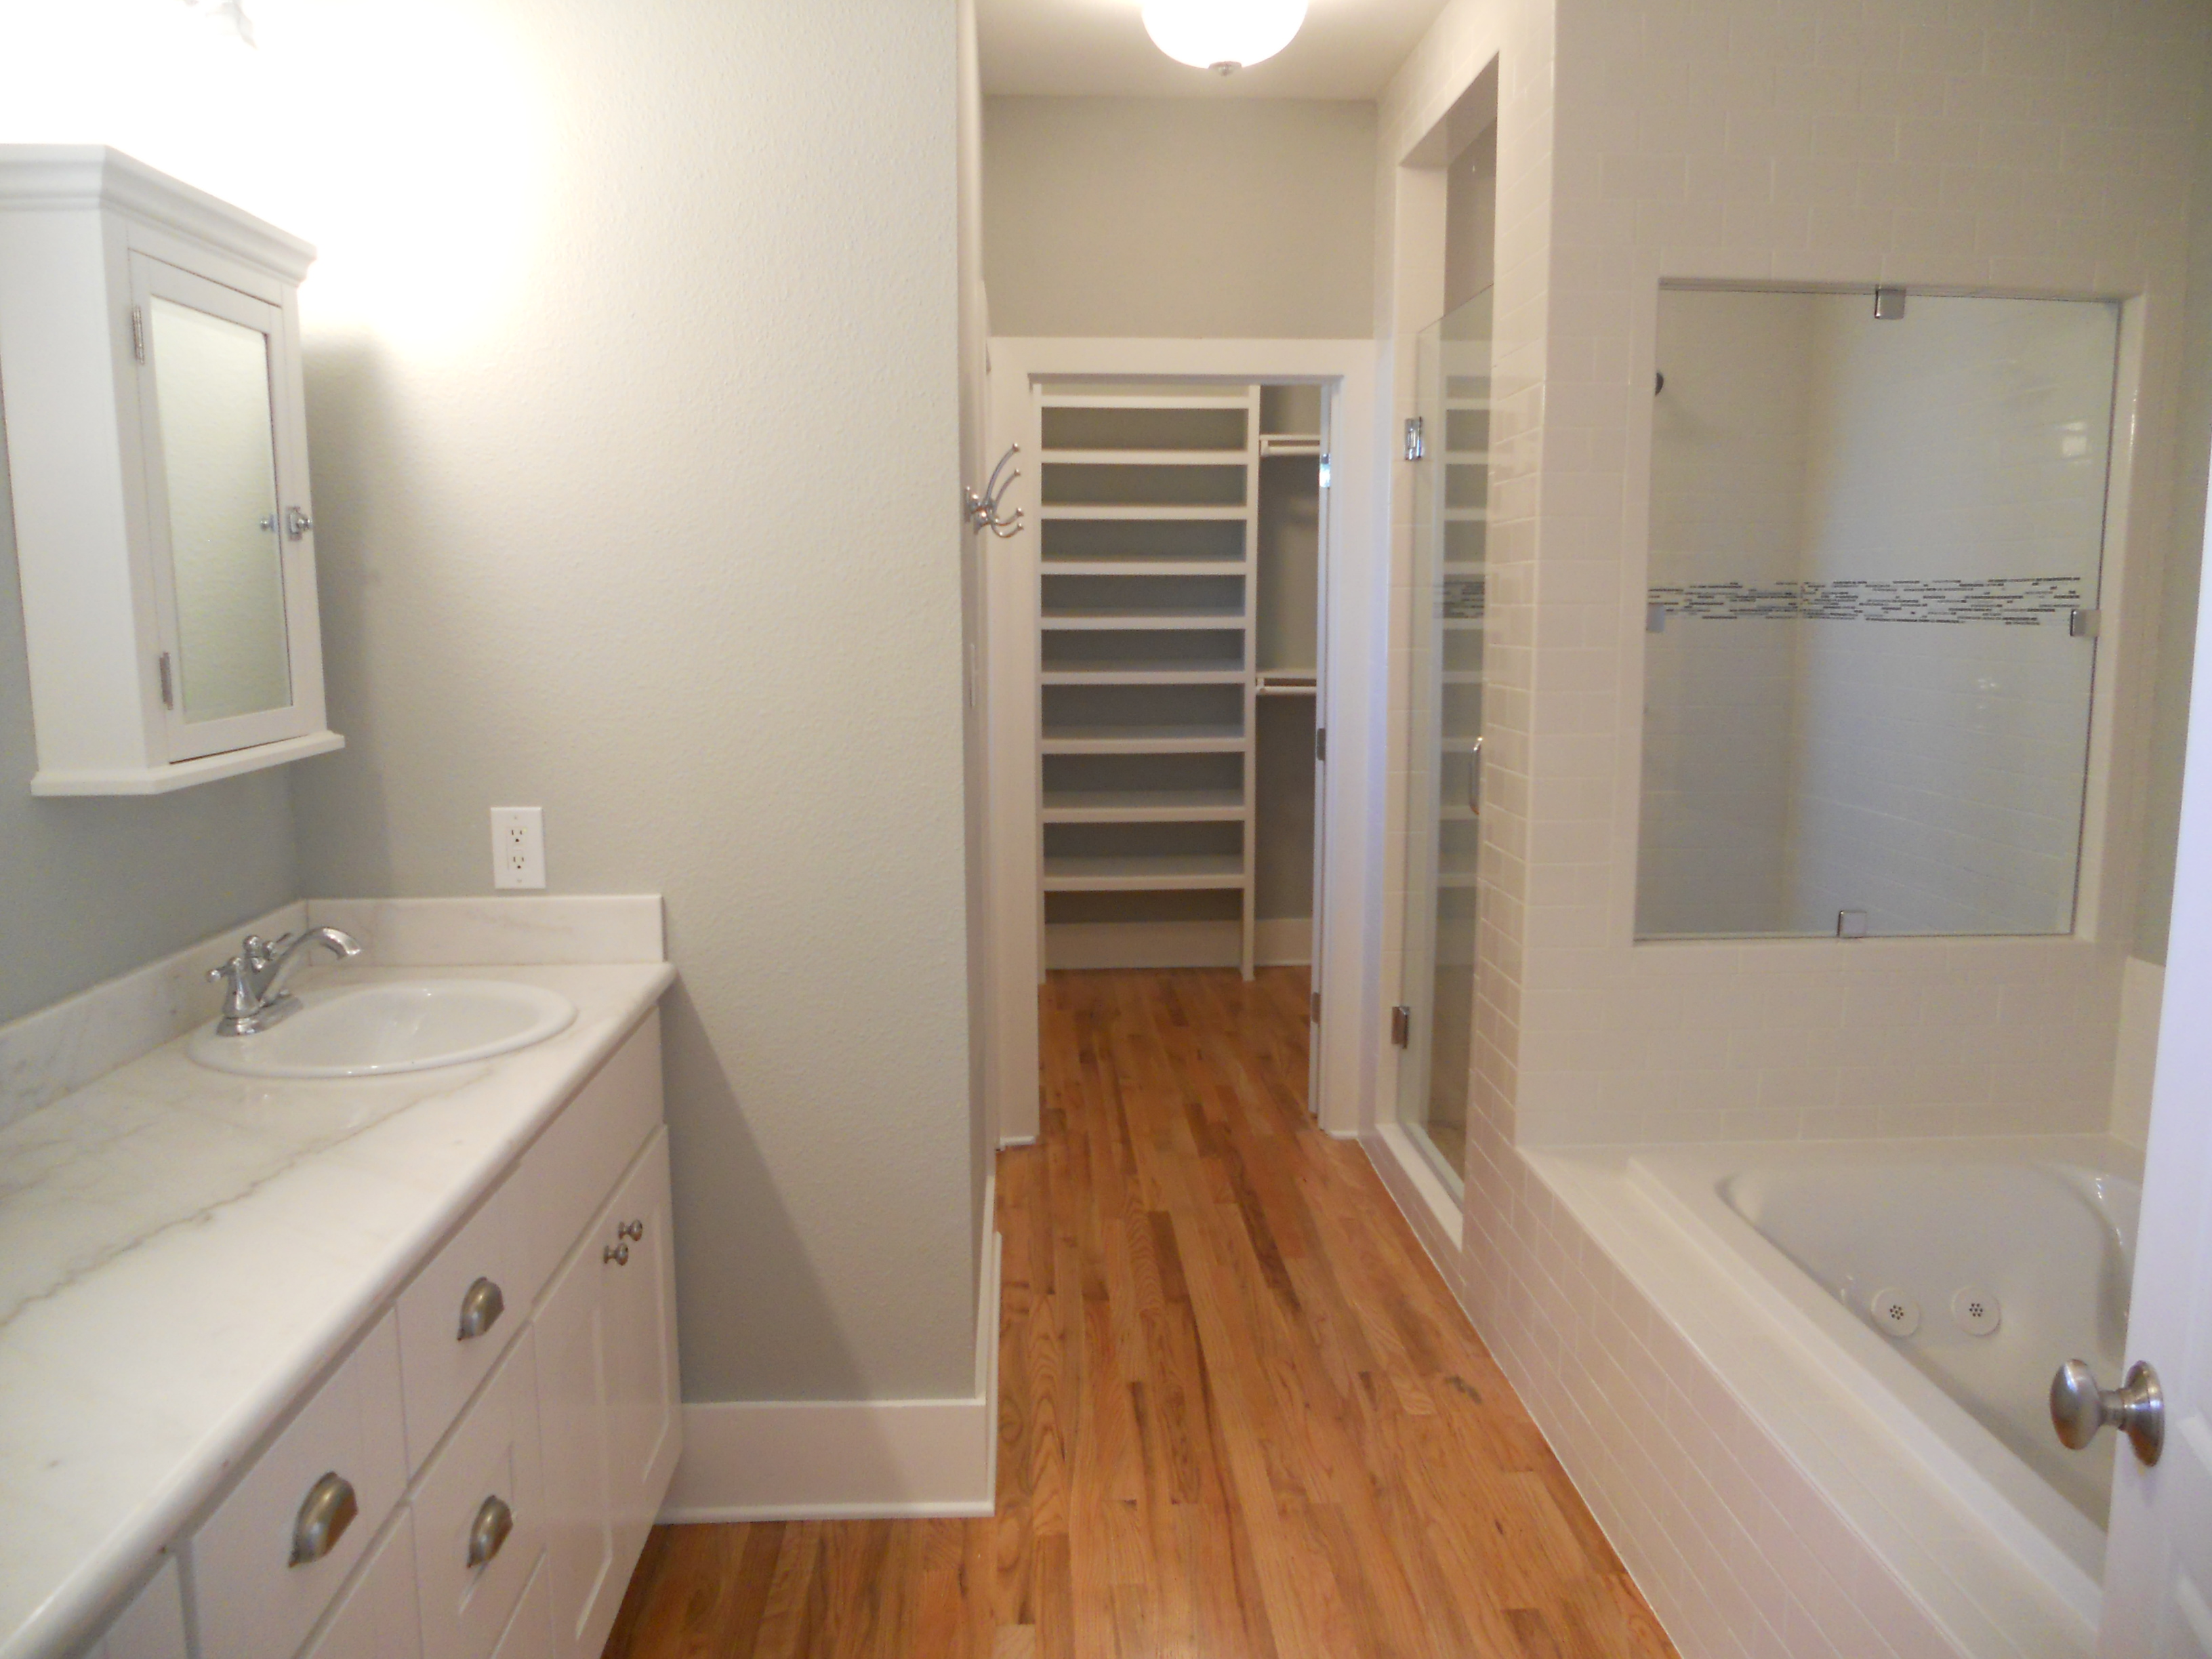
Here’s a sneak peek at the master bath. As you can see the glass company showed up this week between floor coats and installed the custom frame-less glass for the shower. The door is 7 feet high with chrome hardware that matches the other interior doors, I always design them a little higher than the shower-head. The fixed glass picture window is suspended in the tile opening with more beautiful chrome hardware. Most builders put the clamps on either the tops or sides but I did something a little different by having 1 clamp on all 4 sides. This custom frame-less glass ran $1300.00 installed. My plumber is coming this week to set the spa tub and fixtures, with my last contractor I would have done this myself but the new plumber doesn’t want me to touch anything so he can give the future homeowner a 2-year warranty, cool with me, less work. Check out how the new wood even runs through the bathroom and into the walk-in closet, this is a killer upscale look and blows away any kind of floor tile I could have used.
I recently heard that 30% of Americans (myself included) don’t park in their garages, they only use them to store junk turning them into basically a drive-in closet. In California people have alot of pride in their cars, detailing businesses flourish with customers paying hundreds of dollars for hand waxing but then again it never rains so it makes sense to keep your car clean. Here in San Antonio we get an average rainfall of about 32 inches compared to 9 in San Diego. Even after a rain you’ll still see puddles a week later because the streets are so bad. With all this rain you’d think that garages would be hugely popular here. It’s not the case however, people would rather enclose their garages for more living space because they don’t go outside anyway as it’s too hot and humid. Plus, their car is going to stay dirty anyway, garage or not, because of the weather and the street conditions.
So, why the hell did I build this garage you’re asking? Our project is going to be priced around the $400k mark in a city where average home proices are around $150k. Theres an unspoken rule that if you are paying $400k in San Antonio you better get a garage. Even if the locals don’t appreciate them most of our buyers are moving in from other states and telling their realtor to do searches for 3/2/2’s so we dont want to miss any potential customers. Once they get used to the SA way of life I’m sure they’ll stop parking in there, their car will be filthy and it’ll be full of crap. Either way these historic houses don’t have much storage so it’ll get used. I designed the 500 s.f. garage to look historic and match the house architecture. I’ll be using “T117 House Siding” again and I’ve left the rafter tails open, included huge 28″ overhanging eves and even a clipped gable roof. There will be a vent under the gable and of course I’ll multi-color it as well to match the house.


