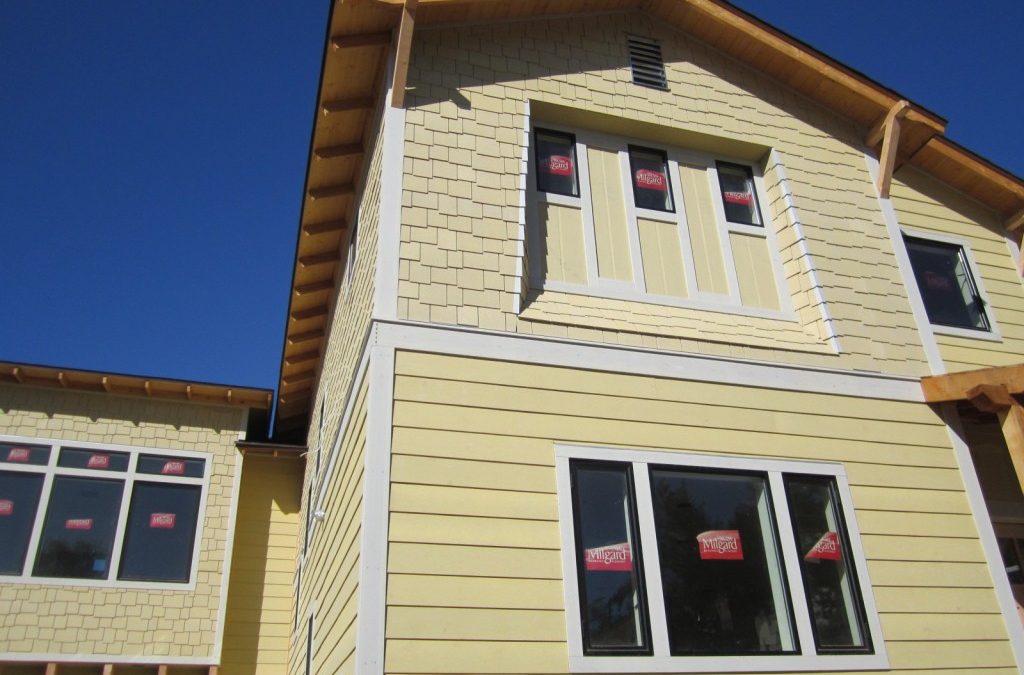
The James Hardi Siding on My South Park Modern Bungalow new build is finally ready for paint, take one last look because the next time you see her she’ll have 3 shades of green, grey rafter tails and cedar stained eaves. It took me and a helper just over 3 weeks to do all the siding, knee braces and corbels but it was worth it.
The James Hardi staggered shingle is very labor intensive but it paid off. It gives some great depth and adds texture while defining the pop out shed dormer too. You can see I separated the siding styles with a Hardi Trim 1×8.
We kept the corbels very simple to match the knee braces. I used Douglas Fir 4×8 and had it re-sawn at my local lumber yard. They will get a cedar stain to match the tongue and groove eaves and porch posts and beam. I’m really liking the big overhang look and all the open rafter tails, cant wait to see them individually painted.
I left the roof off the porch until after paint so I didn’t mess it up by walking on it. It’s going to be a Bronze standing seam metal roof that will be close in color to my aluminum windows. The James Hardi reveal for the 3 small bathroom fixed windows was quite challenging to pull off but it looks very organic. You’ll notice the angle changes from the top as you go down. We used aluminum corners made especially for the Hardi staggered shingle to hide the edge seams and protect it from moisture.
Here are the 4 colors we picked for the house, The body is 2 shades of green, Edgy Gold and Wheat Grass by Sherwin Williams. The trim is a very light green that almost looks white, its Ionic Ivory. The rafter tails, barge rafters and knee braces will be Benjamin Moore Cromwell Grey. All the tongue and groove eaves, corbels and porch post and beam will get that cedar stain. This is the first time we’ve stained the eaves on top of painted rafter tails so I’m pretty excited to see the results.
It seems most sub-contractors are having a busy summer. Building is definitely picking up by talking to everyone in the industry. Because of this, my regular electrician couldn’t get to my project right away so I brought in a new crew.
These guys are new construction, not messin’ around, real-deal electricians. 5 guys showed up on Saturday and by Sunday at 4pm the whole house was 90% done including 200 amp service, riser, all 24 branch circuits, home runs, under cabinet lighting, multiple 3-way switching and 24 can lights.
I went with LED recessed lighting for energy savings, having just used it on a customers kitchen remodel I was surprised that the light quality is far superior to the florescent cans we were using last year to conform to Title 24 requirements. For only 9 watts of power usage you get 65 watts of clean lighting, a huge savings on your electric bill. Just another green feature on this project.
We took the drywall delivery this week, too. I like to get it in the house and stacked in all the rooms ready to go before we close everything up outside. It would have been impossible to carry the 12′ sheets upstairs later so this is essentially planning ahead.
I measured 160 12′ 1/2″ sheets of drywall for the house and 5/8″ for the garage and under the stairwell per City Code. Material cost was $2021.00 not including tape, mud and corner bead.
For more energy savings we always foam the doors and windows before drywall. Some guys still wont do this because they think it will warp the window frames, but its the only way to get a complete seal after the new construction windows go in. We learned this in the hot Texas climate.
After it dries you just remove the excess that comes out and then you have a great energy seal. Per Building Code you also have to use the Fire Block foam on all the holes you drilled through the top plate for mechanicals. The inspector will look for this at my insulation inspection.
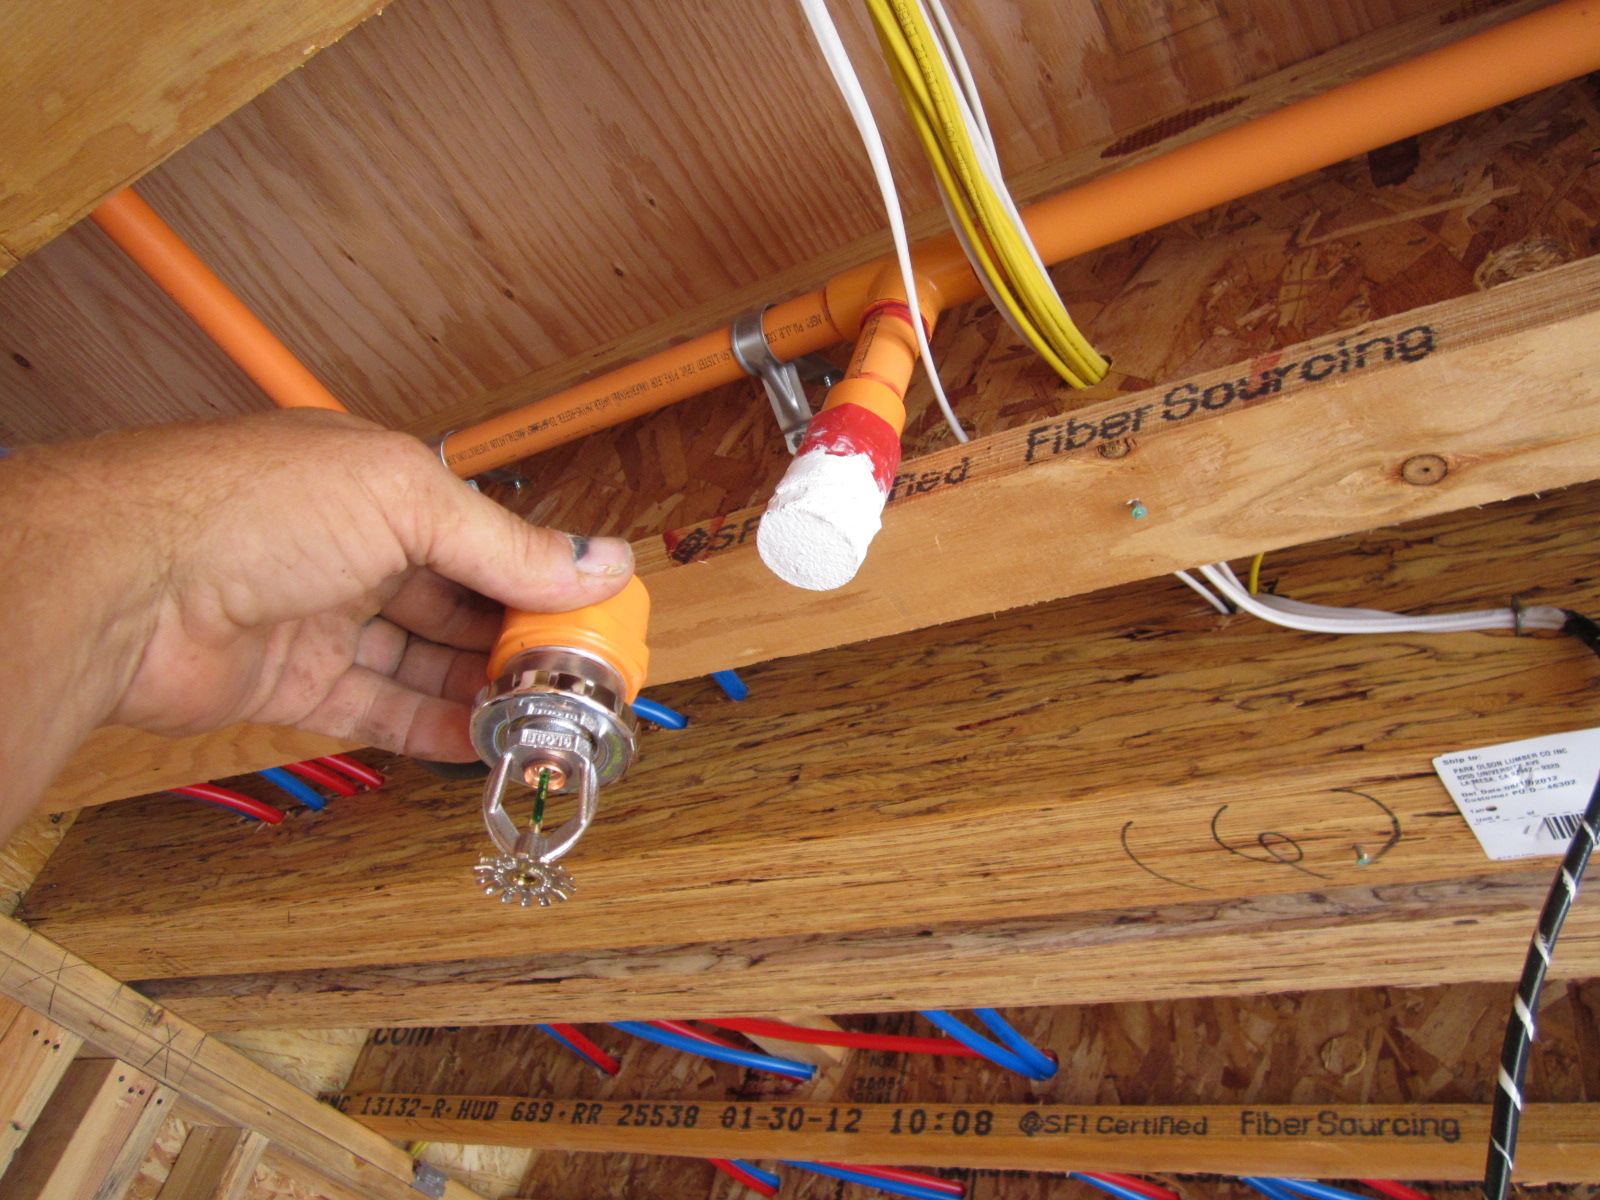
After the electrician was done I brought in my last and final mechanical sub-contractor, the Fire Sprinkler guy. Fire sprinklers on all San Diego residential new construction, and some addition/remodels in fact, has been mandatory since 2007 after we had the big Cedar and Witch Fires.
The supply lines come from a panel location near your water service. To handle the increased volume, water supply size is stepped up to 1 1/4″ to the house and 1″ at the cut off. The fire sprinkler lines are 1″ CVPC that is orange in color, its ran throughout the entire house keeping heads around 8 feet apart and away from A/C registers and lighting, and the calculations call for a certain number of sprinkler heads per room size.
Per his City permitted design, my sub-contractor has 4 heads in the great room, 1 in each bedroom and bathroom, and even 1 in the walk-in closet, water heater closet and HVAC closet. The master bedroom got 2 heads. The fire sprinkler heads will not be visible in the living areas and look like flush mounted white discs after trim out.
The fire sprinklers in the garage go by different calculations and are a bit different, visible sprinkler heads will be in place after drywall. The requirement is 1 head for every 150 s.f. of garage space.
This is the fire sprinkler riser that is located in a panel accessible from the outside of my house near the water service. It also feeds the bell box which gets mounted high on the house in an area where bedrooms can hear it easily.
Once the system is pressurized with water the Fire Marshall will come inspect it and give me a card, which in turn I will give to the City Inspector at the Frame and Rough inspection this week. The cost for this complete fire sprinkler system installed, with design and permits was $2,200.00. I’m ready for this big monumental inspection this week, its all going to be downhill after we get to start insulating and hanging drywall, stay tuned!
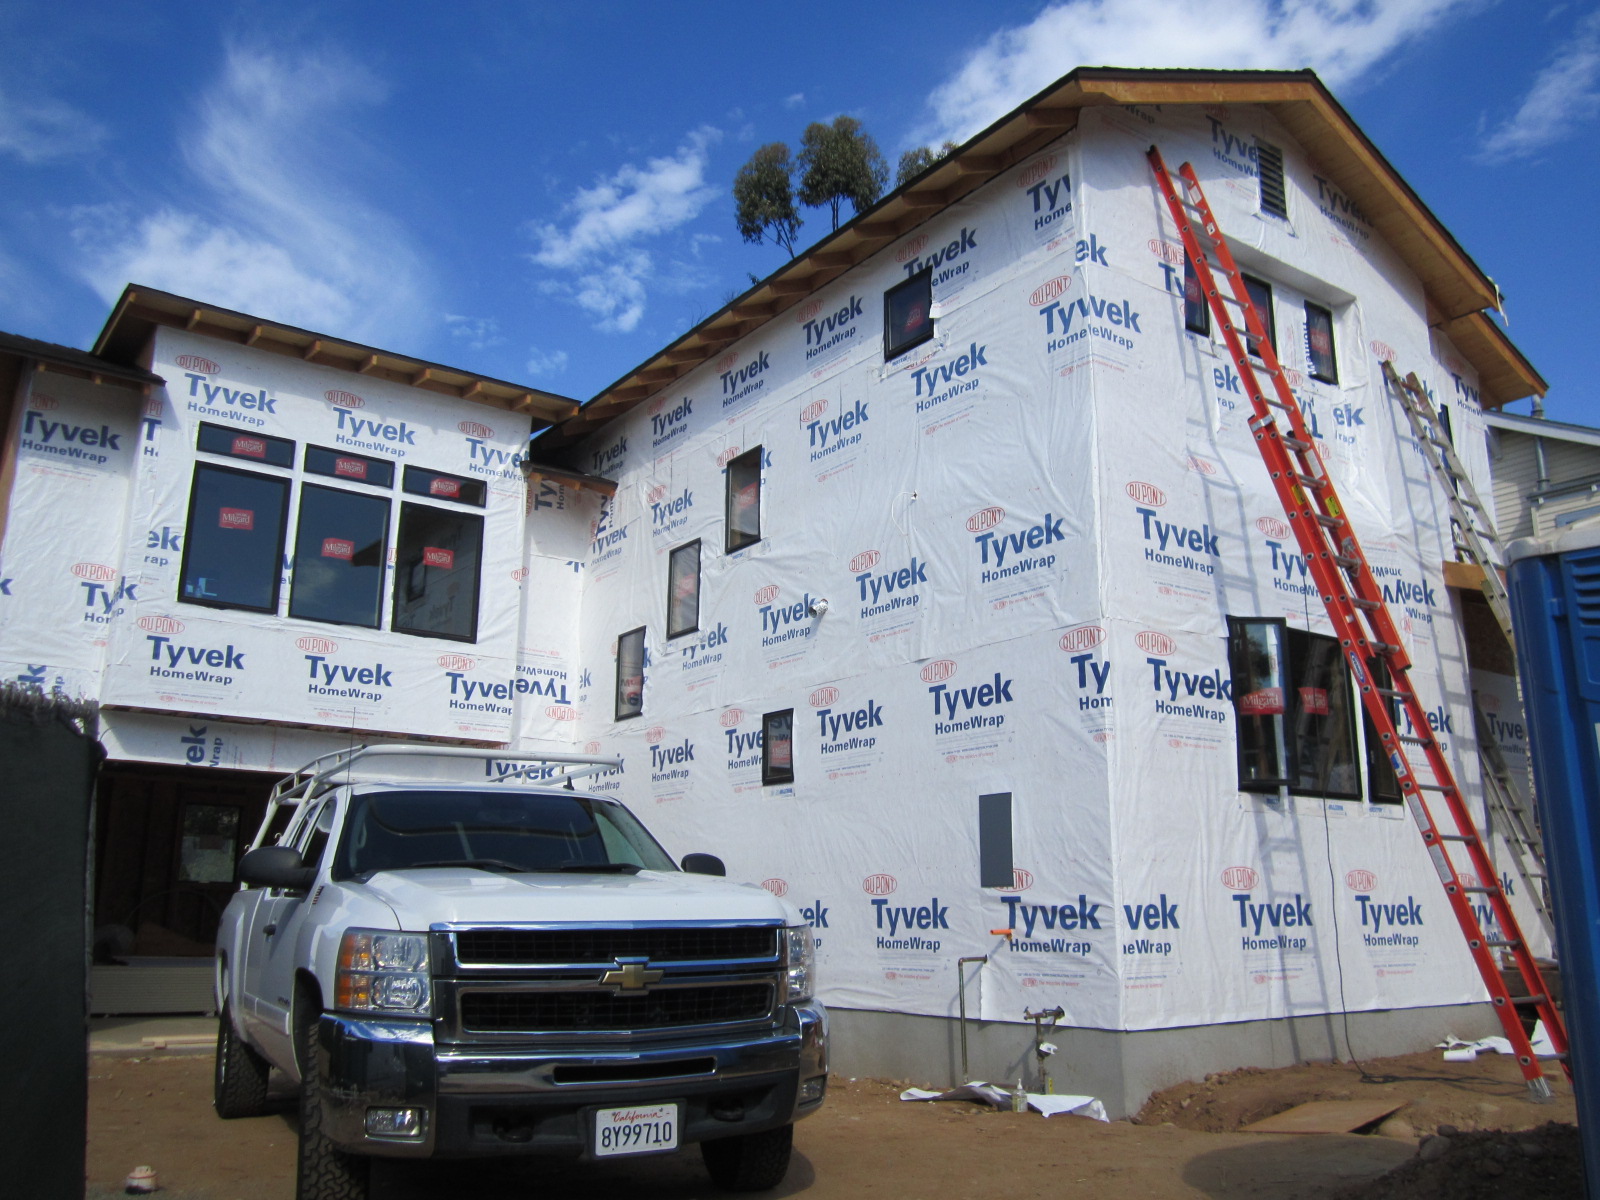
Here’s a Sneak Peek of the new build we are doing in South Park. Rough framing is now complete, roof on, Milgard aluminum windows in, plumbing done, HVAC almost complete, next up is electrical and fire sprinklers then I can call for the big “rough-in” City inspection.
Building new construction is actually a lot easier than remodeling an old home. I liken it to model building when I was a kid. Its all about doing things in a certain order and planning ahead with ordering materials and taking deliveries.
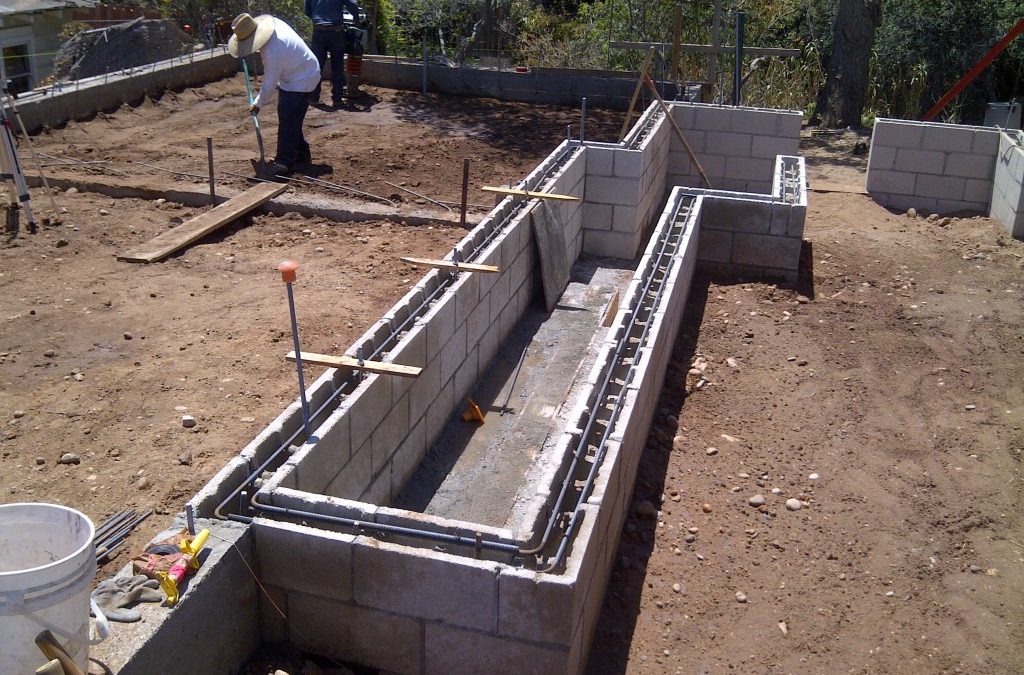
Just a little more concrete last week and now its time for framing. The first thing I did was have a third party inspector come and sign off on the construction of my block stem wall. He personally witnessed the mortar mixture and rebar placement inside. Then I called the City inspector also to sign off on it once it was completed. The reason for the extra stemwall is because the outside wall is the balloon wall and the inside wall supports the load from the upstairs floor joists. The stairs go up in between these two foundation walls and each has its own footing.
When the truck came to fill it up we also had to have the third party “special inspector” on site to take a sample of the mixture that came out of the truck. He packaged it into a small box that he’ll send to a lab for analysis. They test part of it at 7 days and the balance at 28 days for compression strength by putting it in a crushing machine. Inside the stem wall I used 2500 PSI grout mix. I only normally use big rock but this is the only place that its o.k. to use the pea gravel mix. I would never use it in a concrete footing , foundation or driveway. The cost for the 2 trips from the special inspector and the lab test was about 500 bucks. I don’t know what would happen if the lab discovered I got a bad batch from the concrete company, probably make me tear down the wall and start over. I’d rather know now though before I move in that’s for sure!
Next I poured the garage floor. First I rented a compaction machine for the dirt, then put down plastic moisture barrier, topped it with 3-4 inches of manufactured sand and then my #4 rebar 18″ on center tied into the perimeter footing as the plans called for. Once the City came and inspected it we just backed the truck right up to it and poured 7 more yards of 3000 PSI 3/4″ concrete. Once again you’ll see a lot of guys using pea gravel mix but its not nearly as good and tends to crack faster. The larger the rock size in concrete the better. I’m ready for framing now and getting material price quotes from Home Depot, Lowes and Dixieline. Hopefully we’ll be starting on the floor system by mid week if I can get a quick delivery, the framers are anxious and cant wait to get started. I’ll order my custom Milgard windows and exterior doors this week as week so they will arrive about the same time we are done with framing.
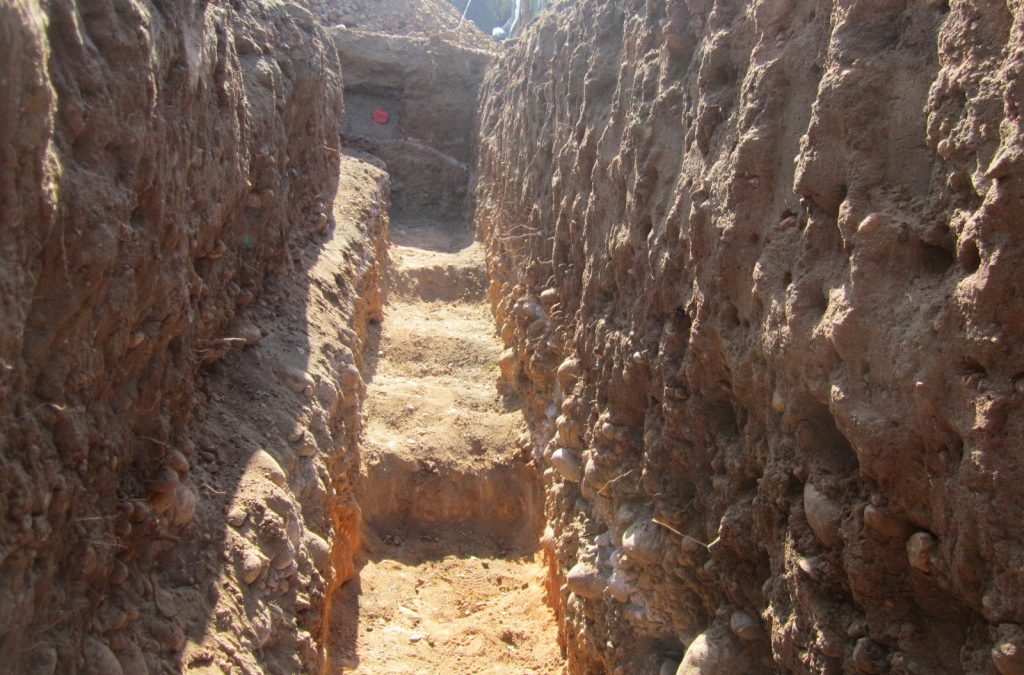
While the City of San Diego only requires footings for a 2 story house to be 18 inches deep, went close to 5 feet in some spots. You can see here that the bottom of all my trenches remain level with steps, so gravity doesn’t take our house down the canyon. The reason the footing trenches vary in depth is due to the distance to reach native soils. No lot is perfect, in our case with this house one main challenge besides having the rear 30% unusable due to the canyon is unstable fill that’s been there for years. The only alternative to digging all the way down to native soils would be to have the whole site compacted to 90%. I could have done a slab on grade at that point but at the end of the day I felt this way will be the most structurally sound. While these deep footings will eat up expensive concrete at $95/yard, a slab on grade foundation would still need deepened grade beams and since the lot slopes down towards the back, the foundation is 3 feet high and end up being about the same amount of concrete. Note the existing 4″ sewer lateral ready to go.
The excavator we rented made quick work of the foundation dig but after the soils engineer came and inspected our footing trenching, he requested us to go farther into the native soils. You can easily see here where the brown, silty cobble fill changes to a rock hard gold color at my spray paint line. This stuff is so hard to dig we used a jackhammer for 3 days to deepen the trenches to satisfy the soils engineer. He’ll now give me a certificate which I’ll hand to the City inspector when he comes to inspect the foundation forms and rebar placement. As previously mentioned, you could roll the dice and not have a soils test but if the City inspector feels there is fill he’ll make you take all the forms apart and get the report anyway. I want to build it right so in my mind this is the only way to do it.
The first step in forming a raised foundation is pulling some control lines from which you can set your exterior forms. We build them all with 2×4’s and OSB, setting the outside of the house footprint first and then starting with hanging the rebar inside. All rebar has to be 3″ away from dirt or forms. Finally after cleaning out and debris that might have fallen into the trenches you then set the inside form. After inspection we’ll pump concrete in from the top.
Once again the City only calls for (4) 1/2″ horizontal rebar inside the foundation with vertical bars 24″ on center. For just a little extra cost I upped the ante to (6) horizontal 5/8″ bars with verticals 16″ on center. Raised foundation houses in California have this exterior stem wall. In the interior of the foot print the load is typically carried by4x6 treated sills that the floor joists rest on. These beams usually sit on posts and piers. My raised foundation design is far superior with one more stem wall running down the middle of the house like a spine. I’ll be using TJI floor joists which will span the whole width of the house without any posts and piers. We’ve fixed so many foundations on old pier and beam bungalows, with this method you’ll also have the convenience of a wide open crawl space to run mechanicals without any posts in the way. A little extra cost but by far a superior design for a raised foundation. Most of the neighbors have stopped by now, its the talk of the street that something is going up on “old man Fred’s” lot. I’ve been extremely respectful to everyone, even buying car washes for neighbors whose cars got dusted out by all the digging. I also rented a construction fence with privacy mesh so no one has to look at the mess all summer. We should be done with the forms mid week and then we’ll get started with the underground plumbing that needs to go in before we pour concrete. Stay tuned, once I get past the undergrounds and pumping this foundation it will get framed up real quick.