Cedar Crossroads

 Right on track we are moving into the interior paint job on our Mid Century Modern renovation. Up top on the Cedar tongue and groove ceiling, I was at a crossroads this week with regards to what product I should use on it after all that work sandblasting it raw. Cedar is a soft wood with natural tannins in it, so any oil based poly or urethane would certainly make the wood darker which I didn’t want to do. There were many options such as linseed oil, wood wax, polyurethane, acrylic sealer, Danish oil, etc. Also some thick poly’s will yellow over time and darken the wood. I ended up using Satin Deft Acrylic Wood Finish from Home Depot. I sampled this product also in semi-gloss and gloss but it came out a little hazy for my liking. I couldn’t spray the Deft Finish and get enough penetration so it had to be applied thick with a roller and then back brushed in order to get into the open grains.
It came out really good, highlighting the natural color and grains and doesn’t look too plastic-like or shiny. The walls are also now in primer with Glidden PVA drywall primer. We are applying it with a 1/4″ nap roller and then sanding between coats in order to keep our smooth texture and not add roller stipple. On the walls I’m going with Decorator White by Behr this time in flat for the whole house, except I’ll switch the sheen to satin in the kitchen and bathrooms. With my wood ceilings and floors there’s no chance of the house looking too sterile with the white walls. Next up we’ll be spraying all the interior doors and trims with the color Sherwin Williams Snowbound in semi-gloss. The beams in the house now have the first coat of Behr Olive Leaf in satin on them as you can see. The dark green next to the natural reddish Cedar is really contrasting and looks dramatic and especially period correct.
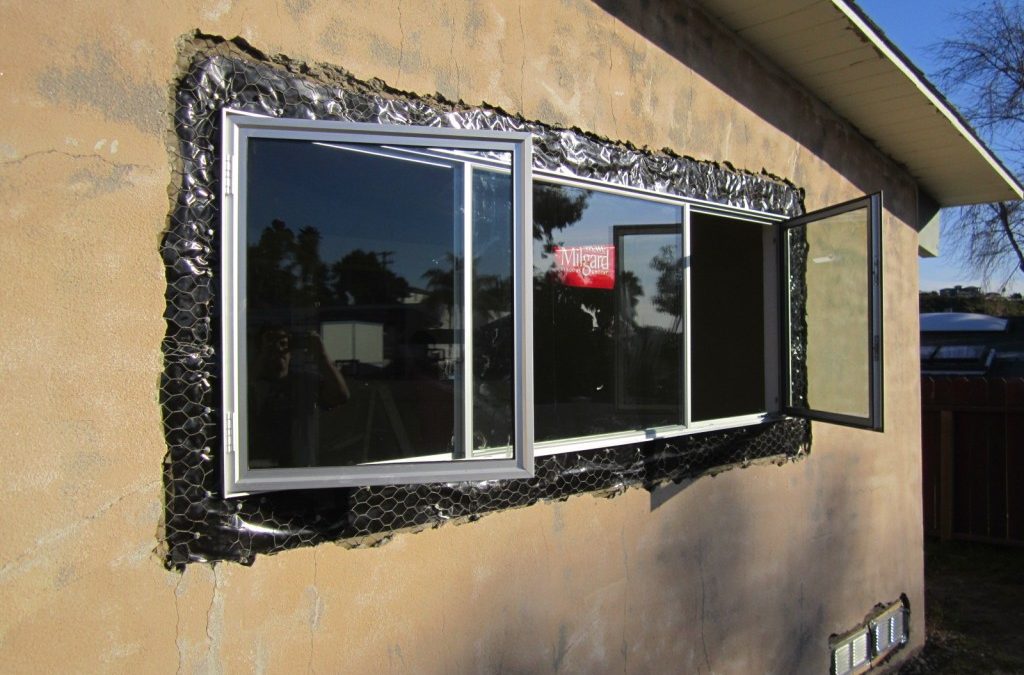
 My new stucco guy came this week to do all the patching around my aluminum windows and doors we put in as well as scratch and brown coat the front of the garage where we covered the existing paneling. After 2 days of showing up after 9 am by himself, he finally brought in a helper and they knocked it out. I look to hire sub contractors who are there at 7:30, bust ass all day like we do, and not drag it out. There are really 2 kinds of contractors out there, the hard working, taking care of business hungry guys and then the ones that seem to drag everything out and want to make small talk with you all day.
When he opened his air compressor line to bleed out the tank on my new driveway I almost lost it. You guys who have air compressors know that the air inside the tank is usually oily and rusty and will stain anything it drains out on. There is a job site etiquette that most guys follow but this guy clearly doesn’t see the big picture. When I called him out on it he mumbled something about it being a “flip” to one of my workers, as if that puts my job in a different category of service from him. Don’t get me wrong we have fun at work but I don’t think I’ll be using this guy again no matter how good the price or end product is. This year I am really concentrating at building the best team possible which will make my business run smoother for the future. It’s a continual battle, first you find sub contractors and then you start switching them out for better ones. Like anything else, the good sub contractors are always busy. The B grade ones will usually be the guys you find first.
 Don’t forget to tune into my interview on Blog Talk Radio Monday night at 8 PM PST hosted by Jim The Realtor. You guys can actually call in to the show using the 1-800 number if you aren’t too shy or type me house flipping and design questions live. If you miss it we’ll have a podcast available after the show. Here’s a link to listen live tomorrow night:
http://www.blogtalkradio.com/jim-the-realtor/2012/02/14/tom-tarrant-on-btr-with-jim-the-realtor