by Tom | Dec 22, 2012 | Concrete, Hardwood Floor Refinishing, San Diego Real Estate Market, South Park Modern Bungalow
What a difference a week makes. Our new hardwood floor refinishing guys came in and did an incredible job on the Modern Bungalow in South Park. Instead of the usual rag on, rag off method for applying the stain, these guys used a lambs wool applicator and drug the stain across the floor. Of course we did not water pop the wood first this time!

The stain came out perfect the second time around, no spots or blotchy areas and this application method actually left more color on the wood. After the stain dried they did 3 coats of semi-gloss clear, buffing in between coats. I’m really happy with the results, this is how Golden Pecan on Red Oak should look, it gives a modern loft feel.

Here is the finished product on the floors, finally I am back on track now. The cabinet finishers are coming in next to stain the uppers to match and paint the bases, island and bathroom vanities.

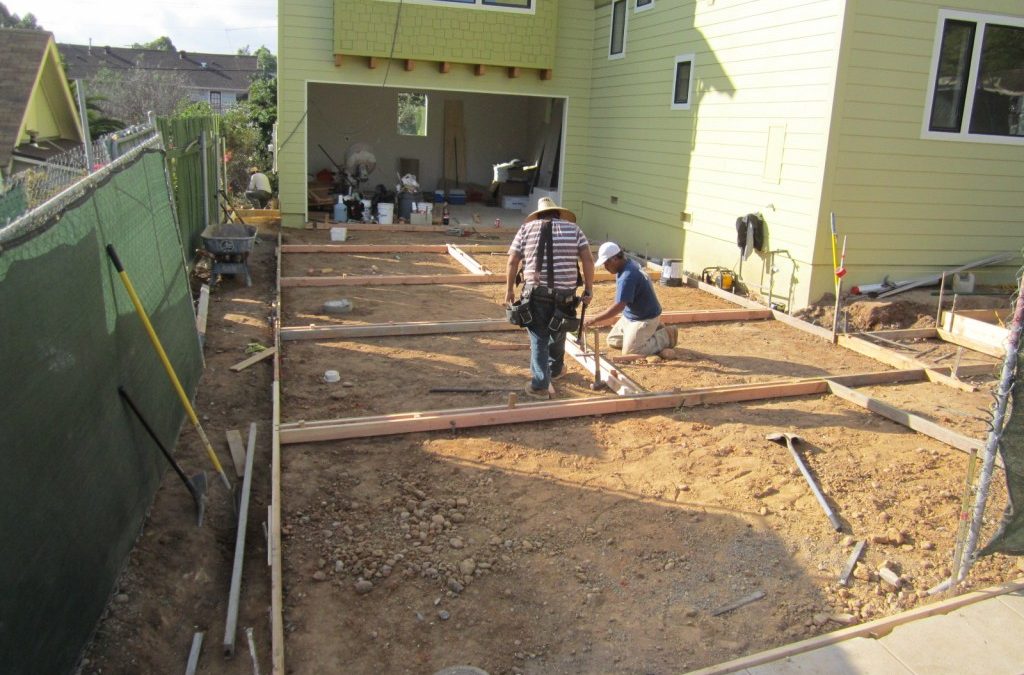
The weather finally cooperated enough to get most of our hardscape in this week. I poured about 20 yards of flat work. The modern design I created will lend itself well to my overall theme, the driveway area was so large, so by cutting it up I brought the space more into scale. Stay tuned for the finishing stretch after the holidays & Merry Christmas!
by Tom | Dec 16, 2012 | Hardwood Floor Refinishing, South Park Modern Bungalow

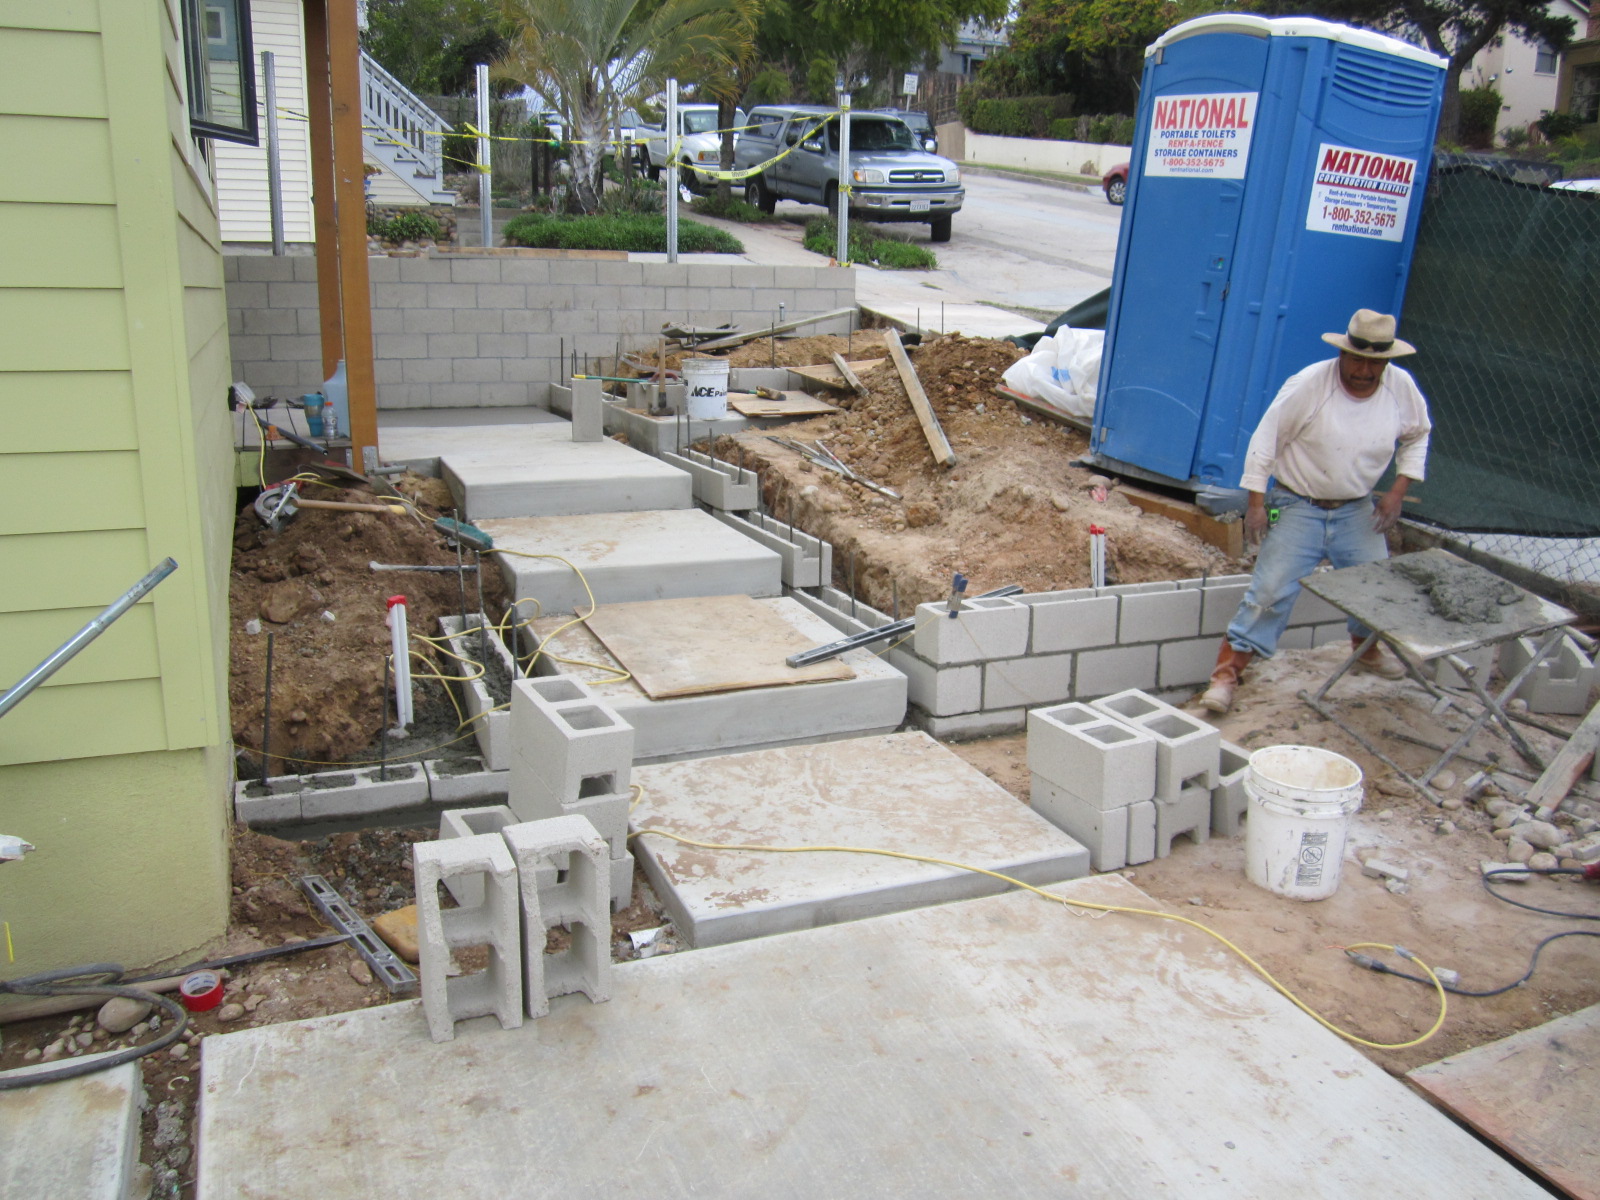
Imagine this picture after 3 days of rain. Yes folks, mud, mud and more mud. It just wasn’t in my cards this week, after almost 2 weeks excavating for the driveway and setting forms, the rains came.
Had I just finished a day earlier I would have avoided a 5-day set back due to the weather. You can see I broke up the huge space by setting the forms in a more modern design for the concrete, it will do wonders for the scale of the driveway and also add an interesting modern touch.
Inside the gaps between the slabs I can put river rock, decomposed granite or even a low grass. There wont be any sod in my landscape design, the whole yard will be xeriscaped and planted with drought tolerant native species.
The unfinished cmu block retaining walls and large square concrete slabs for stepping blocks will give a real urban mod feel and be perfect for my modern bungalow.

The full custom, flat panel millworks package went in on Monday from Jed at Hollands Custom Kitchens in El Cajon. Full extension, soft close, dove tail, the whole 9 yards.
Hollands is rad, great service, quality and they’ve been building cabinets for 35 years here in San Diego. They hand built everything specifically for the house including kitchen and bathrooms. Everything will get finished on site after the install. On the uppers I used grain matching “rift cut” Red Oak.
We’ll stain them Golden Pecan to match the floors while the island and lower cabinets will all get painted a dark blueish grey. I’ll contrast the dark lowers by using arctic white quartz countertops with a square eased edge profile and waterfall on one side of the island.
In fact the counters, appliances and even carpet upstairs are all waiting to go in as soon as the floors are done.

So you can see a lot was riding on the floor job coming out on time. After 2 days of sanding, the floor guys decided to apply the oil based stain when it was raining outside and 90% humidity.
It might have actually worked even though you shouldn’t stain in higher than 60% humidity, but they tried an advanced technique called “water popping” in which you wipe the raw wood with water to raise the grain just prior to staining.
This trick is normally reserved for trying to get wood floors to accept a very dark stain or hide scratch marks, in my case it wasn’t necessary since I’m going very light and Red Oak is the easiest material to work with. Soaking the floor with water combined with the high humidity trapped in the moisture under the oil based stain and it dried looking very blotchy.
I’ve been doing beautiful Oak floors for years and we never popped the grain, I wouldn’t advise anyone to try it unless you are going very dark or have an absolute professional that has experience with popping the grain doing the work.
Needless to say I hired a different company and we are sanding off all the stain and starting over. New 3/4″ Red Oak floors only have enough thickness to refinish about 6 times, its not the best scenario to re-sand new installs twice but they’ll look perfect when we are done and that’s what counts. More on water popping hardwood floors here.
It’s really frustrating to get slowed down at the end of a project, but its just part of the business and being able to react swiftly and find solutions will keep you moving forward.
We’ll see if this week works out a little better. See you soon with concrete pics and a complete kitchen. Have a Merry Christmas and thanks for following our projects!
by Tom | Dec 2, 2012 | San Diego Real Estate Market, South Park Modern Bungalow, Tile, Tubs and Showers
We are still making progress on the Modern Bungalow trying to wrap this house up, but with the holidays its been hard to keep up the pace. Since my last update inside we got the central air conditioning installed, hot water heater, red oak stair treads and risers, and all the electrical trim and fixtures. Custom tile job.
The fire sprinkler guy came back and trimmed out too, installing all the sprinkler heads and bell box. There’s nothing left inside except for the tile setting while I wait for another week for the cabinets to arrive and get installed.
The countertop fabricator is on standby to come right in after the cabinets, then its only hardwood floor refinishing and carpet in the 2 bedrooms. Garage door is also on order. I could have had it wrapped inside by now if I would have ordered cabinets before the drywall went up.

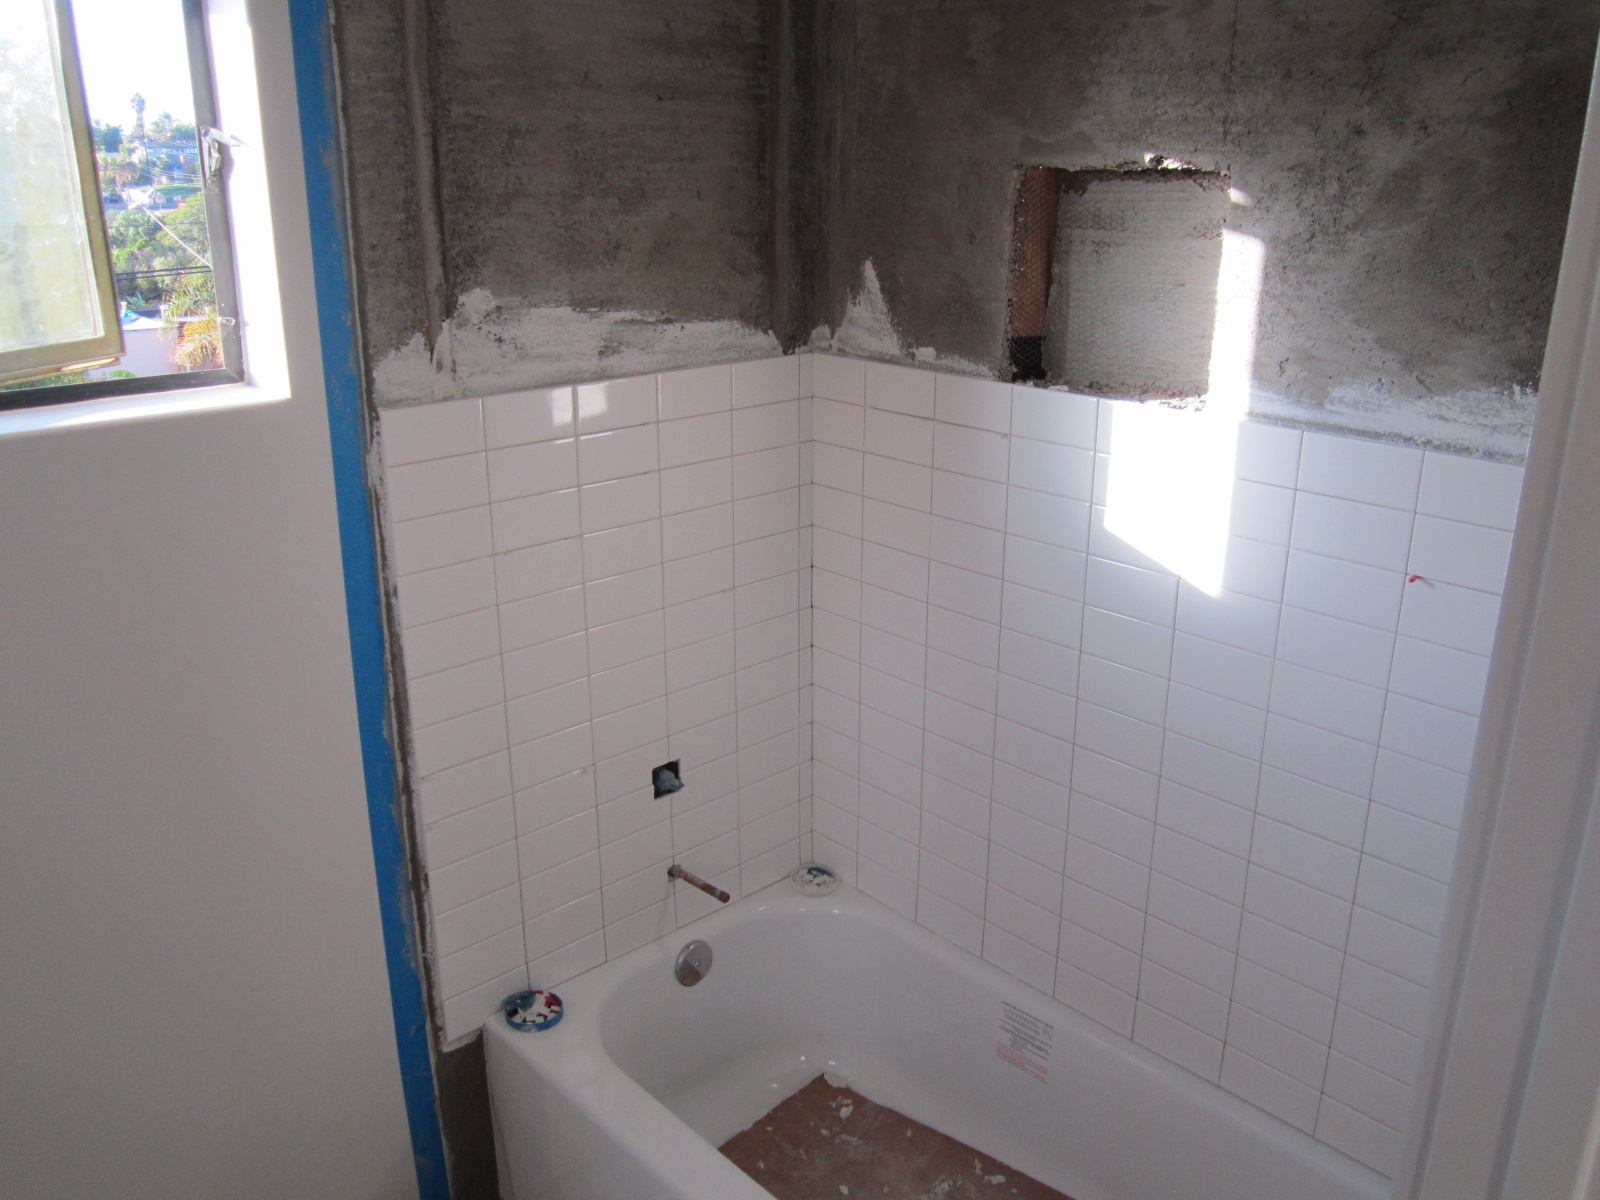
The new tile contractor I hired is done now with mud floating all the walls and getting into tile setting with his wife. This is the second husband and wife team we’ve had on this job, my exterior painters’ wife also was a painter. Mud set tile job is the best method and common in San Diego with real tile setters.
These ladies know what they are doing too, they are not just sweeping up! Instead of Hardi backer we opted for the mud float method where you do moisture barrier paper, metal lathe and then float out the walls with spec mix. The City comes and inspects paper and lath before you can start floating the walls. Mud set is definitely the way to go.
It gives a perfectly flat and plumb surface but definitely more work, he spent 4 days floating the walls with mud when I could have put up Hardi backer board in a few hours. The tile I went with in the master is a modern 12 x 24 light grey designer porcelain and I stacked it square to give a more clean minimalist and contemporary look.
In the hall bath I went with the 3×6 ceramic but also opted not do do a subway pattern so it will be more of a clean look with a period material, working well with our home design. Both bathrooms got great niches in the wall for soap and shampoo bottles.

I thought by now I would have been done with the house but things always drag out at then end, time is on my side with Christmas and New Years coming up now so we’ll move in after the holidays.
The San Diego real estate market is still very hot. No signs of slowing even through the typically slow Fall season. With only a little over 2 months inventory it is a sellers market again and we are seeing bidding wars and multiple offers in all price tiers.
I don’t see things changing through 2013 because interest rates will stay low and there’s no more huge waves of foreclosures coming as all the adjustable loans have reset already. Banks will continue to trickle out a few REO’s here and there, but even short sale volume is dropping fast. House flippers in San Diego will have a tough time competing with large, well funded buy and hold groups investing for appreciation.
Some flippers are moving up the price range and flipping million dollar homes where there is less competition. There’s a lot of investor and first time buyer activity and prices are being affected by it, October was up 13% from last year and in some areas have reached 2005 peak home price levels again.
by Tom | Oct 26, 2012 | Exterior Paint, South Park Modern Bungalow

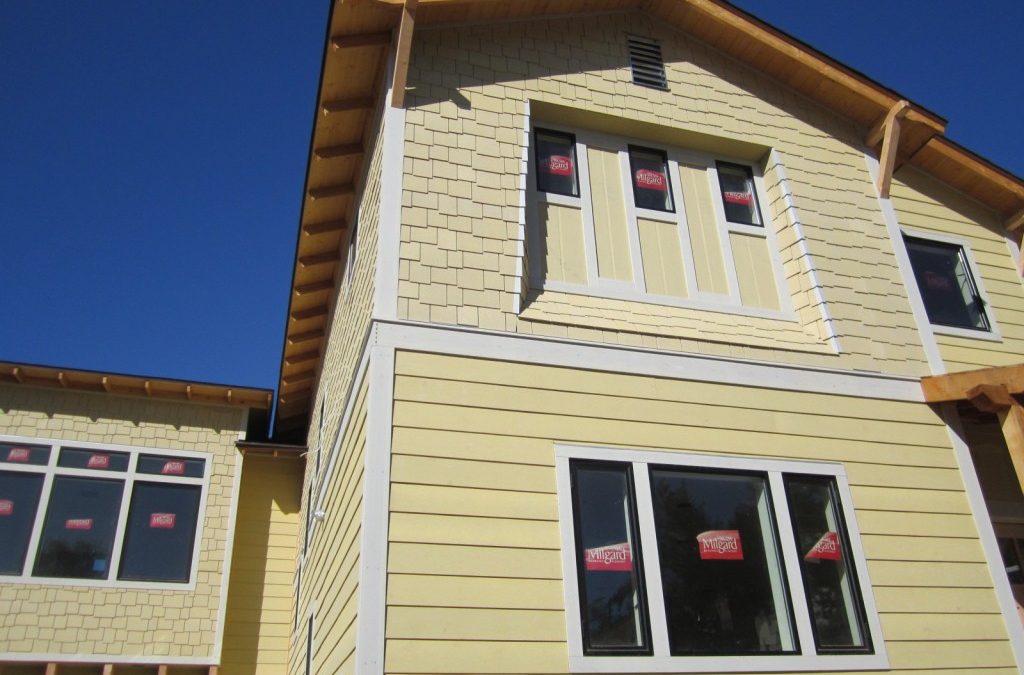
The James Hardi Siding on My South Park Modern Bungalow new build is finally ready for paint, take one last look because the next time you see her she’ll have 3 shades of green, grey rafter tails and cedar stained eaves. It took me and a helper just over 3 weeks to do all the siding, knee braces and corbels but it was worth it.

The James Hardi staggered shingle is very labor intensive but it paid off. It gives some great depth and adds texture while defining the pop out shed dormer too. You can see I separated the siding styles with a Hardi Trim 1×8.

We kept the corbels very simple to match the knee braces. I used Douglas Fir 4×8 and had it re-sawn at my local lumber yard. They will get a cedar stain to match the tongue and groove eaves and porch posts and beam. I’m really liking the big overhang look and all the open rafter tails, cant wait to see them individually painted.

I left the roof off the porch until after paint so I didn’t mess it up by walking on it. It’s going to be a Bronze standing seam metal roof that will be close in color to my aluminum windows. The James Hardi reveal for the 3 small bathroom fixed windows was quite challenging to pull off but it looks very organic. You’ll notice the angle changes from the top as you go down. We used aluminum corners made especially for the Hardi staggered shingle to hide the edge seams and protect it from moisture.

Here are the 4 colors we picked for the house, The body is 2 shades of green, Edgy Gold and Wheat Grass by Sherwin Williams. The trim is a very light green that almost looks white, its Ionic Ivory. The rafter tails, barge rafters and knee braces will be Benjamin Moore Cromwell Grey. All the tongue and groove eaves, corbels and porch post and beam will get that cedar stain. This is the first time we’ve stained the eaves on top of painted rafter tails so I’m pretty excited to see the results.

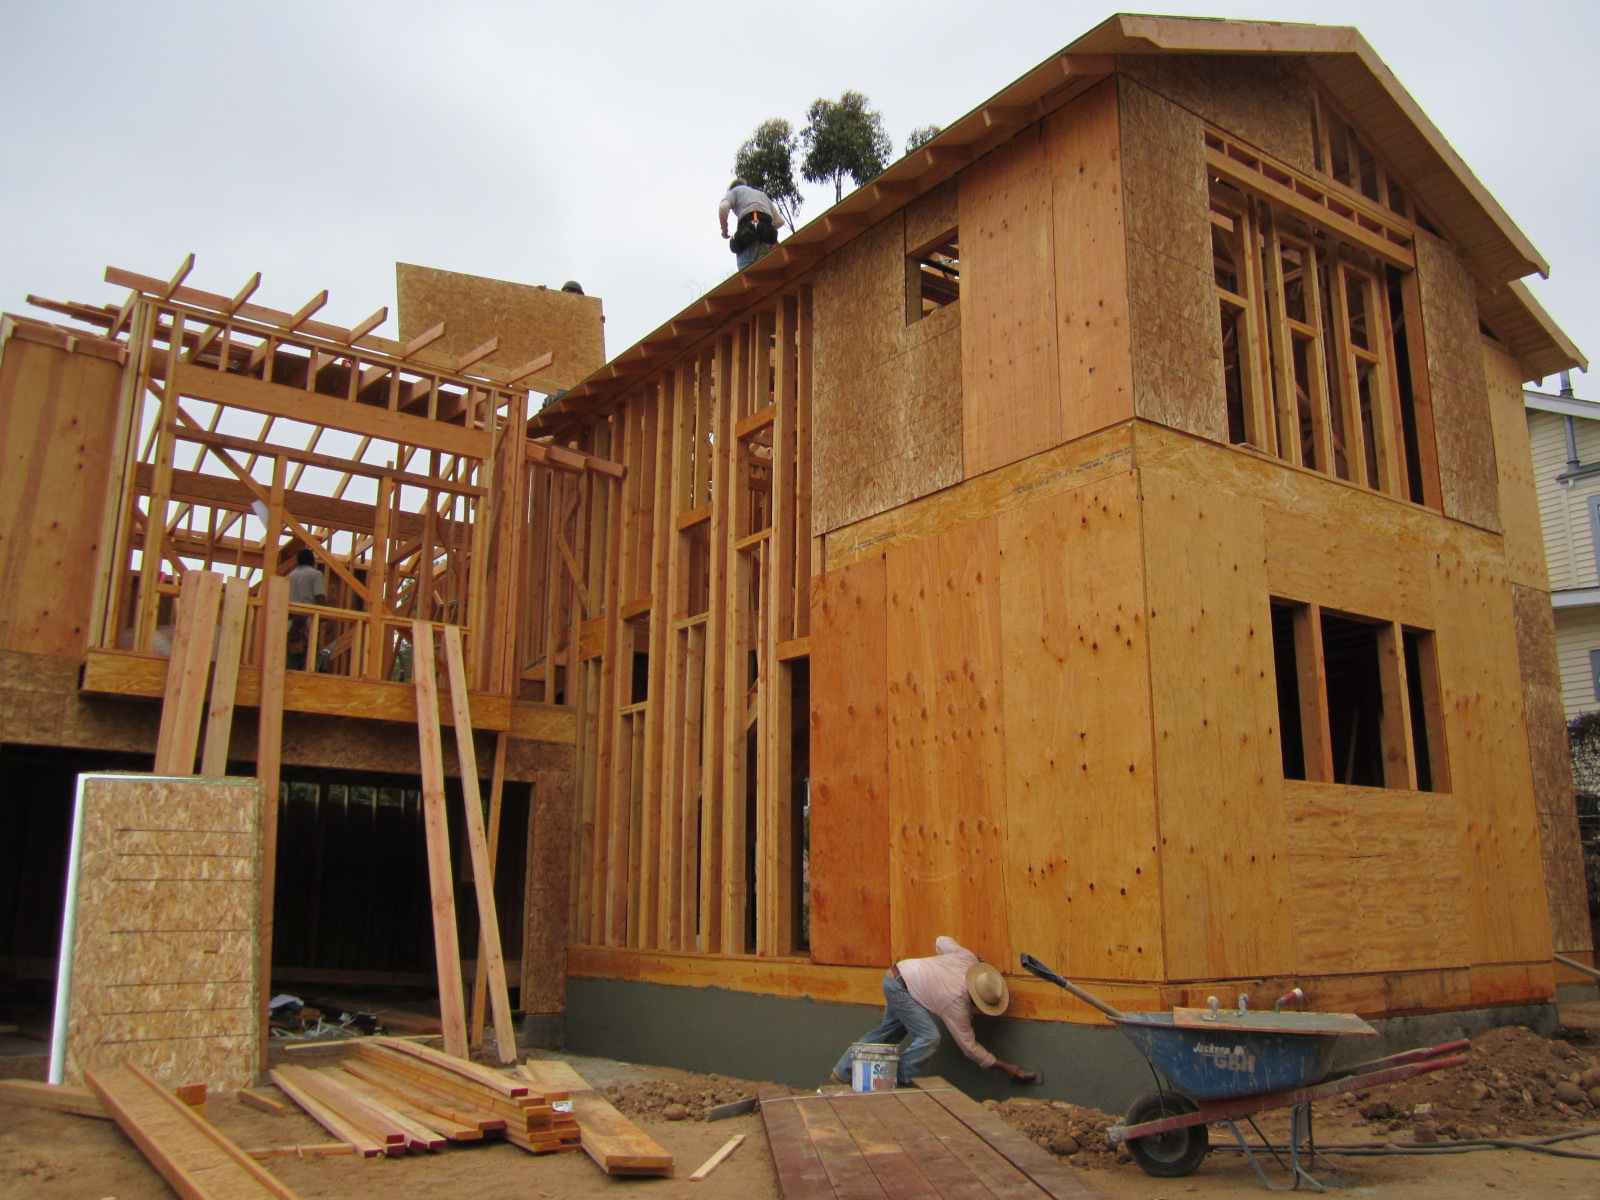
by Tom | Aug 25, 2012 | Framing, South Park Modern Bungalow

Week 3 got us pretty close to being done with the rough framing on the Modern Bungalow. We have a lot of features and angles with this house, its not just a big box so its taking a little longer than originally planned but well worth it. You can see we got the trusses up and the roof is almost completely sheeted. I left the rafter tails open with no facia board to replicate the craftsman bungalow style. The barge rafter also has a nice detail to add some interest.
The trusses were a breeze and went up really fast, but things slowed down we moved to the conventional “stick” framing of the roof line for the master suite above the garage. There are 3 more big parallam beams up there that allow us some really fun and unique ceiling angles, I’ll save that one to show you in the walk through video.

Under the eaves I used 2×6 tongue and groove on the 18″ rafter tails. It’s a great detail that many guys skip because it adds extra cost but its the right way to do open rafter tails and really also mimics the craftsman style. There are going to be several prominent Modern elements also to the home design, so I thought it was important to have as many period details alongside them to balance the blend.

For the roof sheathing I used OSB with a Tech Shield radiant barrier on the under side. It cost about 2 bucks more per sheet but it will be another huge energy saving feature of the home and save money on electric bills. Keeping your attic cool, and well ventilated is key to saving energy as we learned while building in Texas. This product blocks 97% of the radiant heat from entering through your roof sheathing.
Adding this radiant barrier will reduce attic temperatures by 30 degrees and result in a 17% savings in cooling costs. Before putting the roof on I have to get the nail spacing inspected by the City. You have to have a big ladder available but I don’t see this guy climbing up there its so high, it’ll be fun to see what he does.
My plumber got a great start too working alongside the framers, all the ABS waste lines and black iron pipe gas lines are done. Everything inside is real close and we even got the stairs finished.
The electrician and HVAC sub contractors can also start once all rough framing is totally done. There’s a cool new construction project in Encinitas called The Leucadia Collection I want to check out, similar idea to what I’m doing. We might drive by this weekend and see if they’ve started framing or have a model home up.


