Siding and Insulation

Siding and Insulation

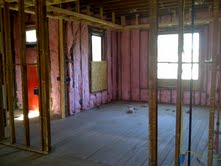
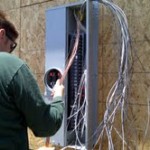
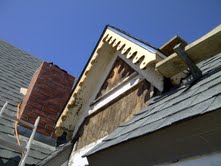
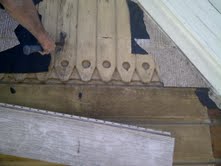
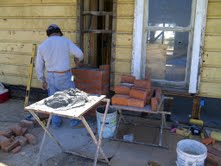
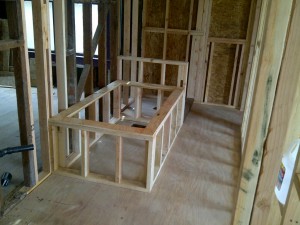
We finally passed all rough-in inspections and have now hung all the insulation. It took 2 tries with   my hvac sub contractor, he forgot to strap down the furnace and didn’t run hard pipe gas line through the unit so we had to call for a second inspection after having him come fix the two issues. These are small details which he should have caught but nonetheless we got all the signatures now on our inspection card and the City inspector is starting to warm up to me a bit now that he sees we know what we are doing. Right after passing I scheduled the insulation to be hung the next day and its called in for an inspection for tomorrow. I insulated the exterior walls and complete sub floor.  This is over and above what my permit called for but having all the walls opens provides such an obvious opportunity to save energy and provide someone with a product we can be proud of. I’m sure the new homeowner will unknowingly be thanking me every month when they pay their electric bill. With all the walls open I also ran Cat-6 and cable wires to all the bedrooms. We are in a heat wave right now in San Diego, I wouldn’t have wanted to be the guy under the house all day itching and scratching trying to hang this stuff. I jumped outside and started trimming out the exterior also, I re-framed the front porch and used 1×3 tongue and groove for the decking that’s historically correct. It’s a little more than I could have spent on another material but its details like this that will pay off in the end and especially since its on the front of the house which is always the most important to focus on.

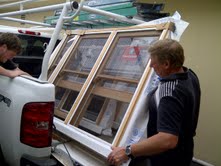
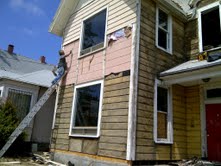
I also got some of my windows installed and I’m telling you they are so neat. TM Cobb makes a mighty fine wooden double hung window for historic homes. I’m totally happy and cant wait for the missing 2 to arrive with the Victorian front door so I can install them too.

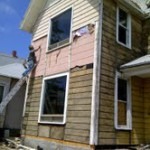
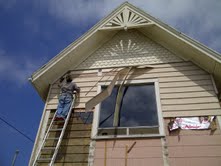
Here’s the bank of 4 windows on the study or optional 5th bedroom. This room is going to be killer with all the light that’s coming in. There was a lot of missing trim on the corners of the house that was probably removed when the metal siding went on. This stuff is easy to replace so we’ve been working our way around the house getting everything back to how it should be.

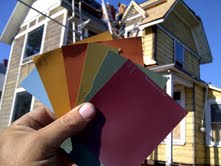
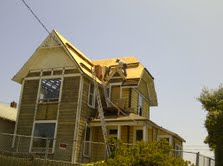
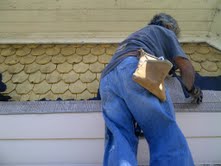
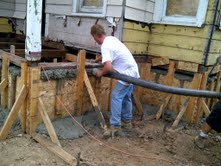
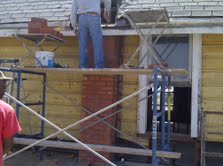
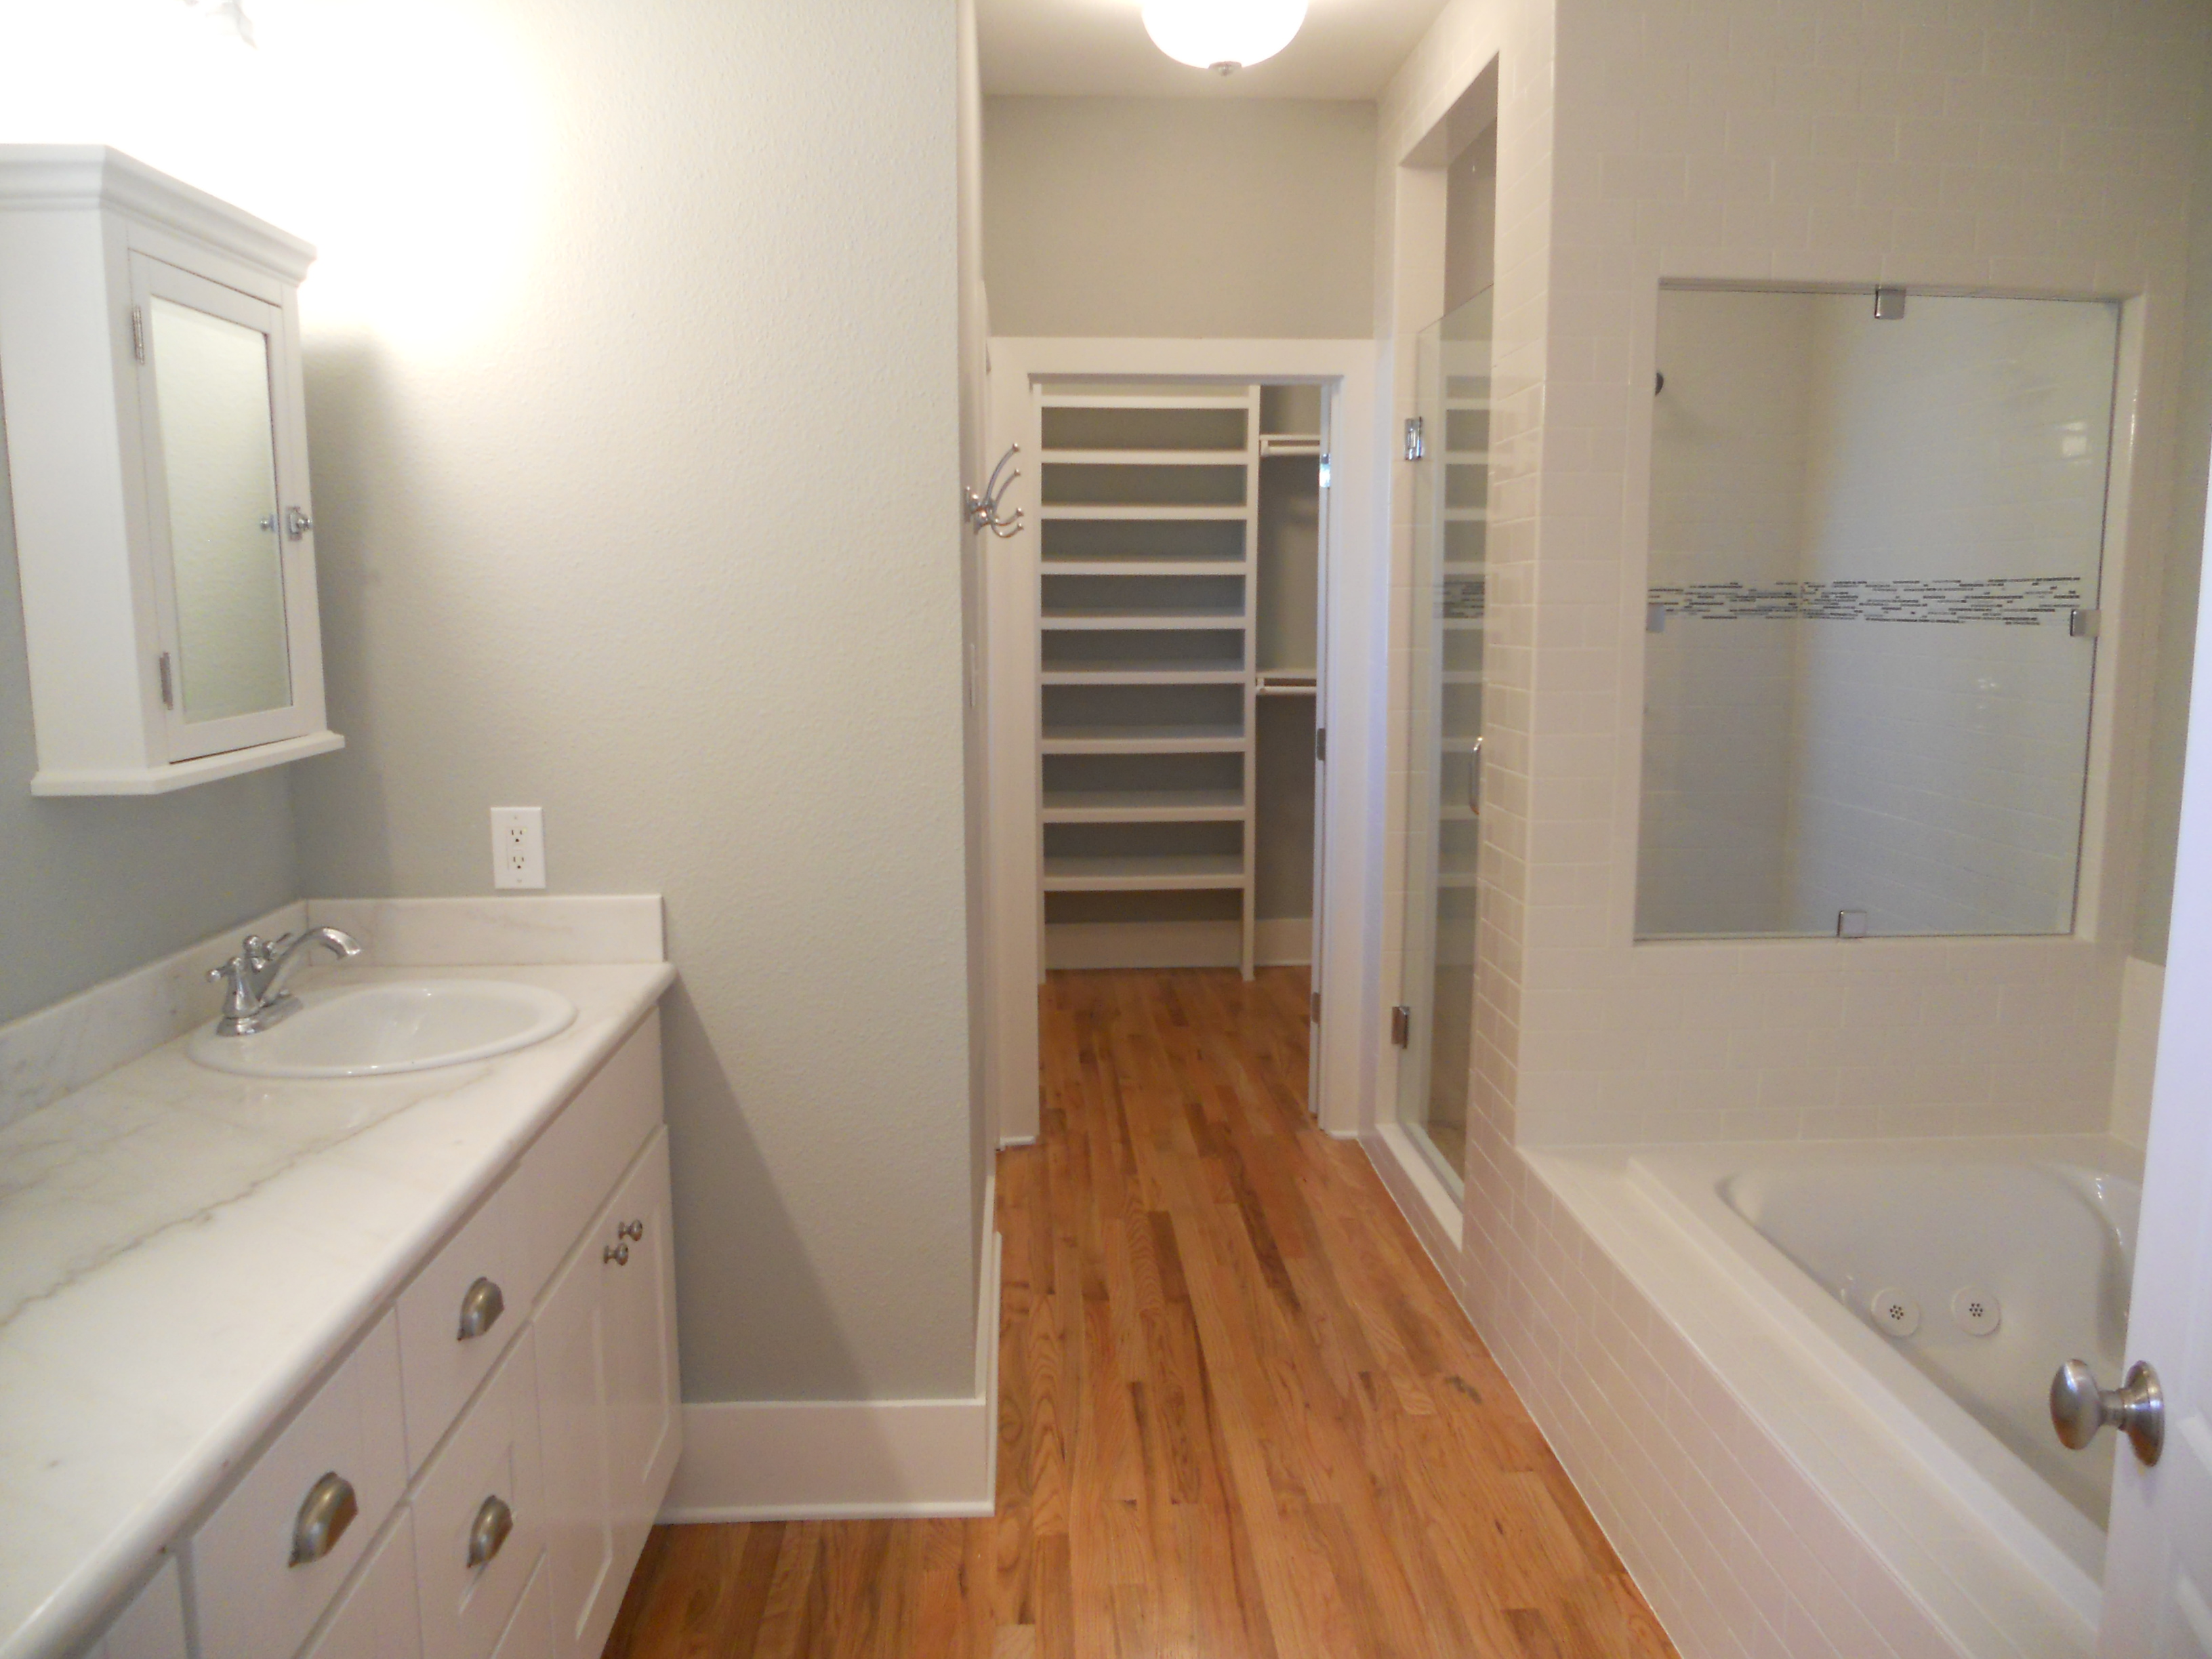
For the rear master suite room addition I purchased 10″ cedar beveled channel siding from La Mesa Lumber at $2.50/foot. This is the first time I’ve used it and boy is it nice. It comes pre-primed and its very straight, unlike the T117 siding I’ve frequently used on the Craftsman bungalows. We wrapped the room addition with Tyvek first of course and are now putting the 773 siding up. It’s great to use all the correct materials, in this case its costing me about $1400.00 for this siding but its going to be worth it. The historical review board here in San Diego wouldn’t even have let me use Hardi Siding if I wanted to. My colors were also approved this week so once the exterior trim and siding is all complete I’m going to have 2 crews in simultaneously painting the exterior of the house and hanging the drywall on the inside. Once the drywall is hung we have to get a nailing inspection where they verify spacing on the screws before we tape and float over it. Stay tuned, we’re going to see some dramatic changes soon. Also, Get on over to Biggerpockets.com and check out the video interview I did with Josh. I break down our business model and explain what kind of projects we look for.

Painted Lady has a New Hat

Painted Lady has a New Hat

This is the craziest roof I’ve ever done and it didn’t help that my roofer only saw it necessary to bring one helper. The pitch is a very steep 12′ on 10′ so it makes walking on it humanly impossible. Not to mention that there were 3 layers including the original wood cedar shake shingle that needed to be removed before we could even install the new roof decking made this an all consuming  job. It was slow going all week due to the steep pitch, they even had to hand carry the individual shingles up the 32′ ladder as we couldn’t load the bundles anywhere on the roof. It’s always good to pick your roof color to go with what exterior paint colors you’ve got planned, I can’t tell you how many times I’ve seen rehabbers make this crucial mistake, like a brown roof with a green house. I usually use the Owens Corning 30-Year Estate Grey but this time I went with something new its the Lifetime GAF shingle in the color called Slate. It’s mostly grey but with a hint of blueish green to make it look like slate on an old house. I think its going to tie in nicely with my paint color scheme. The roof on this house is real important to get right because its so visible. I took this opportunity to remake the historic scalloped decorative facia board also on the mini front gable and it came out sweet.

I also picked up my new wood historic style double-hung sashed windows by TM Cobb this week. These windows are so cool I wish I could replace all of them but the budget just doesn’t permit it. I’m putting in 8 new ones that are either unsavable or someone had already replaced with aluminum and refurbishing the rest of the original windows per the historic board guidelines. I cant put them in until I pass framing inspection. The electrician finished up this week so I’m now finally ready to call for rough-in inspections on framing, electrical, plumbing and hvac all at once. I think I’ve got 7 killer historic colors nailed down for the exterior, they are from the Sherman Williams Victorian House color collection. If the Historic Board approves it, I’ll be using a lighter green body, dark green trim, burnt orange accent on the sunburst, plum windows, medium orange for some accents, and light blue for the porch ceiling. There will also be a grey wood front porch to keep it period correct. These are some heavy colors but I think the Lady will hold them well as long as I use the accents sparingly and in the right places.

Hidden Surprises for Fathers Day

Hidden Surprises for Fathers Day

First and foremost, Happy Fathers Day to all the dads out there! The coolest thing we did this week at The Painted Lady was to remove all of the 1970’s Sears metal siding, of course we recycled it to help save the planet. This is the third time I’ve done this on a historic house but I’ve never removed 2 different layers to get down to the original wood. It’s always a gamble because you never know of the condition underneath but its been my experience that the asbestos or vinyl that’s on top actually preserves and protects the old wood and I’ve always been surprised to see near perfect siding with minimal paint jobs buried underneath. The more the homes get painted over the years, the harder it is to prep so in this case when I found the original yellow paint job with nothing cracking or peeling I was excited.  As we removed it, I found tons more hidden architectural details that these Victorian houses are famous for so I had to tell myself it must have been a pretty good salesman in a polyester jacket who was able to convince the homeowner with his “never paint your house again” pitch years ago to cover all the character of their house up. These cool details in the trim on the house are going to put my paint job over the top.

We also finally got the foundation poured, it took 2 full trucks with almost 20 yards of concrete total, as well as a pumper rig to fill up the spaces we left open around the house in the forms. Once filled we removed the forms while it was still green and hand troweled the finish. Its harder to work with but I used the 1.5″ rock aggregate although most guys use the pea gravel mix. Since the stem wall is 3 feet high in some spots I wanted it to be as strong as possible. This house isn’t going anywhere now for another 100 years. The Historical Review Board also asked me to replace the visable portions of the old chimneys in order to keep the house period correct. The old ones were crumbling and dangerous and I deleted them from inside the house to maximize my floorspace and intended not to re stack the exterior, they weren’t fireplaces inside but only basically a brick flue for stove exhaust. I found some used bricks on Craigslist and had them re-stacked just from the roof line up, I had to knock this out before the roofers show up on Monday.

I finally met with some sub contractor drama this week from one of my subs, I knew everything was going too good to be true. It’s crazy, but unfortunately I cant share the story although it involves the FBI. Hopefully he’ll have his helper finish up next week so I can call for rough in inspection and be ready to insulate and drywall after the new roof goes on.

Painted Lady Week 6

Here’s a walk through to show the progress of The Painted Lady at week 6. After waiting 4 weeks for historical board approval we finally got the green light so we started calling for inspections. It was quite interesting to say the least, initially we failed both the foundation and framing because of a few small issues. The trench for the foundation was 2″ too shallow,  the plans I drew noted a 24″ deep trench which is overkill because a 2 story house only requires 18″ deep footings but I wanted to beef it up a little.

I also upgraded the rebar size from the nominal 1/2″ as code requires to 5/8″ just do make it stronger. None of this mattered when the inspector showed up, he failed me anyway for lack of the 2″ to make it match what the plans called for. On the framing I was missing a few nails as the plans called for. I knew it wasn’t a big deal to make these few changes so it really didn’t bother me to fail. We fixed them quick and called the inspector back out 2 days later.

This is when I learned that nothing is going to just get signed off on that quick. When he arrived it took him all of about 10 minutes to measure the trench depth and check for the framing nails. He then proceeds to tell me that he can only pass me on the foundation but I’ll have to wait to pass on the framing. Really, didn’t you just look and see I made the corrections?  I’ve heard that they commonly show up and will only sign off on one or two things due to time restraints. The framing inspection includes about 4 categories; roof, floor, wall construction and sheer panels and could take up to 40 minutes in theory. Although he already verified everything was o.k. he only passed me on the roof portion “so I could stay busy and put my roof on.” 

As you can imagine there’s not much new construction going on, so last year half of the inspectors got laid off so I don’t think morale is at its highest level.  With half of the staff now the inspectors are covering twice the territories so there’s not much time when they show up. When dealing with inspectors always tread lightly, give respect and remember not to rock the boat. The best rule is to close your mouth and just listen.

This is exactly why most rehabbers look for the cosmetic flips or sneak by without permits.  Next week will be big, plumbing is now completely done, hvac done and electrical 75% done. Monday we are finally pouring the foundation after waiting forever for the City. Even with the slow downs I’m still pushing,  small set backs are just part of the business.

Several other cool things in TomTarrant.com land for this week;

1. There is a new contest at REIClub.com that I am nominated for. It’s another Best Real Estate Investing Blog shoot out. I’m up against some really popular sites so please go and cast your vote for me. Voting doesn’t begin until Monday, June 13 and goes through midnight on Friday June 17. This one is big, I could win a $250 Apple gift card which my wife would love. I need your help on this one guys, if you like the info I share here for you, please take a second and go vote for me!

http://www.reiclub.com/realestateblog/best-real-estate-investing-blogs-2011/

2. Joshua Dorkin over at Biggerpockets.com asked me to do an off the cuff Skype video interview for him where we’ll cover general real estate investing stuff and info about my house flipping business.  Make sure and go by his site next week and look for the interview. I’ll probably spill all the secrets you’ve been wanting to know.

http://www.biggerpockets.com/renewsblog/real-estate-interviews/

An Old Familiar Friend

An Old Familiar Friend

My new master bathroom in The Painted Lady is coming together nicely, it’s generous in size at 6′ x 15.’ Every time I frame up one of these tub boxes for the drop in tub I get a sense of Deja Vu, like seeing an old friend. It seems like just yesterday when I was doing a similar configuration on the Target House project only this time I’m just going with a standard 3′ high pony wall separating the tub and the shower instead of the full wall with the window opening, which will also also keep my tile price down. Every bathroom I design is a bit different, this time I’ve got everything in a line down the left hand wall and then the water closet at the end on the right. You kinda just gottta play with the space and do what works best. I’ve also got the whole right hand wall available for towel bars with this design, I’ve learned this the hard way after doing killer bathrooms and then finding out there no place for towel bars. The door swings in and onto the right hand wall, a 60″ dual vanity is first on the left, then the jacuzzi tub in the middle with a 3′ x 4′ shower at the back. I planned on dropping in a regular soaker tub with no jets to keep the budget down but after pricing them I could get the American Standard Plebe model 32″ x 60″ jetted tub for the same price of $399.00 so it’s a no brainer. There’s a window in the center of the back wall but I’ve got it temporarily sealed now.  Natural light is key for bathrooms, ideally I probably would have had another window in the shower and one in the water closet too but I’m trying to stay within budget so I’m forced to pull back in some areas. Code states that if you don’t have an opening window you must have an exhaust fan but I’ll have both.

As you can see we got started roughing in the plumbing this week,  I got a great quote of $4800.00 for the complete new system with gas lines, I supply the fixtures. I was also reminded that black ABS is used here in California and not white PVC as in Texas and on the East Coast for the waste lines.  I think PVC is better and cheaper but the only upside on ABS is that you don’t have to use primer with the glue.  ABS also gets brittle from UV exposure so it’s now common place to paint the roof stacks in California. I still like PVC better, even though it takes more time to install using the primer but I’m sure there’s some tree hugger issue with it so that’s why California uses ABS. After framing I always get the plumber in first before the electrician or hvac sub contractors, it works best because the vent pipes and waste lines are not flexible. I also wait until the plumber is done before putting on the new roof so we don’t have to butcher the new roof for the vent pipe roof jacks.  Your roof job comes out far superior if all jacks are in place before install, this trick came with experience.  After these waste lines are complete we’ll run the new black pipe gas lines and then finally the copper supply side lines. I’m still going back and forth with the San Diego Historical Review Board, they have made me change 13 items on my plans including window type, siding material, roof type & color and they even want to know the exterior paint colors. Furthermore, they are making me re-stack the exterior brick chimneys even though they’ve been eliminated inside the house. It’s really slowing me down because until I get everything approved from them I cant call for any inspections. As frustrating as it is, I’m stoked to learn exactly what needs to be done to pull off a renovation of this caliber in San Diego so I’ll chalk the delay up to contractor school.

Don’t forget the men and women who died while serving in the American military protecting our great country, this holiday weekend is not just all about beer and barbeques in the park. Have a happy and safe Memorial Day and God Bless our troops!