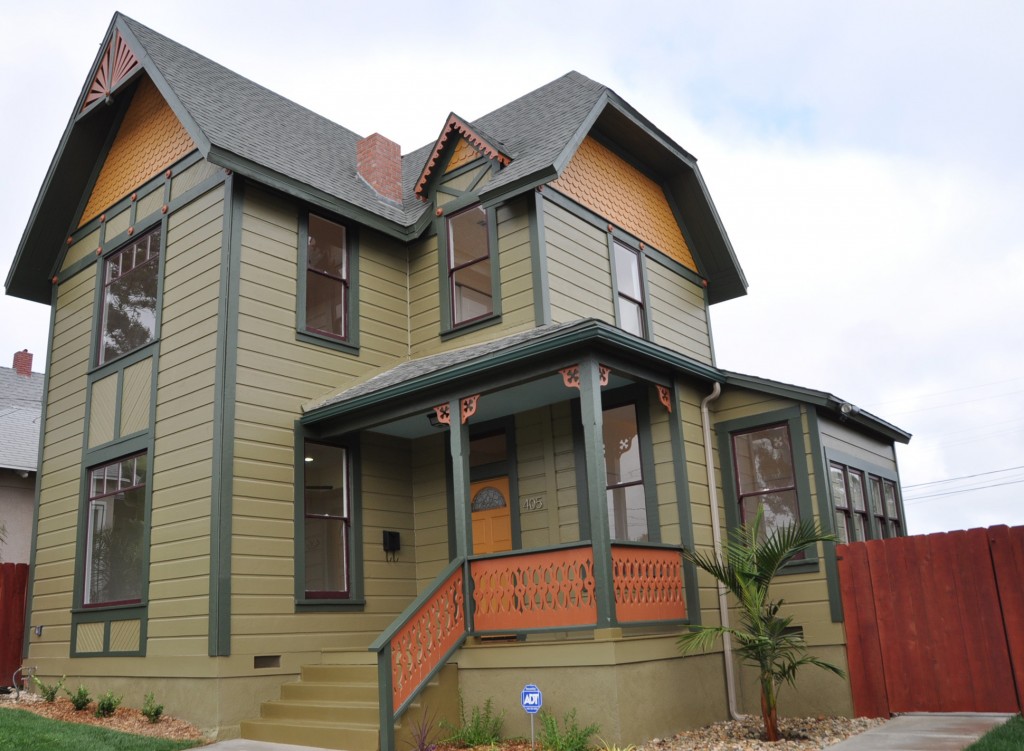
Got Trim!

Got Trim!

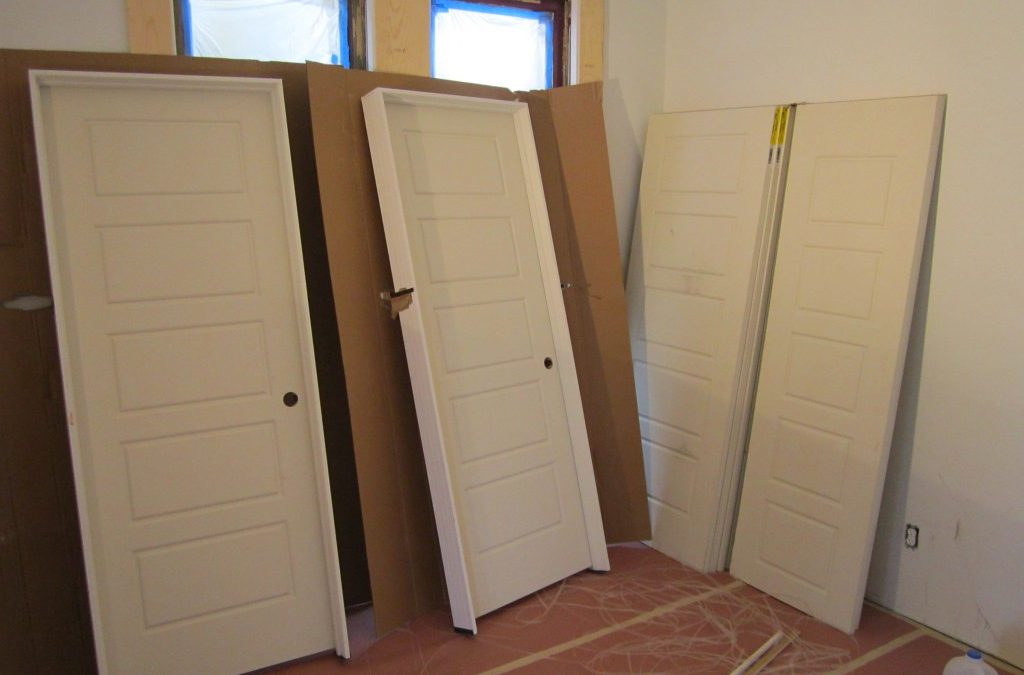
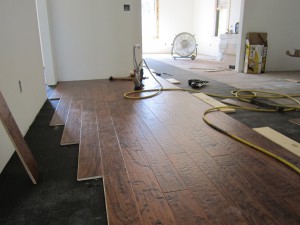
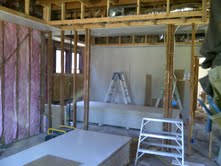
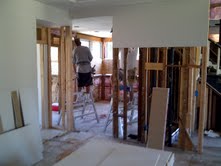
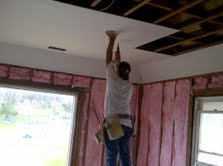
My special order interior doors from Home Depot came in so I jumped right into trim carpentry all week so I could get one step closer to painting the inside of the house. As you saw last week, my hardwood floors went in first, after protecting them with rosin paper I then trimmed out the entire house on top of the floors (baseboards, doors and door casings). That way you don’t have to notch the floors around door jambs and casings or undercut everything and you actually get the wood floors under the baseboards for a better finished product. I am using the same style door as on the Target House called “Riverside” from the Masonite Anniversary Collection. They are a 5-panel raised profile that look good with historic homes. These hollow core MDF doors are cool and are fit within my budget at $80.00 each for the complete pre-hung door with jamb. I also bought matching door slabs for the bedroom closet sliders so everything is consistent. You get to choose the finish on your hinges so I ordered chrome again so I can use brushed nickel knobs and still match modern chrome bathroom and kitchen hardware. They come pre-primed so after everything is installed, caulked and holes filled I will spray them along with all baseboards, window trims and closet shelving in place then lastly, apply the wall color with brush and roller.

For those of you do-it-your-selfers out there, here’s a good trick for ya. Install one side of the door casing with the door on the ground, then tip the pre-hung unit into place and secure it with the finish nailer. Afterwards go to the other side and install the door casing. This is way faster and easier than hassling with shims and battling it for an hour to get it straight. This is how the pro’s do it so give it a try next time you’re hanging doors and you’ll never use shims again. For my door casings I used square profile MDF in a 1 x 4″ to match the original period mouldings that would have been in the home.

I had to go with the huge 1 x 8″ baseboards on this house, I’ve used them before but with the giant room sizes and high ceilings it was a clear choice, not to mention its close to the size that were originally there. After asking all around town I finally found out where everybody gets their trims and its not Home Depot. Builders Moulding Supply in El Cajon has just about any style and size moulding you could want, that’s all they sell and you get it in bulk 16 footers right on spot from their warehouse at a price 30% less than the big box stores. I spent about $1,000 for everything I needed for my trim job minus the closet build-outs which I’ll use pine for because it seems more durable and holds more weight then the MDF. I was pretty happy to see that they also come pre-primed because my old supplier used to only offer them raw. After everything is painted I’ll peel up the paper on the floor and lastly nail in the shoe moulding on the bottom of the baseboards to complete the historic look I’m going for. We’re getting alot of attention at the house now, several interested parties stopped by this week asking when it was going to be done. I’m pushing for late September but its going to be tight especially because I’m doing an equity grab and not paying out a bunch of labor costs in the final stretch. I figured either way it wont be prime selling season so I might as well save the money. The good thing about the timing is that If I get into the next project soon I can stay busy this winter and hit the Spring selling season perfectly. There are so many things about this project that I write off to warming up in San Diego, I’m ready now to dial in my system on the next house. It’s been 100 degrees for months in Texas, it’s been nice to finally be home and we’re having fun!

Bold and Fresh

Bold and Fresh

It’s really nice to be able to try new materials when you are flipping houses, I’m really happy with the hand scraped and distressed hardwoods as an alternative to what style I usually use. In the big expansive space they look bold and fresh. With the large rooms and white walls I still get the expansive feel but with the warmth of the darker wood. Before nailing down the wood you can see I put down 15 pound felt paper as a moisture barrier. With one helper I installed 1400 s.f. in 3 days. Sub contractors were charging $2-3 bucks a foot so by doing this myself I shaved 3k in expenses. The walls are primer now so you can start to visualize how the white interior paint will look. I chose Benjamin Moore Cloud White and hopefully will get it put up soon.

We also installed the 2 new front fixed windows. I made some historic replicas with the mullion across the top. Now the house is finally aluminum window free and all evidence of the former owners 1980 remodel are removed except for the black interior paint on the staircase handrail which will disappear soon enough. My electrician stopped by and made up all the switches and receptacles so now I can have light inside while we paint. We also spent the majority of last week still re-hanging the original windows and trimming them out, there is so much little stuff to do it really seems like its slowing down but I cant pull in a bunch of subs because it will blow the budget so with the help of my right hand man we are tackling everything ourselves. I ordered the interior pre-hung doors so hopefully next week I can get them in and trim out the whole house with casings and baseboards.

Currently up on deck I’m planning on interior paint, tile and kitchen cabinets. From what I’m noticing on the streets it seems like the market is slowing down and inventory is not moving as quickly, I’m not really bothered by it because we have such a specialty project but if I was one of the high volume, run-of-the- mill San Diego house flippers I would be careful. Home prices are down 8% from last year so its extremely important to use recent comps when looking at investing in San Diego real estate. This is when quality over quantity pays off. We buy houses in San Diego and do the renovations ourself. Let us know if you are thinking of selling.

.

Victorian House Colors

Victorian House Colors

Of course its not done yet but we’re 90% there on our Victorian paint job and its really looking good. The steps and front porch will be green and all the windows are still missing the plum color but if you look closely you can see we put it up on one of the porch windows to get a visual. I still have to figure out which color I’ll bring down to the front door, the decorative brackets as well as the two-toned porch railing I’m still going to make. The last 2 remaining big aluminum windows on the front of the house are also getting changed out this week which will complete the package. I’ve got a guy hand making 2 custom big wood frame plate glass windows with mullions on the top. I honestly thought this color scheme might be too crazy but once it went up it didn’t look that loud at all. They are all rich tones and together work perfectly. The missing plum on the windows is really going to give it the finishing accent it needs. I love the way the sunburst, scalloped shingles and gingerbread all contrast on the green body and trim colors and the light blue front porch ceiling looks great with the greens as well. All the little details I fixed are really standing out now. Here are the 6 colors I used, all from Sherwin Williams Victorian House palette:

1. Body: Renwick Olive SW2815

2. Trim: Rookwood Dark Green SW2816

3. Accent 1 (gable shingles, front door) Rookwood Amber SW2817

4. Accent 2 (sunburst, brackets, porch, rosettes, porch detail) Rookwood Terra Cotta SW 2803

5. Accent 3 (windows) Rookwood dark Red SW 2801

6. Accent 3 (porch ceiling) Bluebird

EDIT 11/2011 If you want to see how the finished house looks here’s a link     https://tomtarrant.com/wp-content/uploads/2011/10/painted-lady1-1024×751.jpg

I bought the floors this week as well, they will be delivered Thursday and we’ll start installing them. I’m doing something different this time and mixing it up. I went with a more modern 5″ wide hand-scraped and distressed hardwood, kinda Jeff Lewis style from Flipping Out, and on my wall color I’m going to keep it white and clean, just softened up enough to make the white trim contrast. With the smooth hand troweled wall texture its going to look really modern and high end. I think that with the size of the rooms and the abundance of light coming in that these floors are going to be killer even though normally they are reserved for Tuscan or Old World interior designs. Your typical Red Oak flooring with the expansiveness of the space just wouldn’t have given me what I’m looking for.  And, at $2.60 / s.f. its more budget friendly compared to unfinished Red Oak at $1.99 plus another $2.00 to finish it. After all, the name of the game is to keep the exterior historic but have the inside modern and up to date. What do you guys think of the colors?

Paint on the Lady

Paint on the Lady

The painters I hired for The Lady turned out to be a little in over their heads. Throughout the week I found myself initially letting some poor prep slide, then finally by the end of the week I was actually showing them how I wanted things done and had my hourly helper doing their work. Since we had agreed on a contract price and not hourly, I told them it just wasn’t working out and I wanted to break up.

The straw that broke the camels back is when I had my guy re-sand a whole wall because they didn’t prep it good enough and then before we could even put some primer on it, they sprayed color right over the raw wood. I feel much better now after letting them go, me and my guy will probably just finish it off ourselves.

The paint job is real important on this house and as you know its all in the prep, but even though I had not planned nor budgeted for the caliber of work we’ve done in the past, it still needed to be better than what I was getting.  This is the first sub contractor who hasn’t worked out so I’ve been really lucky getting back here to San Diego and having to build a new team and at least the error is on something I can fix.

I am super excited with my colors, the first one we put up after primer is the dark green on the big eaves. Victorian color schemes are known for dark eaves and trim and lighter body colors. The pictures are large format again so make sure and click on them if you want to zoom in: )

The second color we sprayed was on the gable shingles. This accent color will also be carried down to a few other spots later. Notice the ornamental rosette discs I found online to replace what must have been there originally. When we pulled the siding off last month I noticed these circle marks and figured out what had been there years ago. These little details are going to pop after all the colors are up. I’ve got one more period detail big surprise with the front porch handrail, the house is looking really good now but only half way to the impact I’ve got planned!

The drywall crew is doing a great job and should be finished in a few more days. The hand troweled smooth texture is coming out perfect so that’s my good news for the week. Here are a few pics before the texturing went on, the huge tray ceilings are really dramatic. I also went with the new style “mini-bullnose” for the corners, its smaller than your typical rounded corner but very sharp and clean and usually reserved for high end custom homes.

My plan is to keep pushing on the exterior so we can get all the colors up before coming back inside to do window trim, interior paint and flooring. We had a good home sale a few blocks over, its another historic 2 story rehab, 500 square feet smaller and only a 2 bedroom went pending after only 5 days on the market for $425k. We’ll have to see what it closes for but I’m sure they didn’t take too much less with that short market time. This Grant Hill project will be one of the nicest historic preservations in the area.

Drywall and Exterior Prep

Drywall and Exterior Prep

After having 6-7 drywall contractors bid the Painted Lady I finally pulled the trigger. With the lack of new housing starts in this town a lot of the high volume big specialty crews are not around anymore. Of course there are drywall “companies” here but they all charge more than I want to pay. Any handyman can hang your drywall so it can be tricky to get a good price yet also get a good job, its one of the most important things to get right in order to have a nice finished product.  We always say you can only get 2 out of 3;  fast, good and cheap. It might get done fast and be cheap but it wont be good. It might be good and cheap but it wont be fast. Lastly, it might get done fast and good but it certainly wont be cheap!

In searching for drywall sub contractors I relied on referrals primarily. In our business we always break costs down to price per square foot on anything in order to budget for things. In Texas everyone used a labor price per sheet which was around 11.00. Here in San Diego all the contractors are using price per square foot and quoting .45 to .65 cents for labor which includes hanging, tape an float and texture. Out of all the rehabbers and other investors I spoke to nobody knew how much they were paying but just agreeing on one price.  Things they take into consideration are the ceiling height and any other details that might slow them down. Our house has 11 foot ceilings with trays downstairs and coves upstairs so it adds a lot of time to the job. While a lot of bids came in at .59 cents I ended up getting it finally from a highly recommended guy for .40 cents. Another thing that’s driving my price up is because I am going with a smooth finish texture to replicate the old plaster found in these homes originally. A quick light orange peel spray job would have been way cheaper but I couldn’t do that to this house. At 10,000 s.f. of drywall I’m paying $4k for labor. I’m pretty happy, the hanging crew is done now after 2.5 days with 5 guys and we have the inspection on Monday for screw spacing then Tuesday we can start taping.

On the outside of the house I stayed busy with recreating some more of the missing details that make this house so cool while the painters started prepping. The biggest thing was that the sunburst under the front gable was broken so we had to scale a 32 foot ladder and take it down to copy it. I made a sweet new one and got it back up there in place, its weird to think that the last person who touched this was over 100 years ago and nobody will touch what we did for probably another hundred years. I’m putting in a little extra effort to make sure the front of this house and all its historical little ornaments are intact. We installed the TM Cobb Victorian front door with stained glass window and rebuilt the original transom as well. I also hand made some cool brackets for under the front porch. Since the original ones were missing I used the mini gable facia for inspiration and came up with a heart-Celtic-clover design, they came out cool and are now in place. Its neat when the sun hits the front of this house all these details create shadows on the siding. I also made some fake scalloped shingles for the top of the mini gable that were missing. I cut them out of 1/4 plywood and even put grooves in them to make them look real, another small detail that will pay off. We are getting color on the outside this week, stay tuned to see some Lady paint.