Bold and Fresh

Bold and Fresh

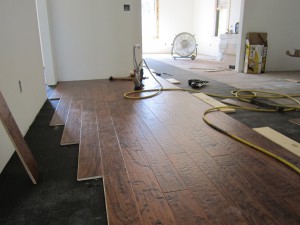
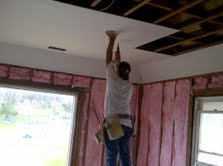
It’s really nice to be able to try new materials when you are flipping houses, I’m really happy with the hand scraped and distressed hardwoods as an alternative to what style I usually use. In the big expansive space they look bold and fresh. With the large rooms and white walls I still get the expansive feel but with the warmth of the darker wood. Before nailing down the wood you can see I put down 15 pound felt paper as a moisture barrier. With one helper I installed 1400 s.f. in 3 days. Sub contractors were charging $2-3 bucks a foot so by doing this myself I shaved 3k in expenses. The walls are primer now so you can start to visualize how the white interior paint will look. I chose Benjamin Moore Cloud White and hopefully will get it put up soon.

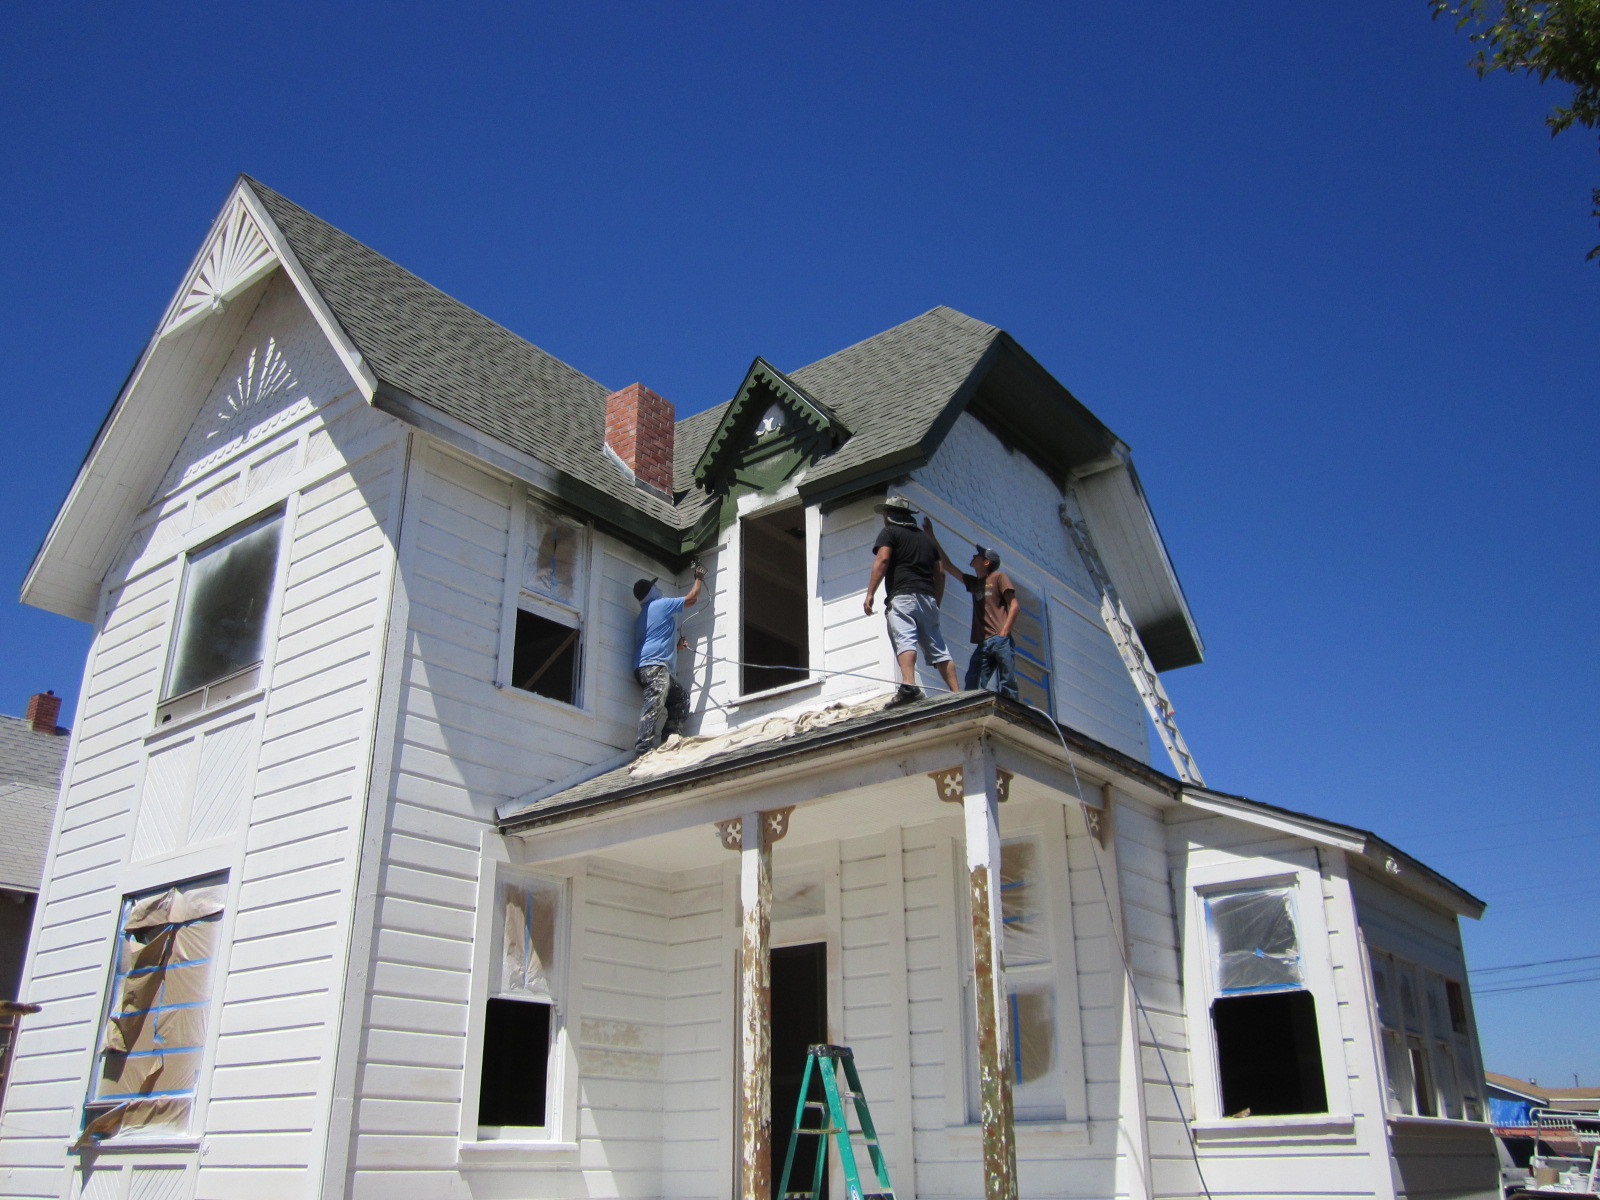
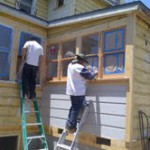
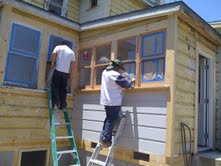
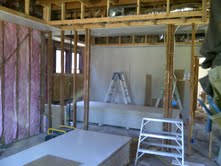
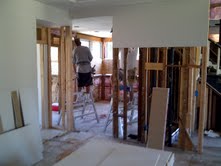
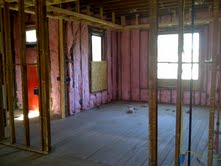
We also installed the 2 new front fixed windows. I made some historic replicas with the mullion across the top. Now the house is finally aluminum window free and all evidence of the former owners 1980 remodel are removed except for the black interior paint on the staircase handrail which will disappear soon enough. My electrician stopped by and made up all the switches and receptacles so now I can have light inside while we paint. We also spent the majority of last week still re-hanging the original windows and trimming them out, there is so much little stuff to do it really seems like its slowing down but I cant pull in a bunch of subs because it will blow the budget so with the help of my right hand man we are tackling everything ourselves. I ordered the interior pre-hung doors so hopefully next week I can get them in and trim out the whole house with casings and baseboards.

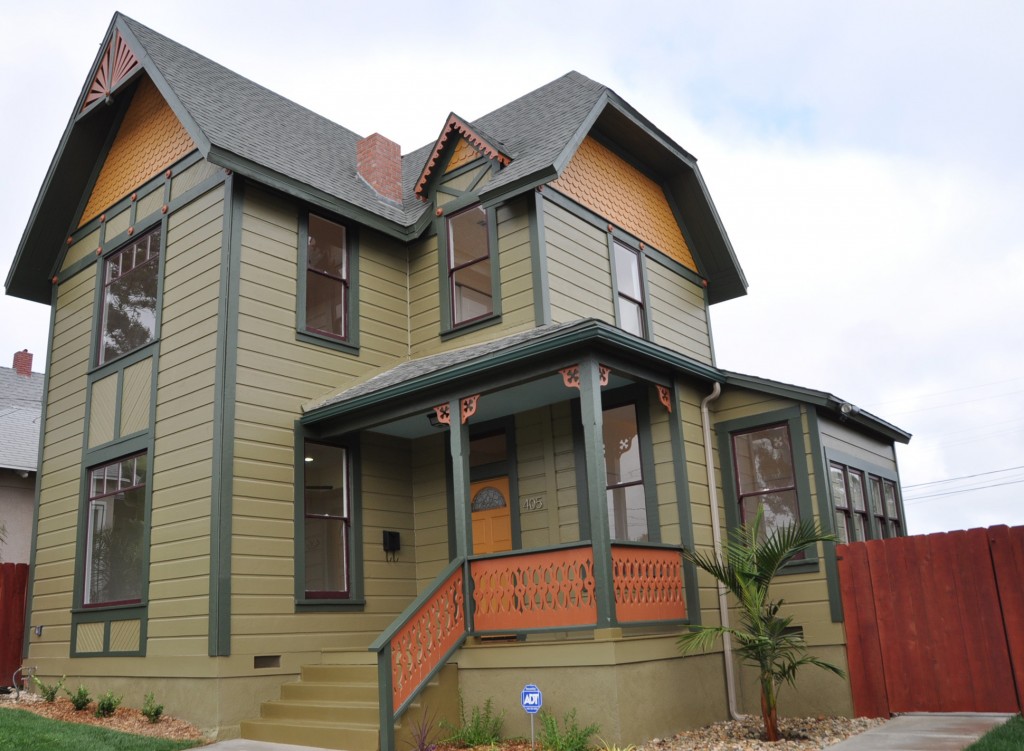
Currently up on deck I’m planning on interior paint, tile and kitchen cabinets. From what I’m noticing on the streets it seems like the market is slowing down and inventory is not moving as quickly, I’m not really bothered by it because we have such a specialty project but if I was one of the high volume, run-of-the- mill San Diego house flippers I would be careful. Home prices are down 8% from last year so its extremely important to use recent comps when looking at investing in San Diego real estate. This is when quality over quantity pays off. We buy houses in San Diego and do the renovations ourself. Let us know if you are thinking of selling.

.

Victorian House Colors

Victorian House Colors

Of course its not done yet but we’re 90% there on our Victorian paint job and its really looking good. The steps and front porch will be green and all the windows are still missing the plum color but if you look closely you can see we put it up on one of the porch windows to get a visual. I still have to figure out which color I’ll bring down to the front door, the decorative brackets as well as the two-toned porch railing I’m still going to make. The last 2 remaining big aluminum windows on the front of the house are also getting changed out this week which will complete the package. I’ve got a guy hand making 2 custom big wood frame plate glass windows with mullions on the top. I honestly thought this color scheme might be too crazy but once it went up it didn’t look that loud at all. They are all rich tones and together work perfectly. The missing plum on the windows is really going to give it the finishing accent it needs. I love the way the sunburst, scalloped shingles and gingerbread all contrast on the green body and trim colors and the light blue front porch ceiling looks great with the greens as well. All the little details I fixed are really standing out now. Here are the 6 colors I used, all from Sherwin Williams Victorian House palette:

1. Body: Renwick Olive SW2815

2. Trim: Rookwood Dark Green SW2816

3. Accent 1 (gable shingles, front door) Rookwood Amber SW2817

4. Accent 2 (sunburst, brackets, porch, rosettes, porch detail) Rookwood Terra Cotta SW 2803

5. Accent 3 (windows) Rookwood dark Red SW 2801

6. Accent 3 (porch ceiling) Bluebird

EDIT 11/2011 If you want to see how the finished house looks here’s a link     https://tomtarrant.com/wp-content/uploads/2011/10/painted-lady1-1024×751.jpg

I bought the floors this week as well, they will be delivered Thursday and we’ll start installing them. I’m doing something different this time and mixing it up. I went with a more modern 5″ wide hand-scraped and distressed hardwood, kinda Jeff Lewis style from Flipping Out, and on my wall color I’m going to keep it white and clean, just softened up enough to make the white trim contrast. With the smooth hand troweled wall texture its going to look really modern and high end. I think that with the size of the rooms and the abundance of light coming in that these floors are going to be killer even though normally they are reserved for Tuscan or Old World interior designs. Your typical Red Oak flooring with the expansiveness of the space just wouldn’t have given me what I’m looking for.  And, at $2.60 / s.f. its more budget friendly compared to unfinished Red Oak at $1.99 plus another $2.00 to finish it. After all, the name of the game is to keep the exterior historic but have the inside modern and up to date. What do you guys think of the colors?

Paint on the Lady

Paint on the Lady

The painters I hired for The Lady turned out to be a little in over their heads. Throughout the week I found myself initially letting some poor prep slide, then finally by the end of the week I was actually showing them how I wanted things done and had my hourly helper doing their work. Since we had agreed on a contract price and not hourly, I told them it just wasn’t working out and I wanted to break up.

The straw that broke the camels back is when I had my guy re-sand a whole wall because they didn’t prep it good enough and then before we could even put some primer on it, they sprayed color right over the raw wood. I feel much better now after letting them go, me and my guy will probably just finish it off ourselves.

The paint job is real important on this house and as you know its all in the prep, but even though I had not planned nor budgeted for the caliber of work we’ve done in the past, it still needed to be better than what I was getting.  This is the first sub contractor who hasn’t worked out so I’ve been really lucky getting back here to San Diego and having to build a new team and at least the error is on something I can fix.

I am super excited with my colors, the first one we put up after primer is the dark green on the big eaves. Victorian color schemes are known for dark eaves and trim and lighter body colors. The pictures are large format again so make sure and click on them if you want to zoom in: )

The second color we sprayed was on the gable shingles. This accent color will also be carried down to a few other spots later. Notice the ornamental rosette discs I found online to replace what must have been there originally. When we pulled the siding off last month I noticed these circle marks and figured out what had been there years ago. These little details are going to pop after all the colors are up. I’ve got one more period detail big surprise with the front porch handrail, the house is looking really good now but only half way to the impact I’ve got planned!

The drywall crew is doing a great job and should be finished in a few more days. The hand troweled smooth texture is coming out perfect so that’s my good news for the week. Here are a few pics before the texturing went on, the huge tray ceilings are really dramatic. I also went with the new style “mini-bullnose” for the corners, its smaller than your typical rounded corner but very sharp and clean and usually reserved for high end custom homes.

My plan is to keep pushing on the exterior so we can get all the colors up before coming back inside to do window trim, interior paint and flooring. We had a good home sale a few blocks over, its another historic 2 story rehab, 500 square feet smaller and only a 2 bedroom went pending after only 5 days on the market for $425k. We’ll have to see what it closes for but I’m sure they didn’t take too much less with that short market time. This Grant Hill project will be one of the nicest historic preservations in the area.

Drywall and Exterior Prep

Drywall and Exterior Prep

After having 6-7 drywall contractors bid the Painted Lady I finally pulled the trigger. With the lack of new housing starts in this town a lot of the high volume big specialty crews are not around anymore. Of course there are drywall “companies” here but they all charge more than I want to pay. Any handyman can hang your drywall so it can be tricky to get a good price yet also get a good job, its one of the most important things to get right in order to have a nice finished product.  We always say you can only get 2 out of 3;  fast, good and cheap. It might get done fast and be cheap but it wont be good. It might be good and cheap but it wont be fast. Lastly, it might get done fast and good but it certainly wont be cheap!

In searching for drywall sub contractors I relied on referrals primarily. In our business we always break costs down to price per square foot on anything in order to budget for things. In Texas everyone used a labor price per sheet which was around 11.00. Here in San Diego all the contractors are using price per square foot and quoting .45 to .65 cents for labor which includes hanging, tape an float and texture. Out of all the rehabbers and other investors I spoke to nobody knew how much they were paying but just agreeing on one price.  Things they take into consideration are the ceiling height and any other details that might slow them down. Our house has 11 foot ceilings with trays downstairs and coves upstairs so it adds a lot of time to the job. While a lot of bids came in at .59 cents I ended up getting it finally from a highly recommended guy for .40 cents. Another thing that’s driving my price up is because I am going with a smooth finish texture to replicate the old plaster found in these homes originally. A quick light orange peel spray job would have been way cheaper but I couldn’t do that to this house. At 10,000 s.f. of drywall I’m paying $4k for labor. I’m pretty happy, the hanging crew is done now after 2.5 days with 5 guys and we have the inspection on Monday for screw spacing then Tuesday we can start taping.

On the outside of the house I stayed busy with recreating some more of the missing details that make this house so cool while the painters started prepping. The biggest thing was that the sunburst under the front gable was broken so we had to scale a 32 foot ladder and take it down to copy it. I made a sweet new one and got it back up there in place, its weird to think that the last person who touched this was over 100 years ago and nobody will touch what we did for probably another hundred years. I’m putting in a little extra effort to make sure the front of this house and all its historical little ornaments are intact. We installed the TM Cobb Victorian front door with stained glass window and rebuilt the original transom as well. I also hand made some cool brackets for under the front porch. Since the original ones were missing I used the mini gable facia for inspiration and came up with a heart-Celtic-clover design, they came out cool and are now in place. Its neat when the sun hits the front of this house all these details create shadows on the siding. I also made some fake scalloped shingles for the top of the mini gable that were missing. I cut them out of 1/4 plywood and even put grooves in them to make them look real, another small detail that will pay off. We are getting color on the outside this week, stay tuned to see some Lady paint.

Siding and Insulation

Siding and Insulation

We finally passed all rough-in inspections and have now hung all the insulation. It took 2 tries with   my hvac sub contractor, he forgot to strap down the furnace and didn’t run hard pipe gas line through the unit so we had to call for a second inspection after having him come fix the two issues. These are small details which he should have caught but nonetheless we got all the signatures now on our inspection card and the City inspector is starting to warm up to me a bit now that he sees we know what we are doing. Right after passing I scheduled the insulation to be hung the next day and its called in for an inspection for tomorrow. I insulated the exterior walls and complete sub floor.  This is over and above what my permit called for but having all the walls opens provides such an obvious opportunity to save energy and provide someone with a product we can be proud of. I’m sure the new homeowner will unknowingly be thanking me every month when they pay their electric bill. With all the walls open I also ran Cat-6 and cable wires to all the bedrooms. We are in a heat wave right now in San Diego, I wouldn’t have wanted to be the guy under the house all day itching and scratching trying to hang this stuff. I jumped outside and started trimming out the exterior also, I re-framed the front porch and used 1×3 tongue and groove for the decking that’s historically correct. It’s a little more than I could have spent on another material but its details like this that will pay off in the end and especially since its on the front of the house which is always the most important to focus on.

I also got some of my windows installed and I’m telling you they are so neat. TM Cobb makes a mighty fine wooden double hung window for historic homes. I’m totally happy and cant wait for the missing 2 to arrive with the Victorian front door so I can install them too.

Here’s the bank of 4 windows on the study or optional 5th bedroom. This room is going to be killer with all the light that’s coming in. There was a lot of missing trim on the corners of the house that was probably removed when the metal siding went on. This stuff is easy to replace so we’ve been working our way around the house getting everything back to how it should be.

For the rear master suite room addition I purchased 10″ cedar beveled channel siding from La Mesa Lumber at $2.50/foot. This is the first time I’ve used it and boy is it nice. It comes pre-primed and its very straight, unlike the T117 siding I’ve frequently used on the Craftsman bungalows. We wrapped the room addition with Tyvek first of course and are now putting the 773 siding up. It’s great to use all the correct materials, in this case its costing me about $1400.00 for this siding but its going to be worth it. The historical review board here in San Diego wouldn’t even have let me use Hardi Siding if I wanted to. My colors were also approved this week so once the exterior trim and siding is all complete I’m going to have 2 crews in simultaneously painting the exterior of the house and hanging the drywall on the inside. Once the drywall is hung we have to get a nailing inspection where they verify spacing on the screws before we tape and float over it. Stay tuned, we’re going to see some dramatic changes soon. Also, Get on over to Biggerpockets.com and check out the video interview I did with Josh. I break down our business model and explain what kind of projects we look for.