We had a suprise visitor to the project, one of the 7 sisters who grew up in the house after her dad built it in 1923. She was amazed at what we were doing to the house and commented on the fact that the original stained glass windows were still present. Its hard to imagine a family with 7 daughters growing up in this modest 2 bedroom 1 bath bungalow. Pretty cool that she stopped by and brought me these old photos of the house, I wish I would have had them earlier when I was rebuilding the missing porch columns so I could have seen how it looked. When asked if I found anything in the attic, all I could really mention was the 1933 license plate that I found under the house, no doubt it was from her dads car. I’m glad she didnt ask if she could have it, I’ve really become attached to it. One of the other sisters is coming down from Dallas soon to also see the house. I had a cool idea for the marketing campaign when the house is done, I’m going to bring in a 1920’s Model T and park it under the porte cochere for the open house and mls pics.
House flipping tip of the week: Finding good contractors is a huge key to your success when flipping houses. There are 2 kinds of contractors, General Contractors, or GC’s, and Sub-Contractors. Most investors hire a GC who then brings in his own sub-contractors, oversees all their work and tacks on about 30% to your price.
This works great for people who have little construction knowledge or don’t want to spend the time ordering materials, checking in deliveries, writing checks on Fridays to subs and overseeing work.
My feelings are that most investors are doing this anyway and basically acting as their own GC, so shouldn’t be paying for one. Homeowners these days are even acting as GC to save the 30% and hiring subs themselves while building their new home.
There’s even a national company called U-BuildIt that sets you up with the list of subs for a fee. So, the key to the savings is finding the subs and managing them yourself. (more)
Another good tip for flipping is the get a mentor who can help you and you will fast track your career.
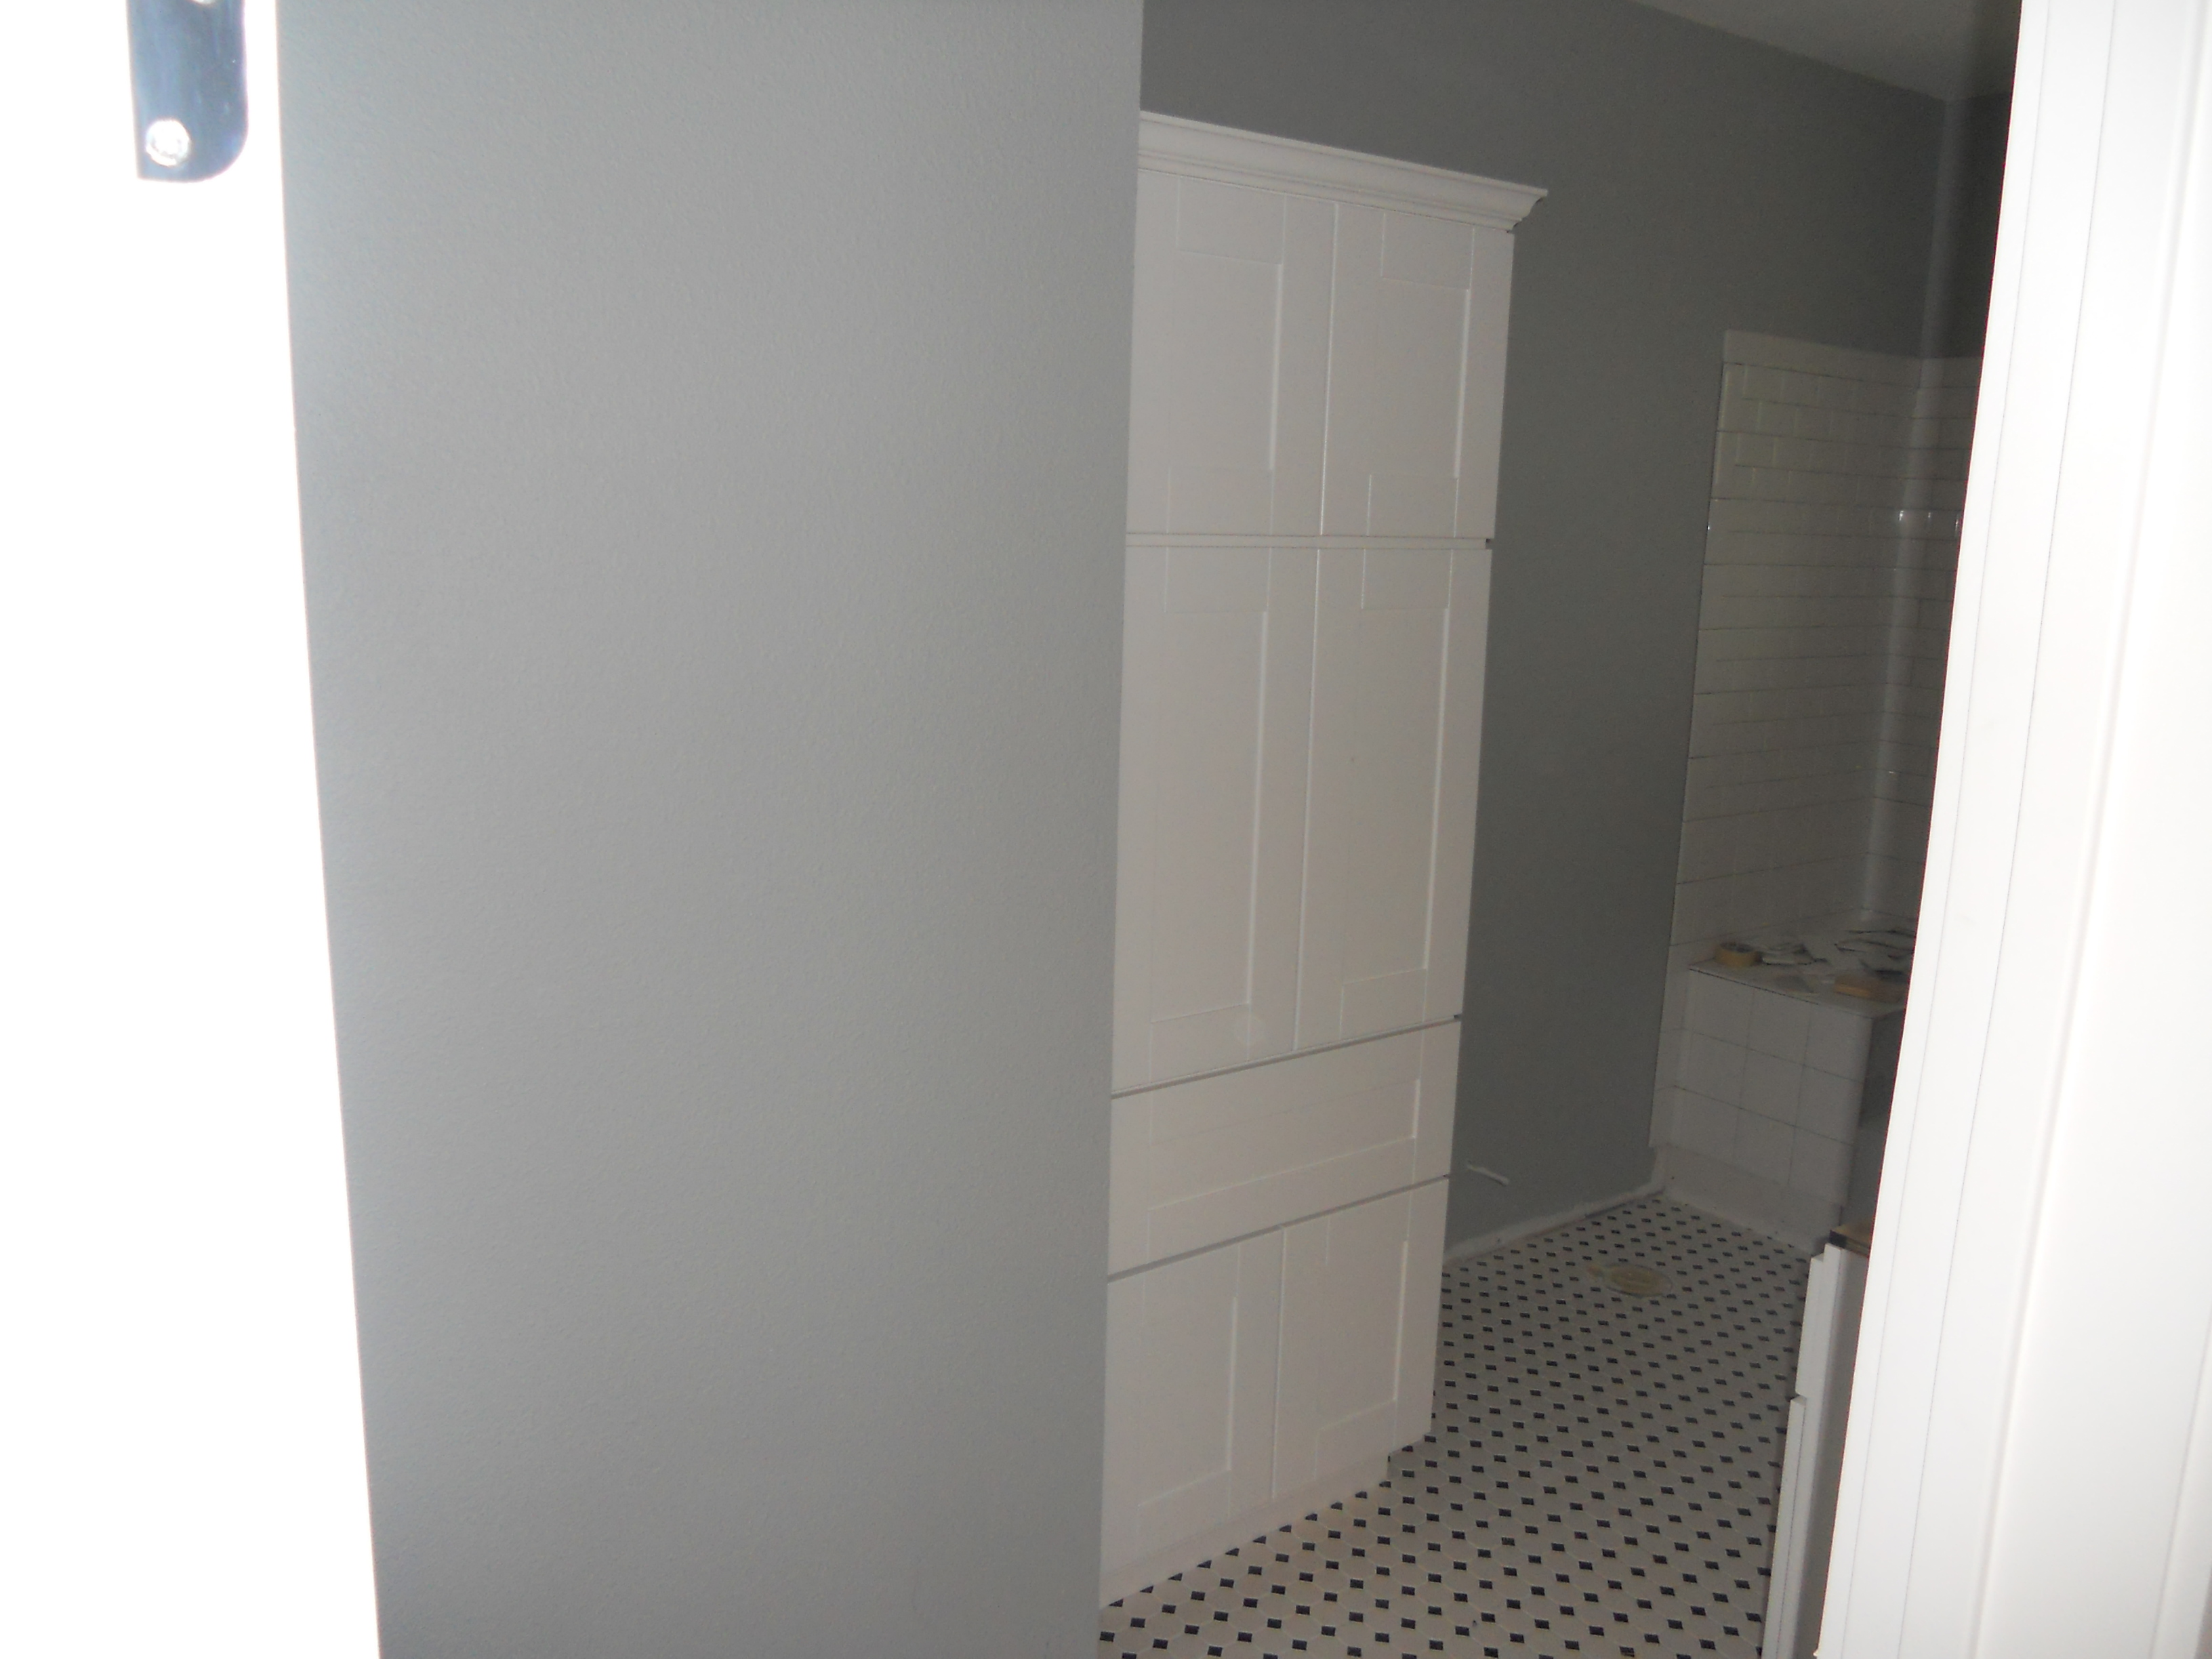
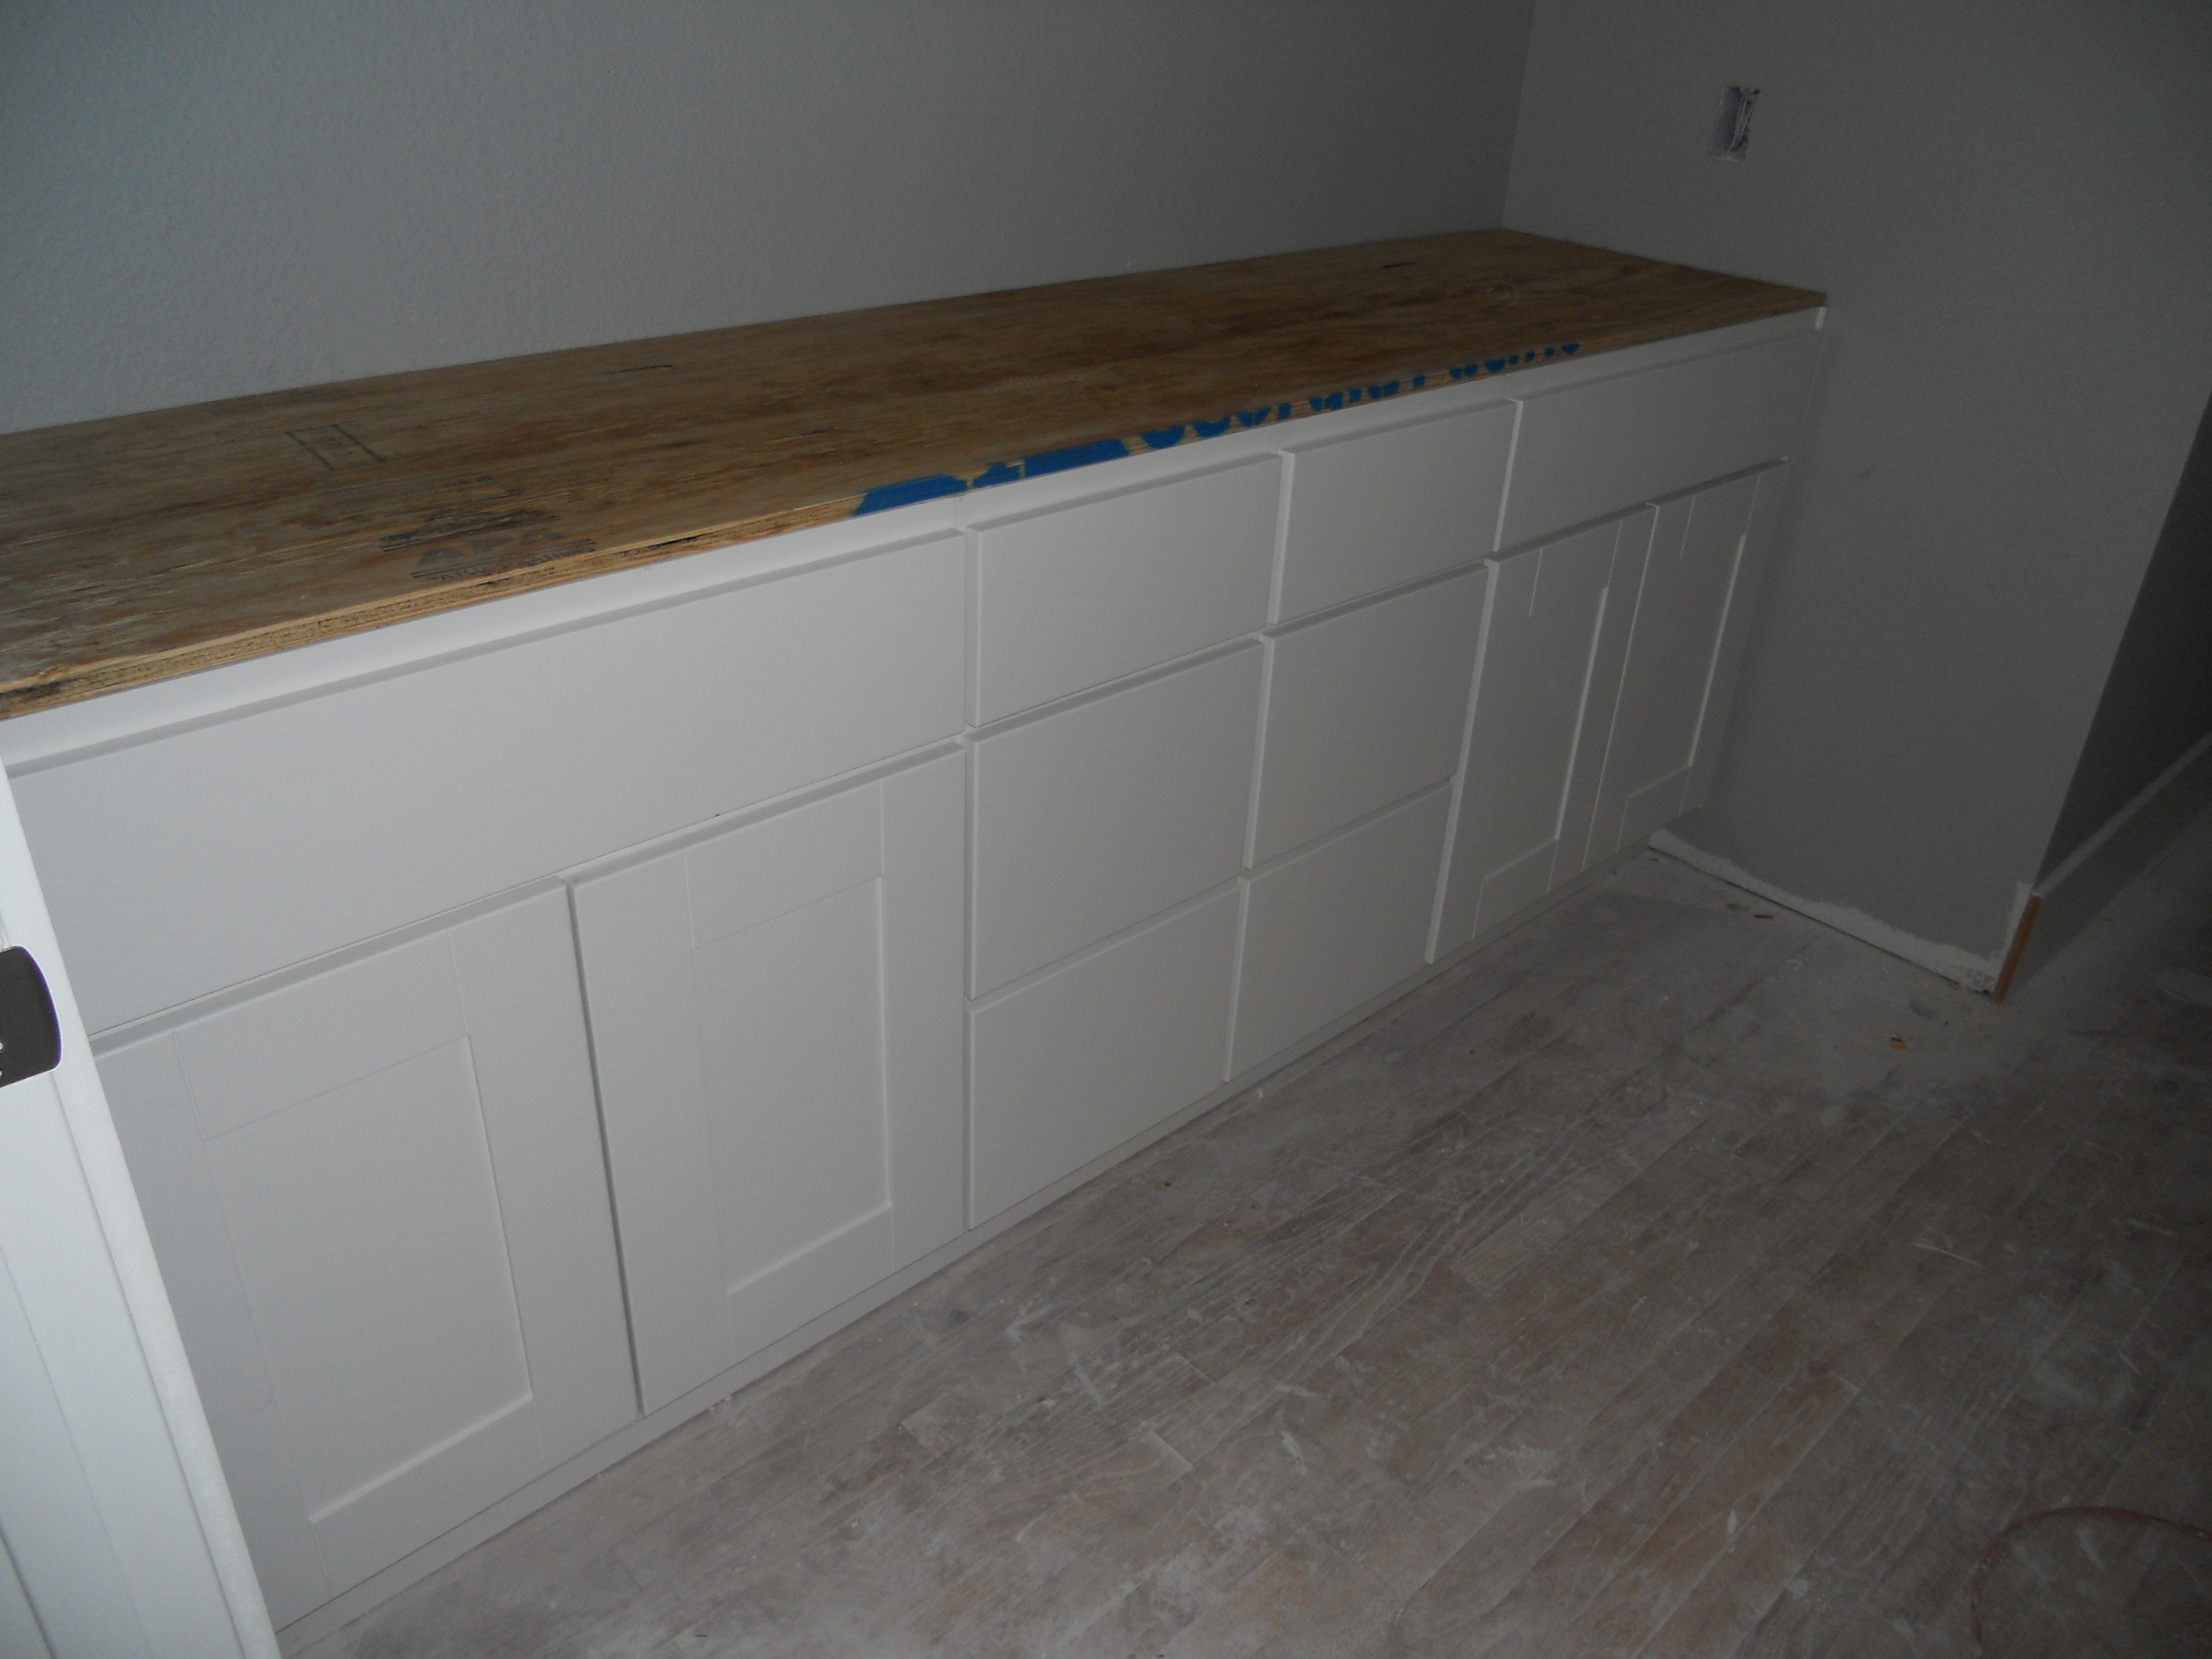
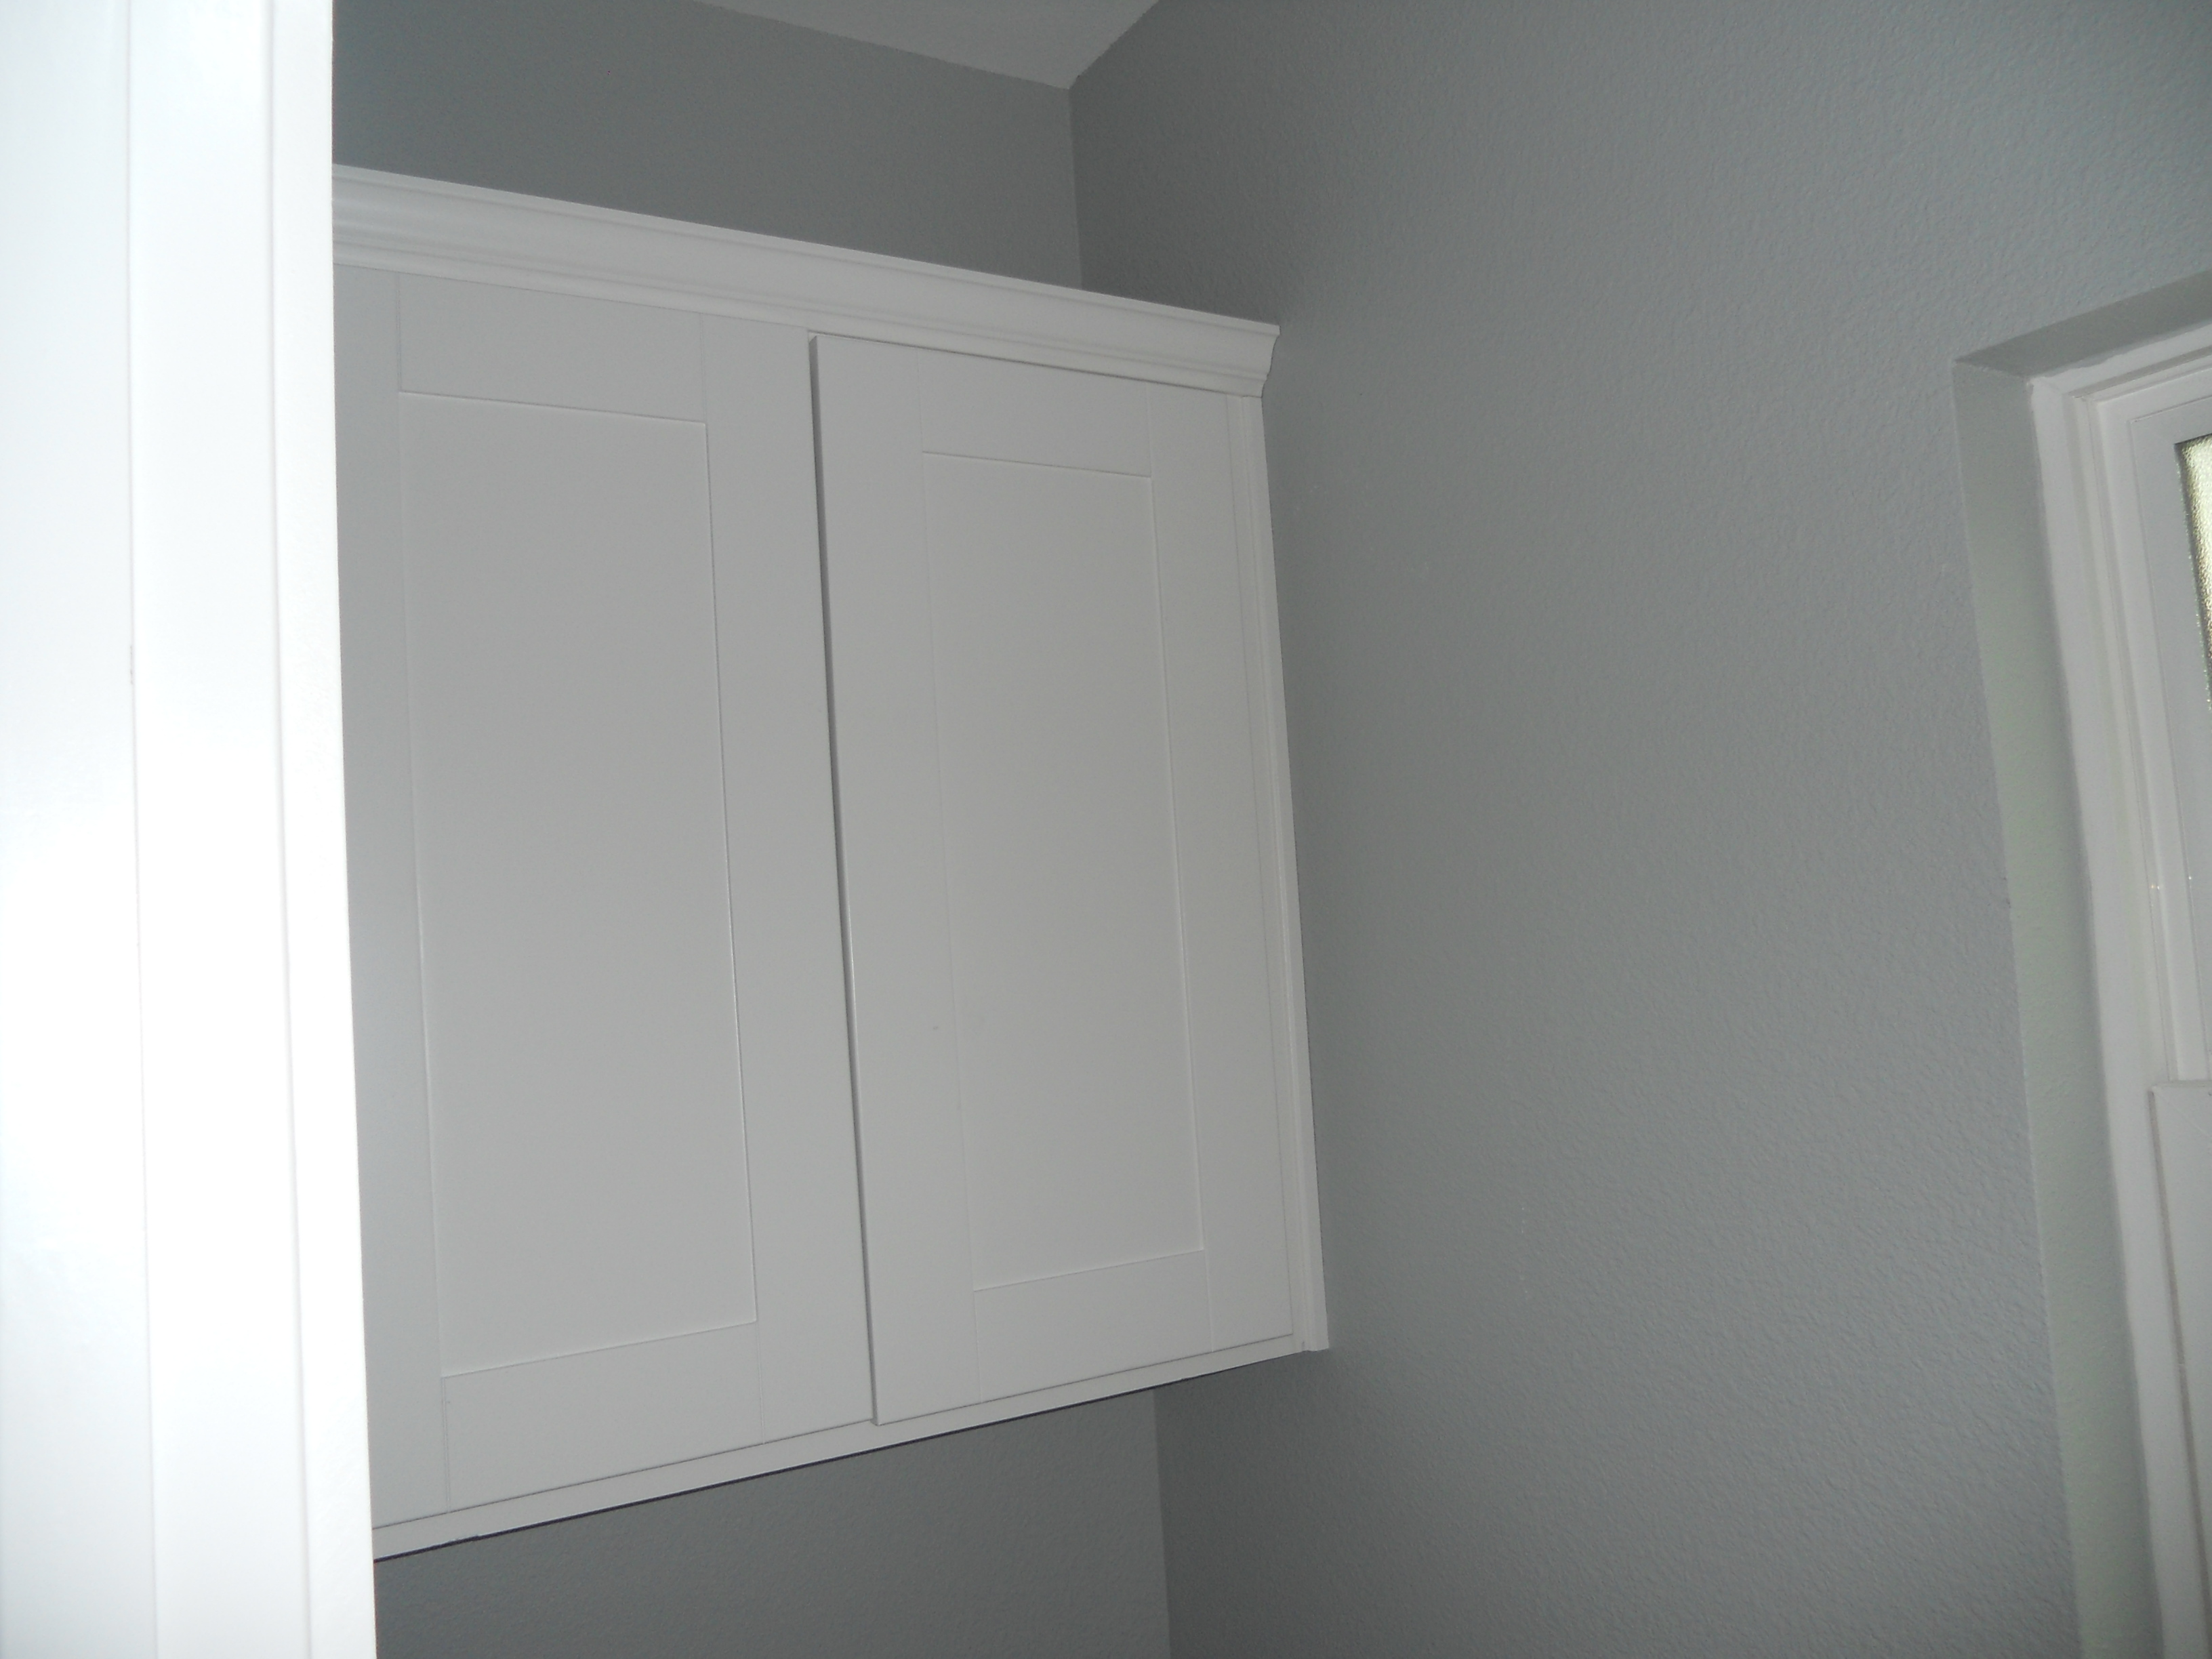
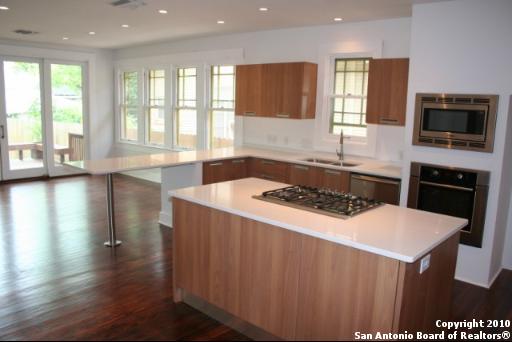
Kent Moore Cabinets delivered our millwork package this week and boy do the cabinets look good. I put a lot of weight on what goes in my projects these days. These cabinets are solid wood construction, full custom sizing meaning there are no filler pieces and the doors are Shaker style with a full overlay (3 still missing in pic). The drawers are full extension with ball bearing glides and euro hinges for the doors. I chose their color Snow Drift so it comes very close to matching my Sherwin Williams Snowbound trim color. The cabinets are installed in the entire house so everything matches the kitchen including utility room cabinets, bath linen, bath vanities and even a head knocker cabinet above the toilet in the water closet. Like most house flippers I used to go to Lowe’s or Home Depot and pick out some random bath vanities but this is really the right way to do a remodel. Having all your millworks match and being able to special order bath vanities that are 35 inches high really puts your remodel in another class. These new style bath vanities are kitchen height so you don’t have to bend way over to brush your teeth. The 42″ upper kitchen cabinets also have crown molding as well, it really plays well under the existing crown. After the truck delivers, you get an install crew that handles everything in 1 day, then followed up by a service rep who adjusts all the doors and touches anything up. Additionally, you get a 2 year transferable warranty on all the cabinetry to give to the buyer so this is also a great feature for a rehab. The entire package on this house was $7000. I’m really happy with Kent Moore, I’ll be bummed when I cant use them when we get back to San Diego. If you are in Texas and want to step your game up, call Melvin at KMC and tell him Tom sent you.
If you’ve been following our blog for a while you’ll be getting Deja Vu right about now. As you know we are big fans of, and love the Ikea Farmhouse Sink called Domsjo. For the price at $299 you cant beat it, compare elsewhere for $1000. Some people call them apron sinks due to the big white front band that stays visible after install. Additionally, it really goes well with the Arts and Crafts style homes we’ve been remodeling and it’s so big that if you have small kids it can double as a bathtub. Here in the 7th largest city San Antonio, they don’t have an Ikea so we have to drive up to the hipper Austin to get them. Maybe if it was called El Ikea they would have one down here. Before making the trek, we always check availability online to see if they have stock. I was struck with a mild panic attack when my favorite Swedish item didn’t appear on their website. We called and found out that in fact there were 7 left so I was relieved to say the least. This sink will work with a standard 36″ base cabinet after a little simple modification. Here’s an instructional video on How To Install Ikea Farm House Domsjo Sink in standard non Ikea cabinets.
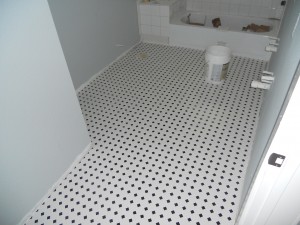
That’s what my tile guy heard earlier this week. As I mentioned on my last post, the Friday before he snuck off to another job and left his helper there to lay the bathroom floor. By the time I noticed this goofball had done such a crappy job I told him to pull it all up before the thinset dried. I called my guy and told him if he didn’t personally do the job that I would find someone else, I know this guy does excellent work but he’s bouncing around from job to job having helpers do most of the work now. As a general contractor (or homeowner acting as one) you constantly have to watch your subs, even if you know they’ve done great work before. Monday rolls around and who shows up? A different guy still. Of course I asked him where’s Elijio? Oh, he’s coming right now, he’ll be here in 10 minutes. By 1 pm he still wasn’t there so I told his worker “no mas trabajo aqui.” If I wanted to spend all day showing him how to lay it and looking over his shoulder I might as well do it myself, so that’s where I’m at. I got the hall bath floor re-laid after going and buying all new material with a cool ceramic hexagon/dot pattern in black and white. It’s really historic looking and since this bathroom is in the original part of the house and visable from the dining room I wanted to keep the feel. It’s grouted now so I’m ready to set the vanity and linen closet in there Monday when my cabinets arrive.
In the master bathroom I put down beach pebbles again but this time I found a better supplier. In the last house the rocks were different sizes and it felt odd on your feet, this time its way more consistent but you still get the spa therapy feel. I’ve started the white subway tile that will make up most of the tile job with the exception of a small amount of Carrera Marble for the accent liner in the shower and around the double-sided fireplace. I’m staying with all clean and sharp lines in the master bath, it’s going to be elegant and modern.
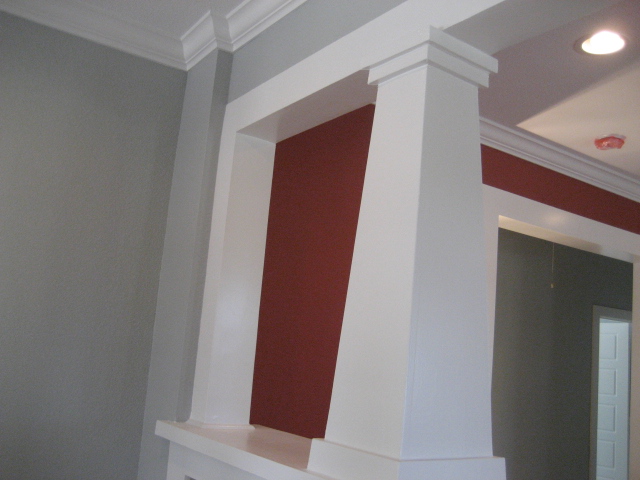
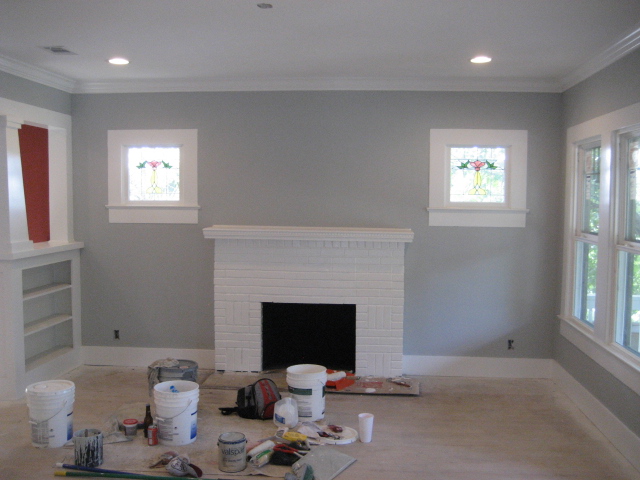
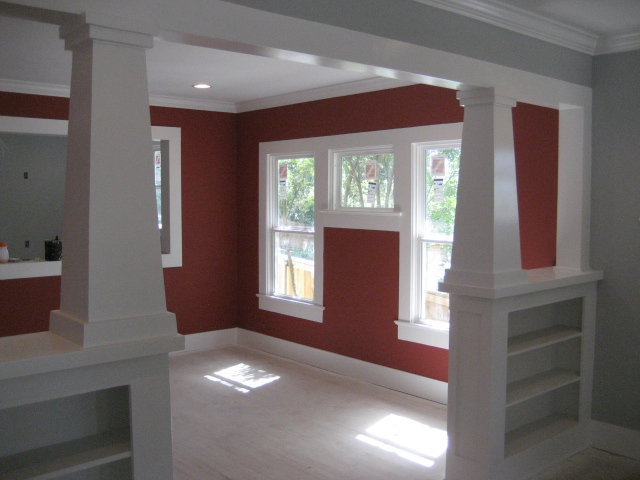
Lastly I re-tiled the fireplace hearth. We decided to go with a red to tie in with the dining room wall color and also match the historic stained glass windows above. They are 4″ ceramic, laying them was the easy part, first I had to demo all the old pieces and then float it out with mortar so I had a smooth surface for the new tile. The dark red looks killer, all I need to do now is install the oak transition pieces for a border before the hardwood floor guys start refinishing.
We are known for the attention to detail in our rehabs. Here’s a tip that a lot of flippers are blowing it on and its really inexpensive to correct. A long time ago we became conscious of the fixtures and finishes we were choosing for the rehabs, and how to use them correctly. Every house we do now we chose a finish for the hardware and keep it consistent throughout the whole house. Oil rubbed bronze (ORB) looks great with travertine and typical tan flip house colors. Brushed nickel looks clean and modern and goes with everything. Nobody uses gold, don’t even think of going here. Chrome is usually reserved for modern style homes. If you are going to use oil rubbed bronze for instance then make sure you buy ORB shower trims, ceiling fans, faucets, cabinet pulls, door knobs and hinges for your doors. Everything should match. Sounds basic right? You would be amazed at how many flips I’ve walked through that have gold door hinges, brushed nickel door knobs (yes, on the same frickin door!) and then ORB ceiling fans. This is a total rookie move and will cheapen the look of your rehab, I’m just sayin’ with a little planning and about $100 bucks for replacement door hinges you can bring a way better product to market and see the results at closing. All prehung doors at Home Depot and Lowe’s come with gold hinges, not sure why. What’s happening is that investors who are not contractors themselves and just hire out all their work, don’t have the eye for detail so they don’t get changed out. We don’t buy our prehung doors at the big box stores anyway and actually get to chose the hinge finish they come with, so before painting I usually put “dummies” on and then switch them back after everything is done. I keep this box of paint covered dummies and reuse them on every house. Additionally, I don’t care how good you are at taping, there’s no better look than crisp new hinges and knobs with no over-spray or drips on them. A lot of new home builders are actually spraying over the gold hinges when they paint their trims, this is a big no-no also as the paint will surely scratch off eventually. Take a bit of advice from me please, change out your hinges guys and reap the rewards!
For this house we chose chrome door hinges with brushed nickel door knobs. All the faucets, cabinets pulls etc will also be chrome, this is the only instance when you should mix two finishes in a house unless you are doing a “theme” room as we’ve also done in the past.
The interior paint job is done now. Pedro J. want to see more pics, here ya go Pedro glad to oblige. Came out incredible. In other news, I made my tile guy rip out most of his work and start over. If I wanted an average job I could have done it myself. The part he did came out killer but he snuck off to another job and let his helper take over and I was busy painting and didn’t notice. Sneaky. You gotta watch these guys. When the tile gets done it’s Cabinets, counter tops, floor refinishing and then appliances.
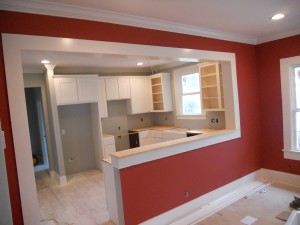
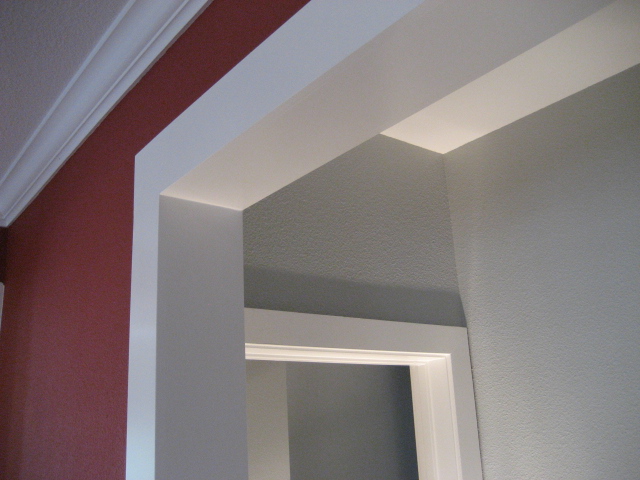
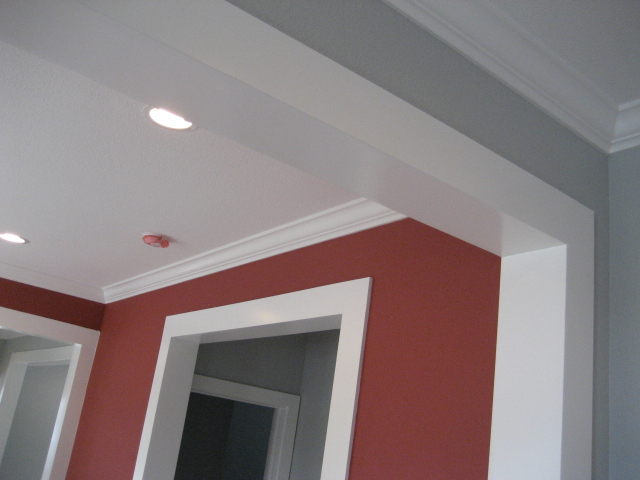
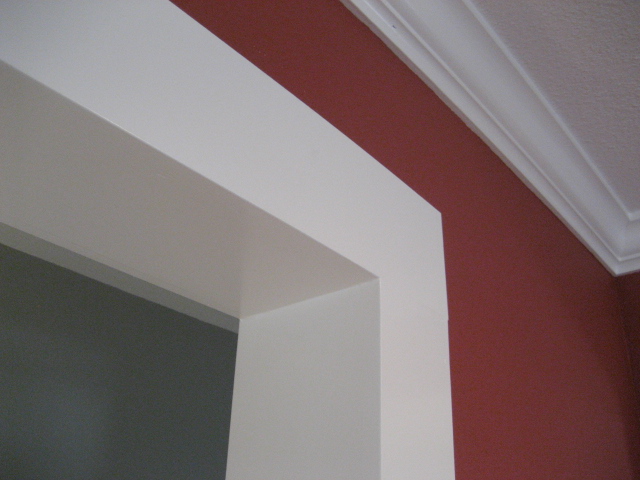
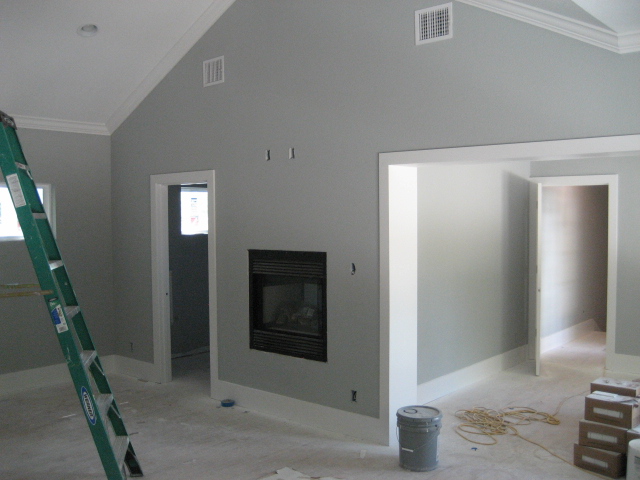
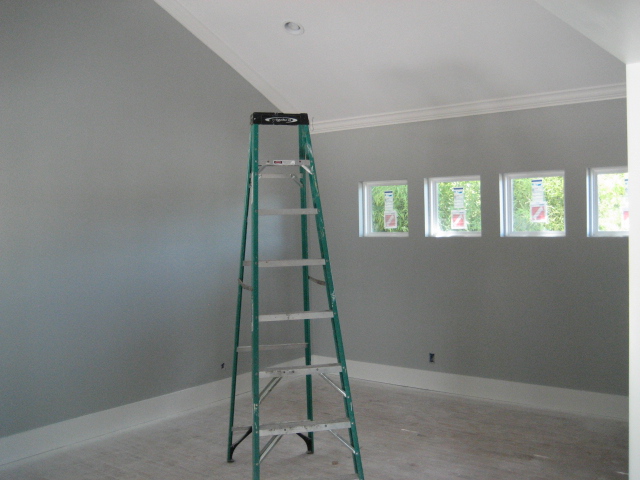
Sorry for the lack of updates, I’ve been a baaaaaaad blogger… but after moving we didn’t have internet service for over a week. I’m back online now and back in action! Although I’ve been distracted with the personal house sale and move, we’ve still managed to keep the momentum up on the Target House. I’ve got the millwork package ordered and it’ll arrive by the end of this month so that prompted me to get right on the interior paint and tile so I’m ready when it shows up. After alot more prep inside we finally got everything primered and then I sprayed 2 coats of semi-gloss on all my new trims, no brush marks baby, first class all the way. For the walls I chose a medium warm grey for the whole house with the exception of the dining room which as you can see is red. The grey probably wouldn’t be too safe for most homes but with all the natural light I have coming in and the abundance of white trim it really doesn’t make it dark or feel small. The red for the dining room ties into the stained glass windows in the living room and we planned to pull that same red down onto the new tile for the fireplace hearth.
The kitchen cabinets will be white shaker style again that will pop good on the grey walls. I’ve chosen black granite counters that will contrast the cabinets as well and then we are going light on the hardwood floor stain. It’s going to look incredible, definitely the best renovation we’ve done to date. Also this week I had my mason come in and re-mortar the fireplace brick and firebox, now there will be no cracks and it’s back to good as new condition. Thankfully I got the A/C on just in time for all this inside final stuff, it’s sure nice to work in the coolness after what seemed like months of humid 100 degree heat. For the first time in my life I hired a pro to do my tile, this guy is really good and its nice to see it getting handled perfectly and without taking 2 weeks of my personal time to do it. I picked up $2500.00 worth of various sizes of white ceramic, mostly 3X5 subway tiles that we are putting in a brick pattern. For the hall bath I am using white ceramic hexagon floor tile with black dots and as you can see they’ve almost got the tub surround completed with the 6×6 and subway pattern combo. I opted not to do a decorative liner in this bath to keep it clean as we’ll have plenty of stuff going on with the floor pattern.
In the gorgeous master bath I’m running subway all the way up inside and outside of the shower and the tub box as well. I’ve picked out a real neat liner for the shower that’s super clean and linear to go with all the sharp lines. No glass accent tiles in this home, we are moving on to newer materials now. Having an account at Dal Tile is key, they do they not sell retail to the public. Their stuff is a little expensive even at my contractor discount but they’ve got the best of the best with new materials to choose from. Picking materials like tile, fixtures, etc. at Home Depot or Lowe’s will make your rehab look like everyone else’s. Nothing worse than walking into someone’s project and recognizing all the fixtures and tile from a big box store!
The San Antonio real estate market is feeling some post tax credit blues as is most of the Nation, home sales were 25% down in July as compared to last year but 6% up for the year. Median and average prices were up in July due to the higher number of home sales above the 500k mark, which have previously been getting hammered. As I’ve been saying, we’ve definately pulled some demand forward so this Fall should be interesting. Stay tuned and thanks for coming back, it’s all hands back on deck now.
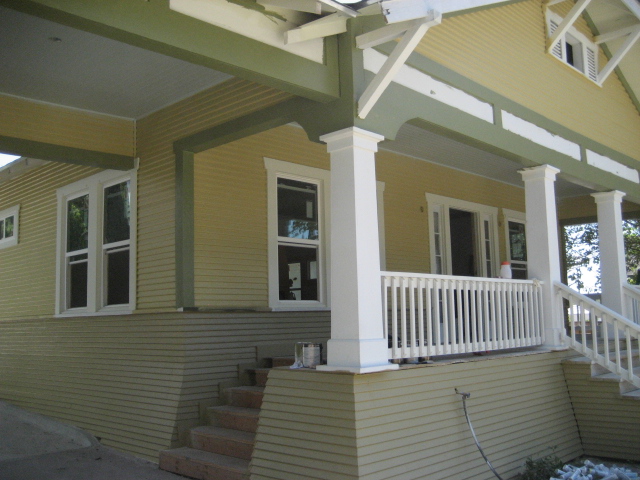
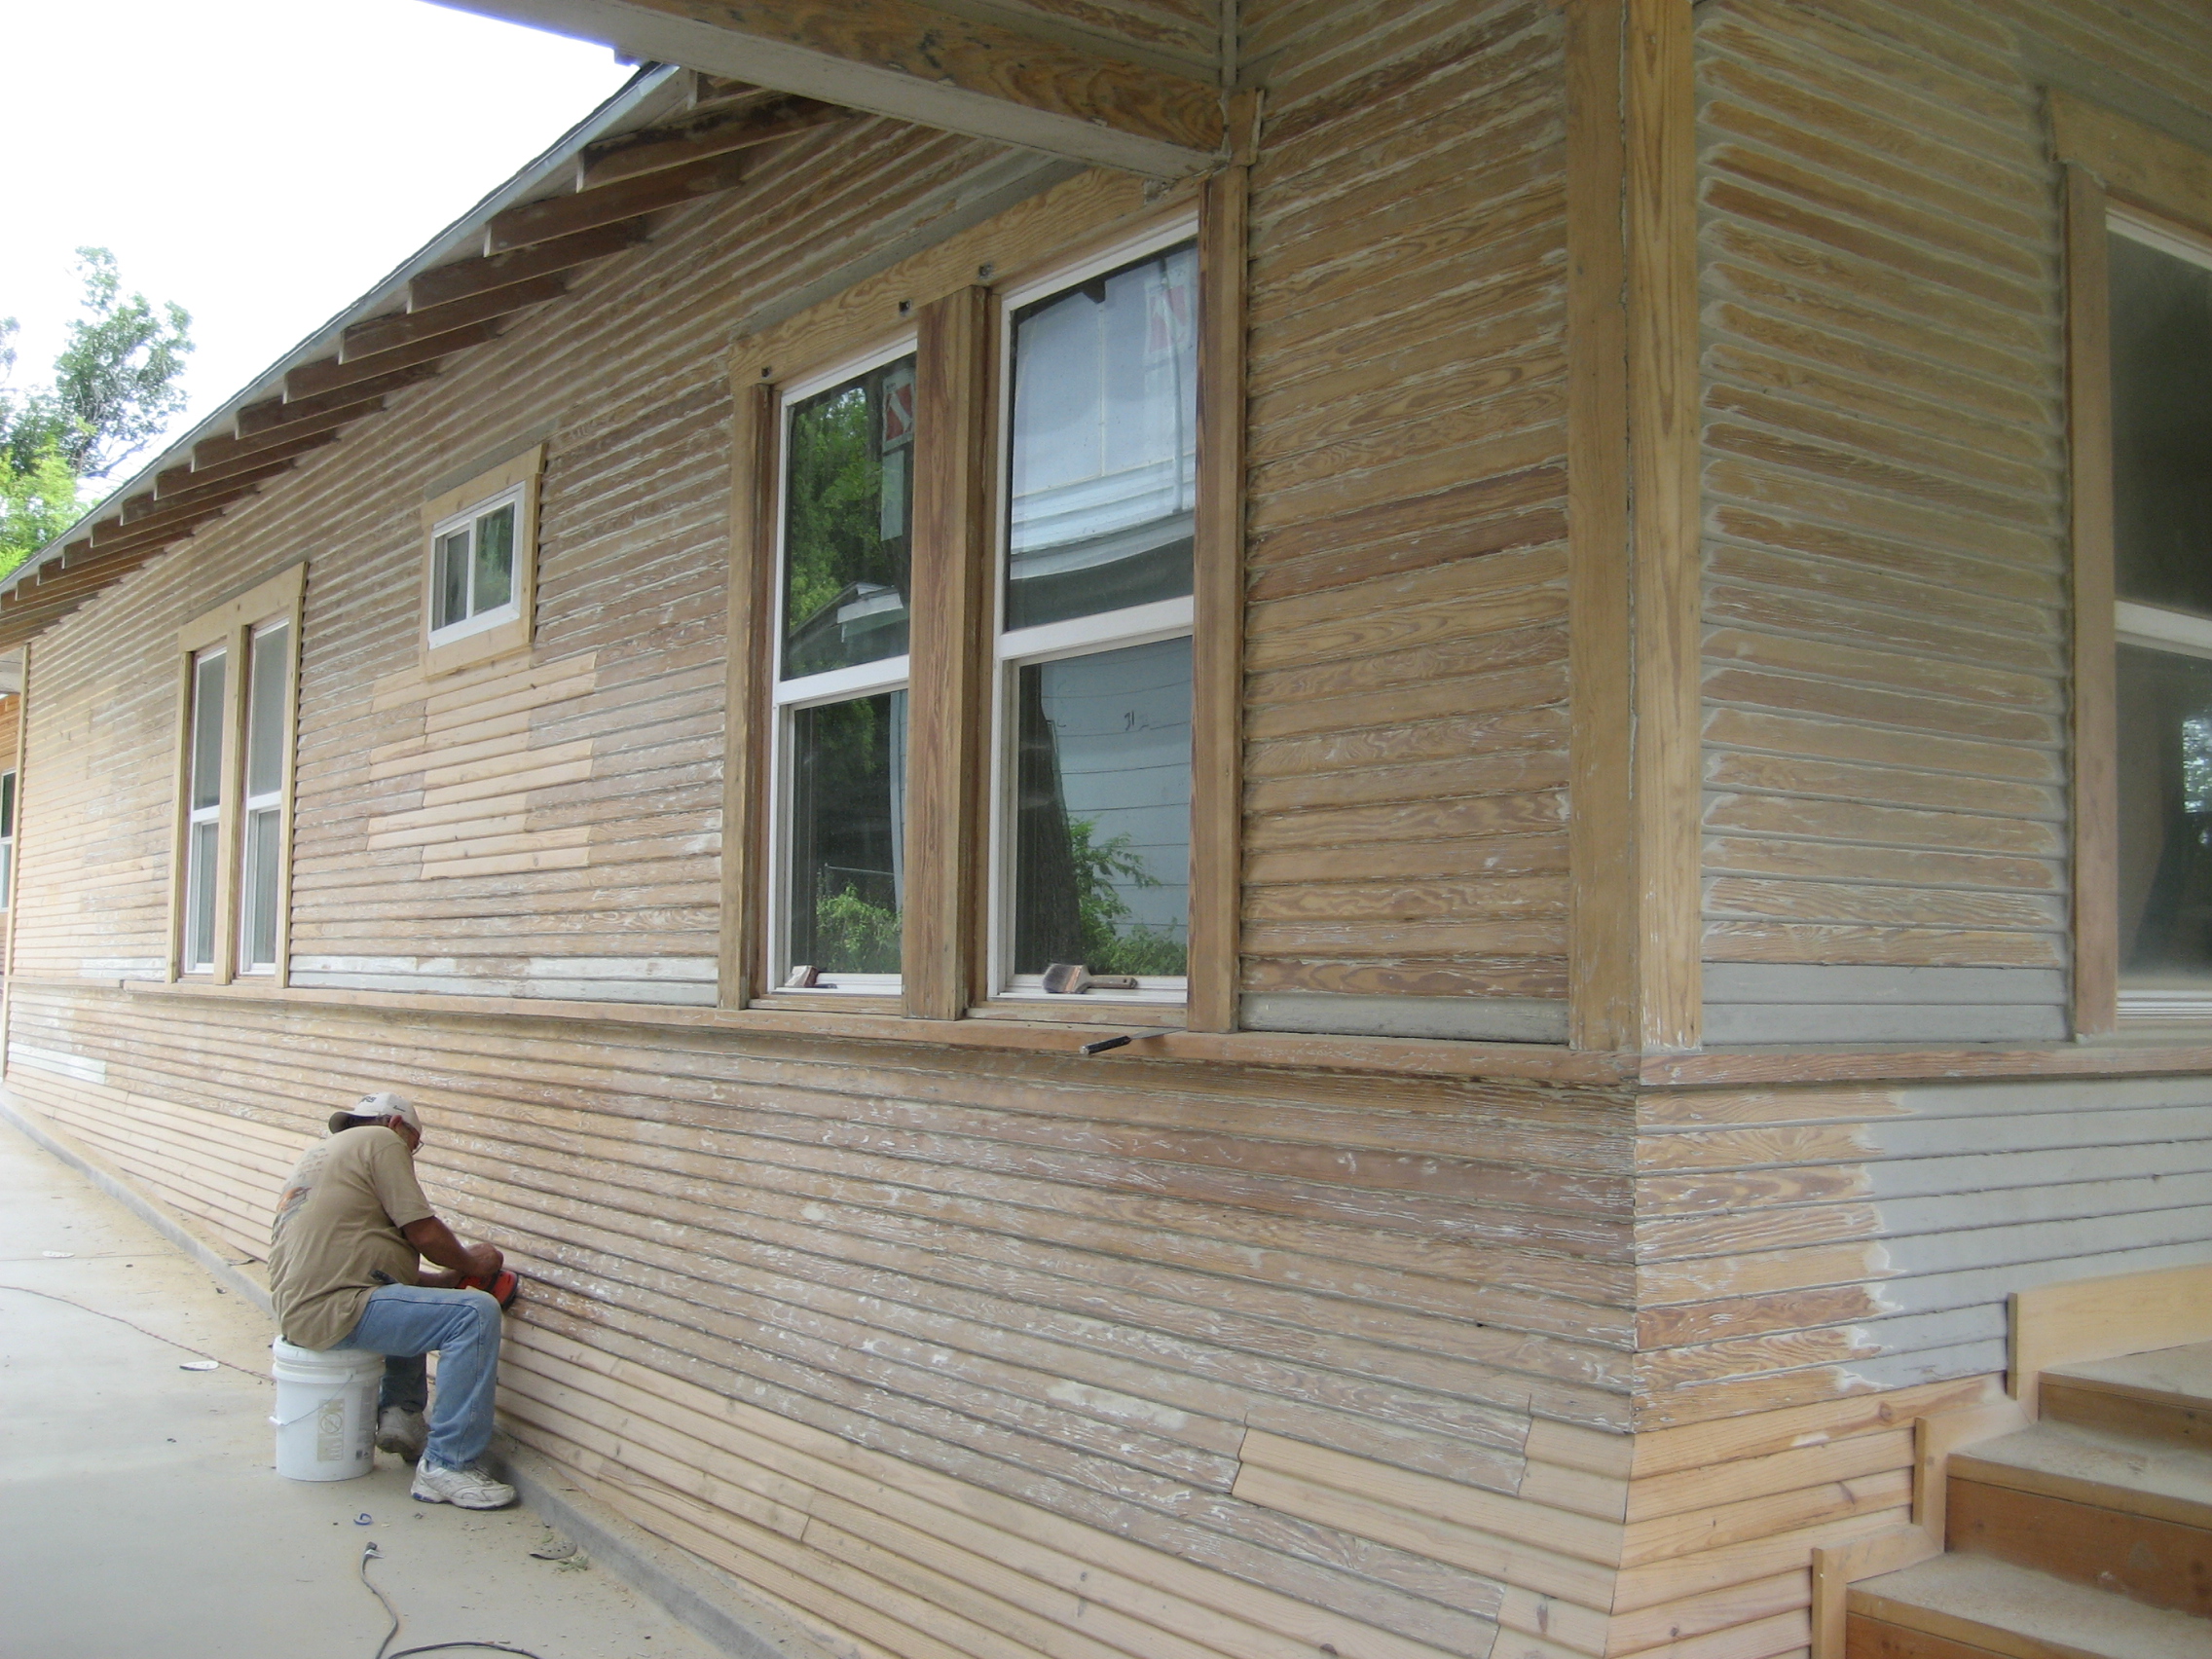
It was a humid sweltering week with temps near 100 and a heat index closer to 110 but we finally got the outside finished. I know it probably seems like it took a long time to paint this house, in fact it did. This was the most intensive exterior coloring I’ve ever done but after all the work I have to say it was worth it. Out of the 7 colors we only got to spray 3 with the airless so the rest was all brush work. There are so many details on the house and with each individual rafter tail getting painted as well as the 1×4 trim in between them a different color and with everything getting 2 coats you can image how much cutting in we did this week. The dark green rafter tails against the cream eaves is really neat and adds a lot of dimension. Thanks to Morgan Penix at DeWitt Architects, she came through for us again with this great color scheme. This week I was also able to get all the miscellaneous trim done that I never finished. I made vents, access doors for the crawl space and finished the skirt siding around the room addition. The rear porch still didn’t have its decking so I laid down some original style long leaf pine to match whats up front, I’m really happy with the way this back covered porch came out, another great historic style detail in our design. The icing on the cake had to be hanging the original window screens Saturday, they made such an impact. I won’t stretch the frames with mesh as my new dual pane windows come with screens, they are only there for the cosmetic appeal and historic correctness plus they cover the modern energy efficient windows that lurk beneath. I was excited this house still had the screens in place, on the last 2 projects I actually had to hand make frames to get the historic look I needed. I think that everyone visiting our house flipping blog will see that we aren’t doing your average rehabs here, there’s a lot of intensive labor that goes into saving one of these historic homes, especially in the condition that we find them. It’s our mission to do these projects correctly and thoughtfully so these great old homes will serve the needs of todays buyers and be around another 100 years.
After all that hard work prepping the house we finally started putting some colors up this week. It’s really an honor to get to spray it after all those hours of sanding. We squeezed 117 tubes of Alex Plus 35-year caulk into every crack known to man, my finger tip might never recover. And of course I had paint samples visible, so the unsolicited comments from neighbors started flying. It’s amazing how people aren’t shy to tell you they don’t like something. On a previous house we did, my wife and I had about 10 samples up on the front trying to decide what looked good. This was back in the day before we used a professional to guide us. Upon arriving the next morning I found that all the neighbors had “voted” in chalk on the sidewalk. What the heck, I mean they are the ones who’ll have to live with it after I’m long gone but mind your own business people! I learned long ago when house flipping don’t piss off the neighbors so I try and bite my tongue now. You can see here we’ve got 5 of the 7 colors up already. I know it sounds like a lot of colors but really its only various shades of brown and green. These historic homes can handle a lot of color easily as well but most homeowners would be frightened by the thought of using that many. I think when you see the finished product you wont even realize there’s 7 colors. The last color is going to be the most dramatic so I’ll show you guys as soon as it’s done. It’s going on the knee braces, barge rafters and each individual rafter tail will also be hand painted. A lot of work but it’s going to be crazy when it’s done. I also have the original 1923 window screens that I’ll be painting and hanging back over my new windows, this always gives such a killer detail in the color blocking. In the pic here the columns and porch railings are still in primer. The ceiling for the porches on historic homes are always painted light blue. This keeps wasps from building nests and it really works!
I’ve switched helpers now, my last guy who helped with all the prep started to look like he was going to pass out. After going home last week at lunch from being too tired I decided it was time for the second shift. My new guy is super pro, he’s been painting for 30 years and I’ve used him before. After we are done with the outside this week we’ll roll straight inside and start catching the interior up. I’m still trying to pick granite and tile colors but for sure I’ll be going white shaker style on the cabinets.
The hard part of this paint job is done. After 9.5 days of grinding and sanding we broke out the sprayer and put up 35 gallons of Kilz2 latex primer in a matter of hours. For a historical paint job on 117 siding I always get the house to primer first so any cracks and holes become visible and then start caulking and dialing it in getting ready for the colors. I estimate about 4-5 days of caulking now and then we’ll be ready for the 7 color paint job. Every piece of siding will get caulked so there’s no seams and the tiny holes from the trim nailer all get filled as well. A paint job like this goes against any typical house flip theory but then again we aren’t doing your average flips either. This paint job will pay off.
While the paint job is a huge undertaking for only 2 guys, myself and a hired gun, I’ve also been busy on the home front with more important issues. We’ve been spending alot of time getting our personal house ready to put on the market and after finally getting all the odds and ends completed we put it in MLS last weekend and it sold for full price in 3 days! My wife and I have decided that its time to take our real estate investing show on the road and head home to sunny San Diego, Americas Finest City, and the first step we determined is to sell our primary residence. This way we can get into a rental house and be able to leave at the end of any rehab. We came to San Antonio in October 2006 after the real estate market crashed in California. I had done alot of research at the time and we picked SA due to the growth rate, affordability and strong local economy. Our guess worked out great, we’ve had tons of success here but now its time to take on a new challenge, we’ll be returning to ground zero for the real estate bubble. Remember, the markets that crashed first will be the first to recover. SD has now seen 11 straight months of price appreciation. California unlike Texas has wild swings in home prices, the largest transfer of wealth in our lifetime is taking place right now and we want to get in at the bottom again. We’ll miss San Antone as there have been alot of fond memories created here, namely the birth of our beautiful baby boy! Thank you Texas!
90 man hours and $400 bucks in sandpaper and we haven’t even started shooting the primer or caulking yet. A good paint job is all in the prep, as you can see here we’ve been giving this grand old lady some love this week. You cant just paint over 90 years of multiple peeling paint jobs on one of these historic houses and a scraper wont faze it. We stripped this T 117 siding down bare. Don’t worry, we used full protective gear and the lead paint remediation process. My guy is posing here for the photo!
I’ve seen people pay $18-20k for a paint job like this, stay tuned we’ve got 7 great colors going up playing off the colors in the original stained glass windows still present. Oddly enough after first picking the colors we found that our trim choice was exactly the same as what was underneath all those layers of paint. I guess the builder had the same idea about matching the windows. You can also see here where we found replica T 117 siding and patched some areas.
Just wait until you see it with the original decorative window screens over these new windows. Would have been better to save the original sashed wooden windows but they were too far gone and replacement TM Cobb was not in the budget for this price point.
Exterior paint jobs on historic homes are probably one of the most satisfying jobs we do!
Happy 4th! Here’s a construction update for our big rehab, the Target House. It rained all week from Hurricane Alex so we got skunked out on the exterior prep for paint but at least I saw some progress with the interior trim-out that’s now complete. I used a cool new 5 panel style door from Masonite called “Riverside” and a complete custom MDF trim out. Walk through the project with me below and see how our progress is coming along. There’s a house for sale on our street that just went under contract, cant wait to see the sales price as that will be the nearest comp. It’s listed for $300k but its hardly updated at all. With this in mind, I think our list price will be close to $399k for this project when its completed later this summer. In other news, our House Flipping Blog got chosen this week for “Top 20 Real Estate Investing Blogs”over at Biggerpockets.com. Thanks to Joshua Dorkin for the recognition! PS, keep the comments/questions coming as well! Thanks for following along with me on our 1923 Arts and Crafts Bungalow renovation.
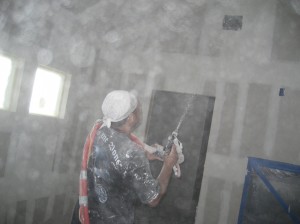
It’s finally starting to look like a house again. As I’ve said before its always fun to see it with drywall so you can get a feel for the new spaces you’ve created and how they flow together, the new master suite I built is definately going to sell this house. I’m very particular on the drywall job for these big projects, I use a new construction crew that specialize in this trade and do it all day long, every day. Of course every tom, dick and harry out there can hang drywall and tape and float it (including me) but this important step really dictates how your final finish out will appear. My guys use all the latest tools like roto zips to cut out the boxes and mud bazookas and taping machines to float it out. There’s literally no sanding when the mud is applied correctly. Tons of other rehabbers here locally are going “handyman” style and having painters hang their drywall, tape and float it and use a hopper to spray the texture. The texture on your rehab is a very important detail, some buyers probably wont notice bad texture but the 20% who are in the know will recognize the quality. Plus, after all that work to get to this point who would want a chunky uneven surface on your walls that looks like old drywall thats been retextured and patched? Hoppers are o.k. for small jobs but for a big house it will be hard to get even coverage and mix it consistently one bucket at a time. A professional crew will bring in a truck with a spray rig, one mixture and they spray the whole house evenly without stopping.
Once again, that’s what these guys do for a living. Once the texture truck pulls up 3 guys start running around masking off all the windows and can lights while the sprayer starts at the back of the house and works his way forward. The whole house takes about 2 hours to complete. For a professional drywall job like this we pay $10.00 per sheet for labor. That includes the hanging crew, tape and floating as well as the texture. I supplied the drywall itself, this house ate up 270 4×8 sheets. Of course we don’t use 8 footers so as to minimize the joints but thats how the labor is calculated, what actually went in was 180 12 footers. Per building code we use 5/8 on the ceiling and 1/2 on the walls. If you hire someone to do the drywall in your big rehab and he shows up with a texture hopper, run!
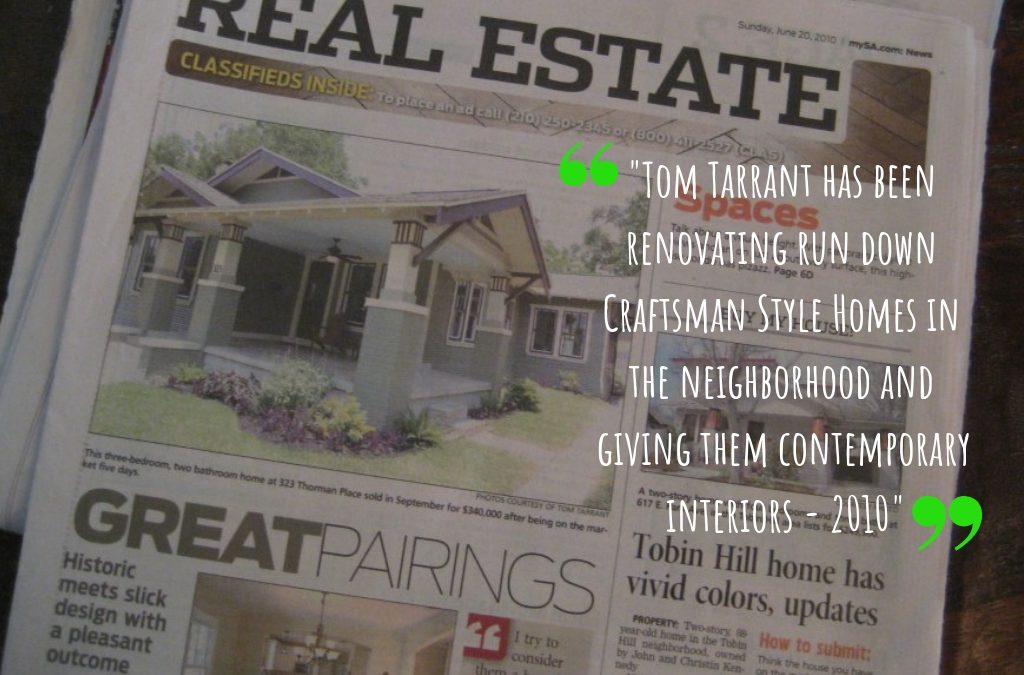
“From the joining of two unexpected, seemingly opposite mates, great pairings can happen. How about Sonny and Cher, bacon cupcakes or Labradoodles?
Well the home design world is adding another great, albeit unexpected pairing to the list: historic home shells with über-modern interiors.” – Jason Buch, Express-News
I was interviewed this week to take part in a story that came out today called “Great Pairings”in the Express-News about local home remodelers specializing in pairing historic homes with modern interiors and features. As it turns out they were actually interviewing a realtor and another remodeler in the Historic King William area of town and they told him about what I’ve been doing for Mahncke Park and along the Broadway Corridor so they searched me out.
I was pretty excited to see who’s photos they used for the front page, especially when the meat of the story is really about another guy blending Contemporary architecture. As you can see our 1900 Arts & Crafts Bungalow built by H.C. Thorman dubbed Hat Trick House from last summer got the money shot. What made this house so special is the time we put in to carefully preserve the historic exterior of the home while gutting the entire interior, adding square footage, re-configuring the floor plan and offering a finish out to meet today’s most discriminating buyer.
While the article is promoting “uber-modern” interiors, we stayed somewhat true to the time period of this home with the renovation and material choices. This house got a lot of white ceramic tile w/subway pattern, White Shaker style cabinetry with seeded glass fronts and even a Farmhouse sink to keep the historic feel. While new materials like granite and stainless were still present, the kitchen didn’t look out of place after we were done.
Maybe Jason is trying to stir up his audience by using the terms historic and modern together because everyone hates seeing historic homes altered but at some point nobody wants to live in an antique either. If you want to see for yourself, here is the Contemporary Ikea kitchen in the other historic house referenced in the article. To check out the whole renovation video of my project with before and after shots, click here.
Over at our historical renovation, The Target House, we took care of the new concrete driveway and garage foundation this week. My contractor is charging around $3.00/s.f. for a job like this including demo and haul off, we poured 2000 s.f. The concrete was an important part of this project, the original 1923 driveway width was more suitable for a Model T rather than a soccer mom SUV. Additionally, since our lot is sloped and I excavated such a deep cavity under the room addition for the peir and beam foundation it was imperative to prevent any water from entering the crawl space so the new driveway & curb will divert all rain and roof run off down the driveway. You’ll also notice in the video we are rough sanding the hardwood floors even before we hang drywall. This is a little trick I learned in cases where there are bad stains and smells. Sanding the wood takes the finish off and opens the pores in the wood so it can breathe and dry out. We’ll start bleaching out any stains and then once we are ready to refinish the floors possible do a bit more patching in any areas that still need it. Since my plan on this house is to go light with the floors I wont be able to hide anything with the dark stain. The last thing I want to do is go all dark on my brand new wood floors just to try and hide 4-5 stains up front on the existing portion of the house. We passed framing inspection and the insulation is now hung. Once we pass insulation inspection Monday we’ll be free to finally hang the drywall so I’ve got a delivery for 180 12′ sheets on Monday.
The May San Antonio real estate market stats were released this week and although activity was up nearly 20% the median price dropped almost 4% from last year. I normally don’t put a lot of weight on median prices anyway but there were certainly more less-expensive homes selling due to the buyer bait program. The higher transactions were also obviously a result thereof. After 2 consecutive months of low foreclosure numbers, SA now jumped up by 34% for the July auction and is on track for a record high 2010 number. I think the market will be slowing as Summer settles in, let’s hope home prices don’t continue to slip.
We have now passed all rough-in inspections for the Target House. Tomorrow I’ve called for the next inspection which is for the framing. This inspection is on the whole house permit that the owner or GC pulls. When inspecting framing they look for placement and relationship to all the trades’ fixtures as well as other items like foaming the windows and fire blocking the holes from the electrical wires. Once I pass framing I’ll be free to hang the insulation this week. Only after the City then inspects the insulation job can I hang the drywall. I’ll order it for a late week delivery and we’ll start hanging right after the insulation inspection.
Today I had the whole house sprayed for wood destroying insects (termites). This is the perfect opportunity to spray as the walls are all opened up. I don’t know any other rehabbers doing this, it’s a little more expensive but worth its weight in gold to the future homeowners and the life of this killer old house. The residue stays in the walls for up to 10 years and also kills roaches and other bugs who normally use those highways to enter your house. These old historic homes have tongue and groove wood all over the walls and ceilings so it’s a party if termites get in. I’ve heard of some people sprinkling seven dust in the wall cavities before drywalling but as you can see in the video we soaked everything to the hilt.


